Case Studies / Arlington, Virginia
Structural Ground Floor Reconfiguration
A narrow kitchen and divided living areas become one connected ground floor. Behind the white oak, plaster and veined marble is a carefully coordinated transformation of the structure, plumbing and brick exterior.
The designer’s walkthrough
See the plan come together.
Join Talha Gursoy from the first walkthrough through demolition, structural work and the finished kitchen. The story follows the decisions that made the new plan possible, including the work that is now hidden above the ceiling.
- Opening the kitchen to the dining and family rooms
- New beams, relocated services and revised brick-wall windows
- White oak cabinetry, a working island and carefully selected marble
01 / The starting point
Good rooms, separated.
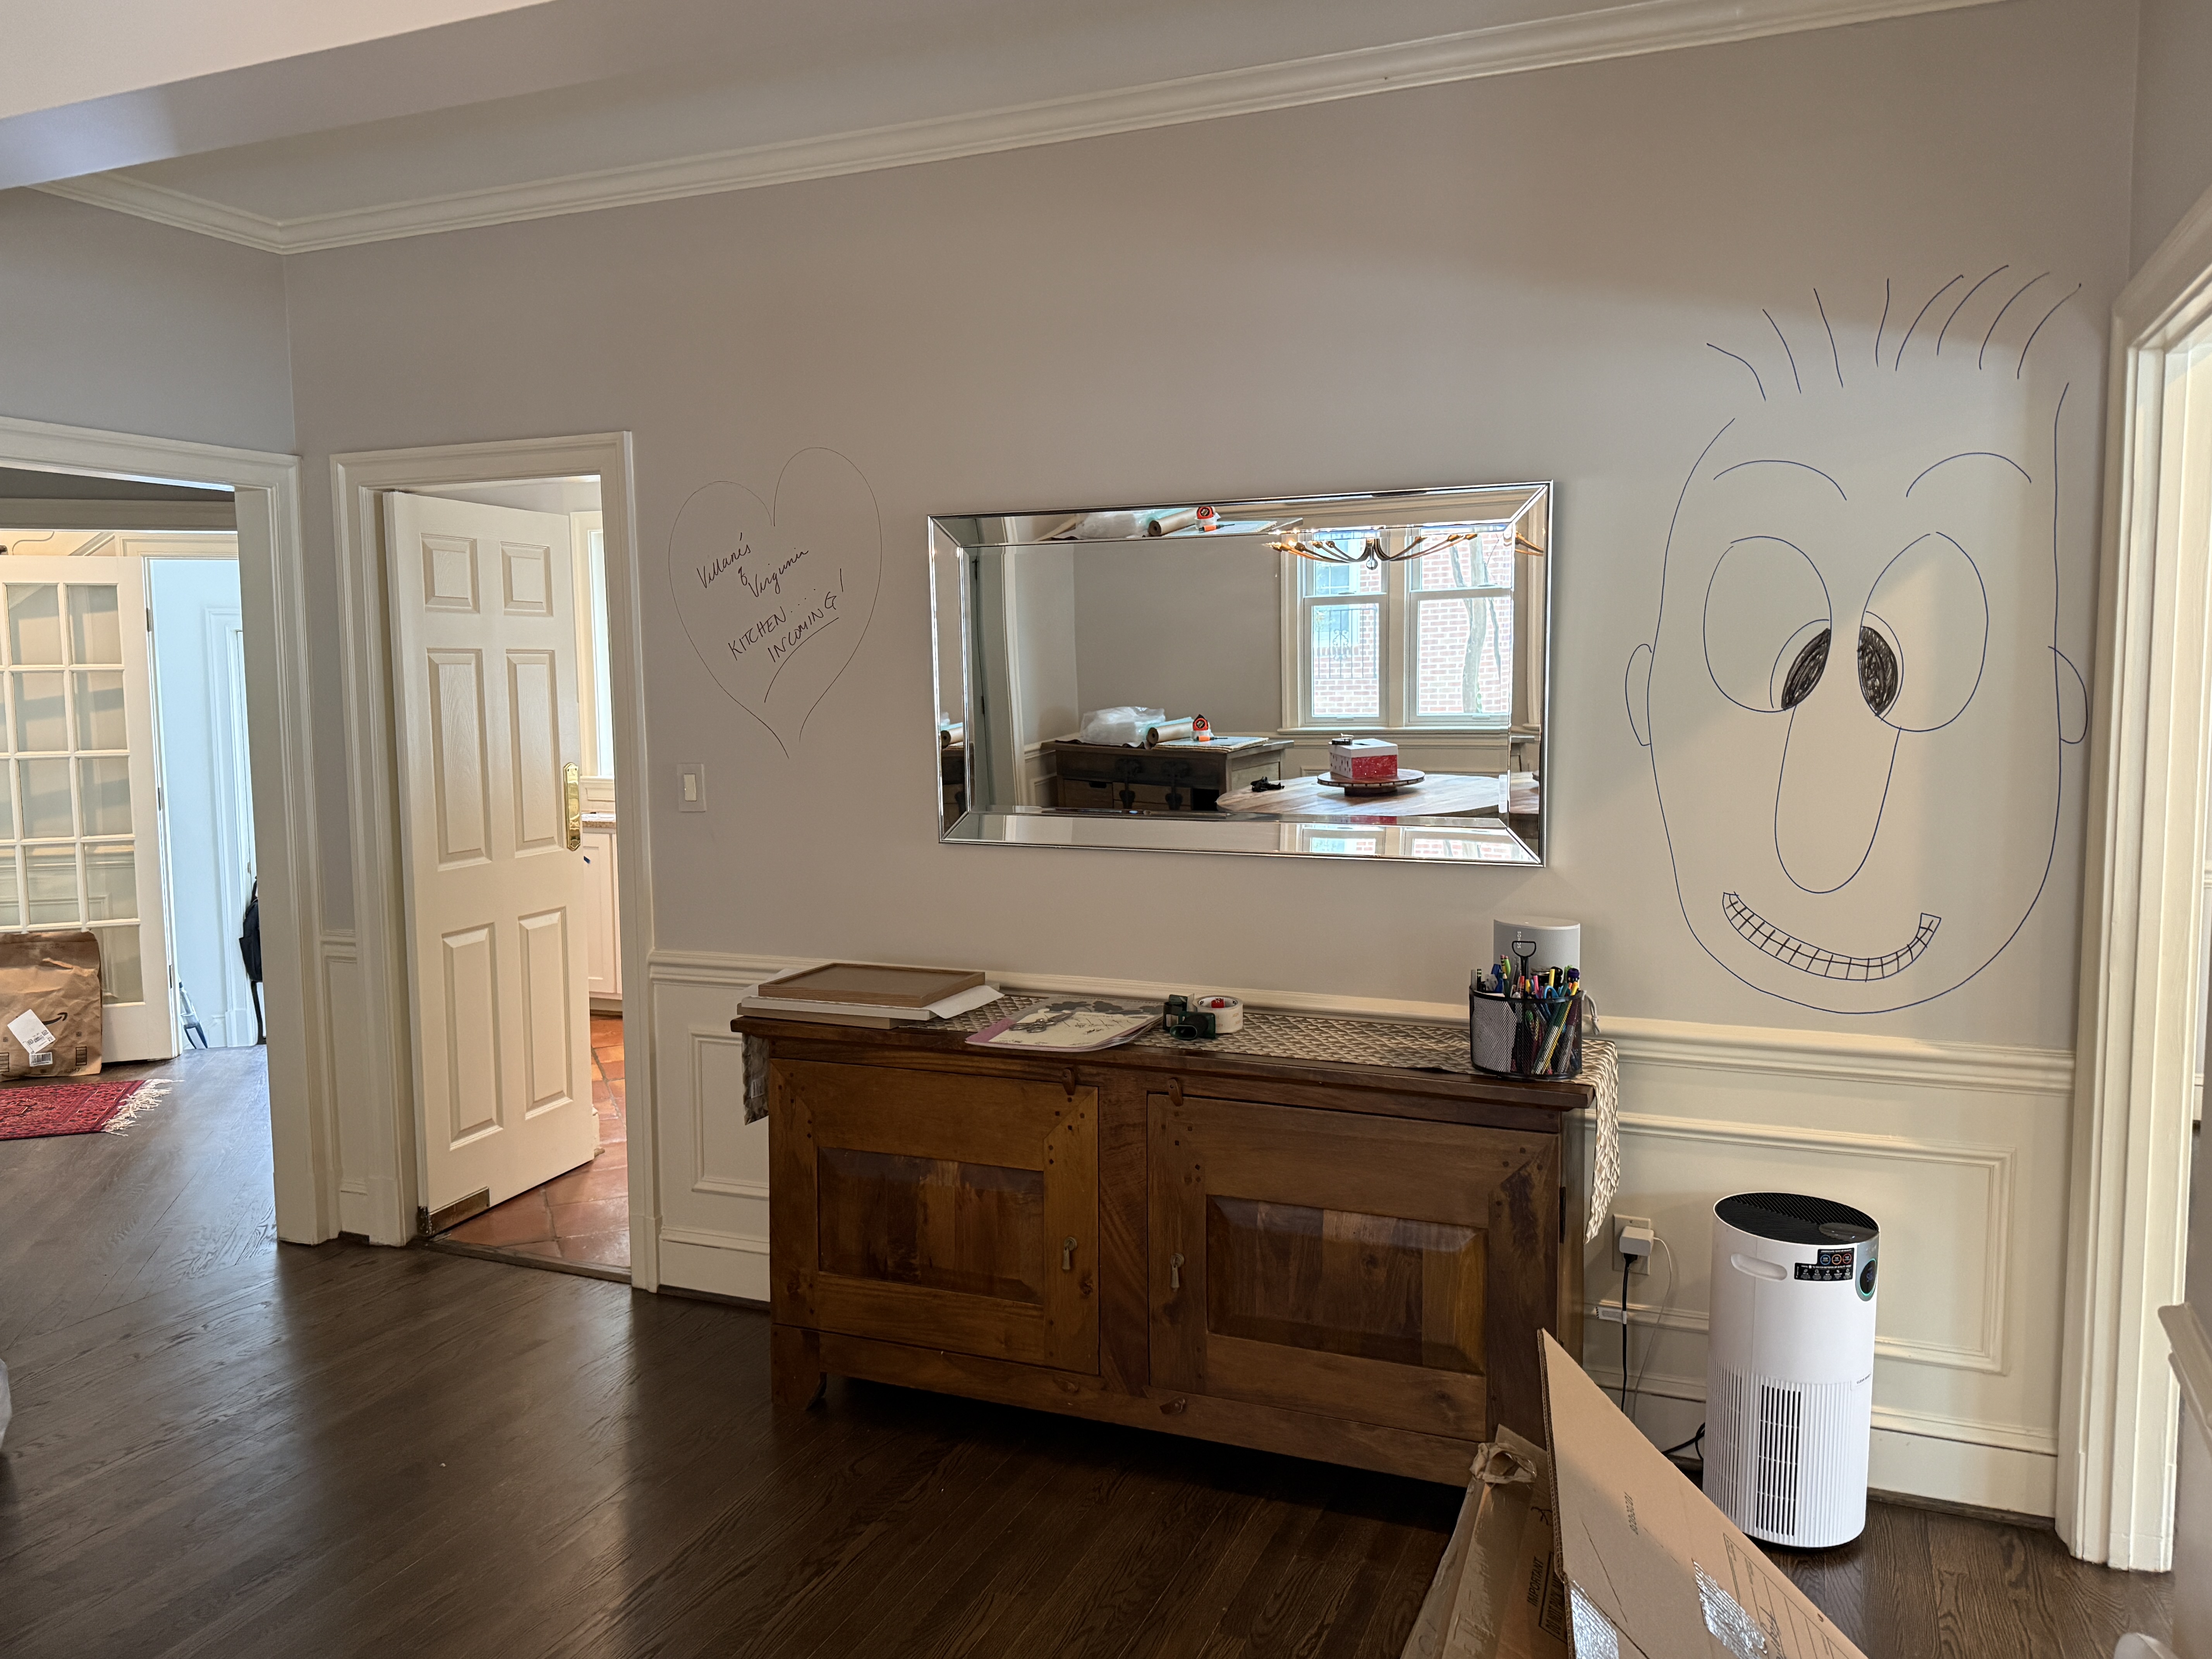
The existing kitchen had already been updated with white cabinetry, but its position within the house limited how it worked. Long and narrow, it felt like a passage. Someone preparing a meal was separated from people in the dining room or family room, even though the combined ground-floor area was generous.
The brief was to bring those everyday spaces into a shared plan. Removing two dividing walls would give the kitchen a broader footprint and open the sightlines between cooking, dining and relaxing. The foyer and private office areas could retain their separation, while the rooms used together gained a more direct relationship.
Before
After
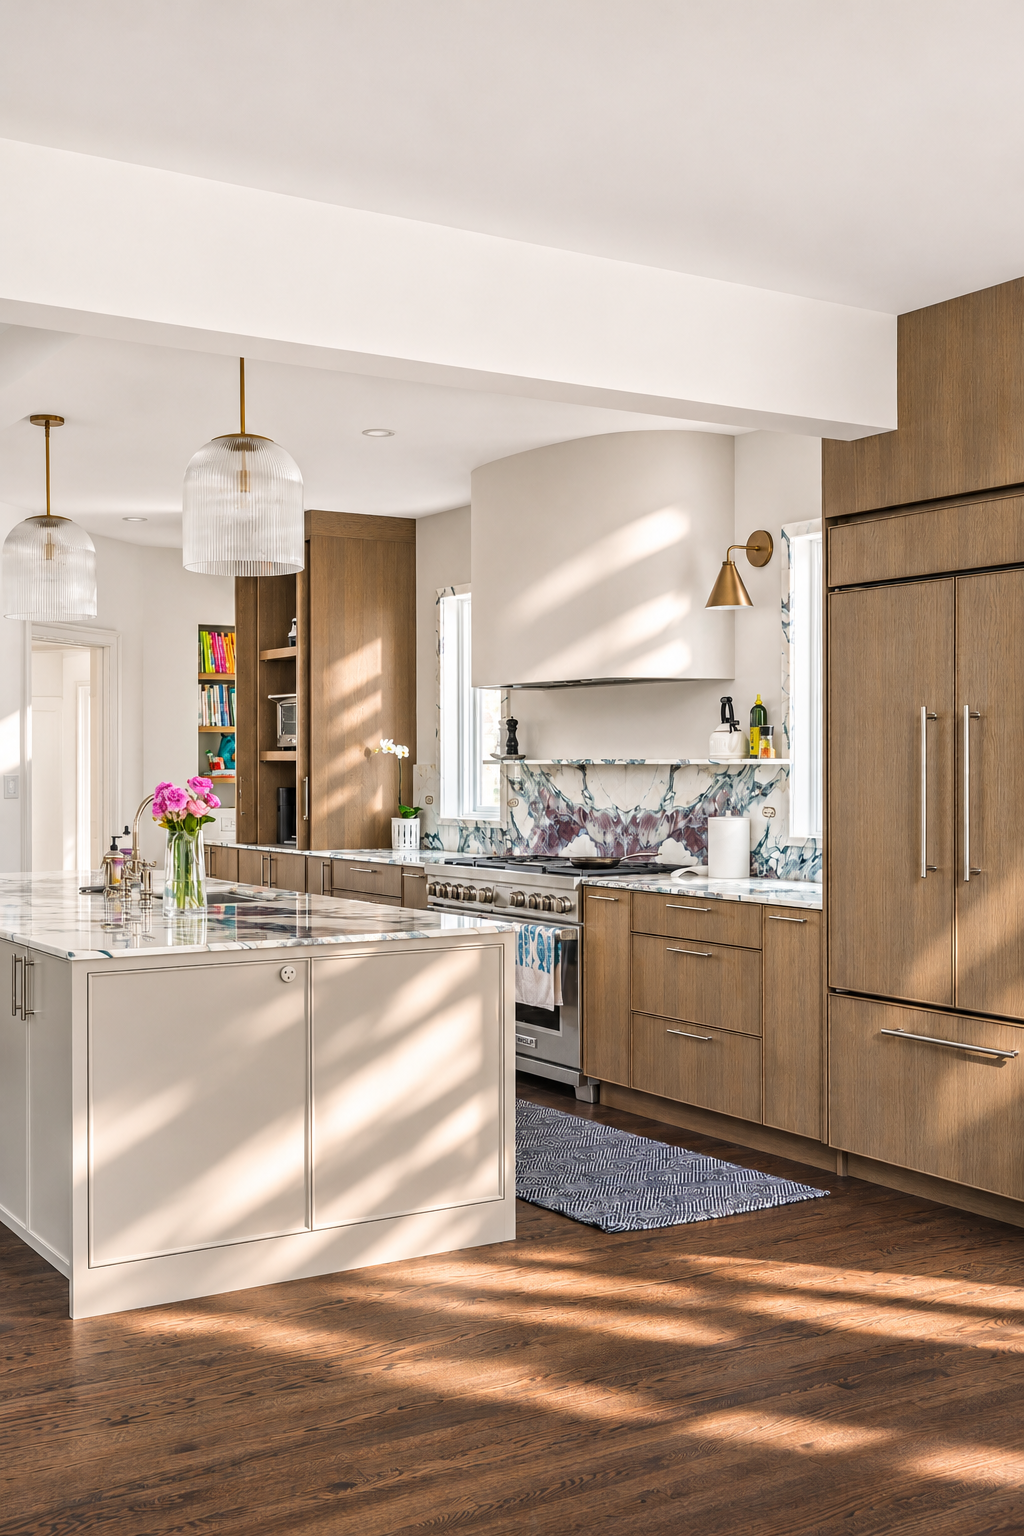
The finished kitchen is visible from the adjoining living area. These views show the change in connection from different camera positions.
02 / Planning the change
Resolve the plan before the finishes.
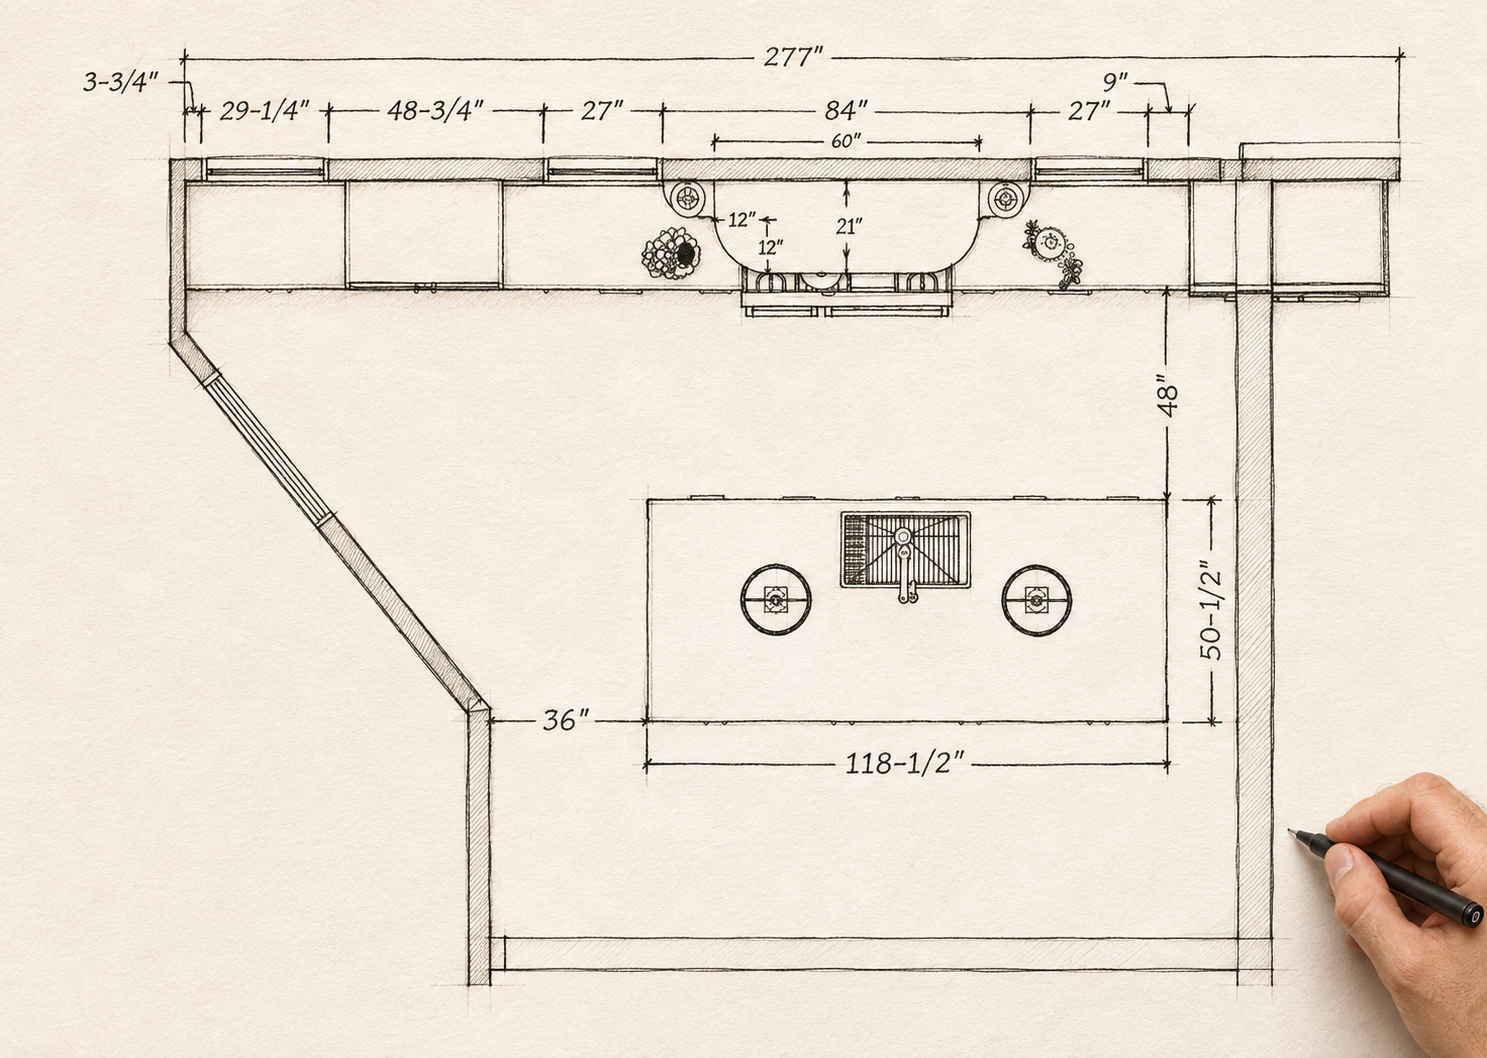
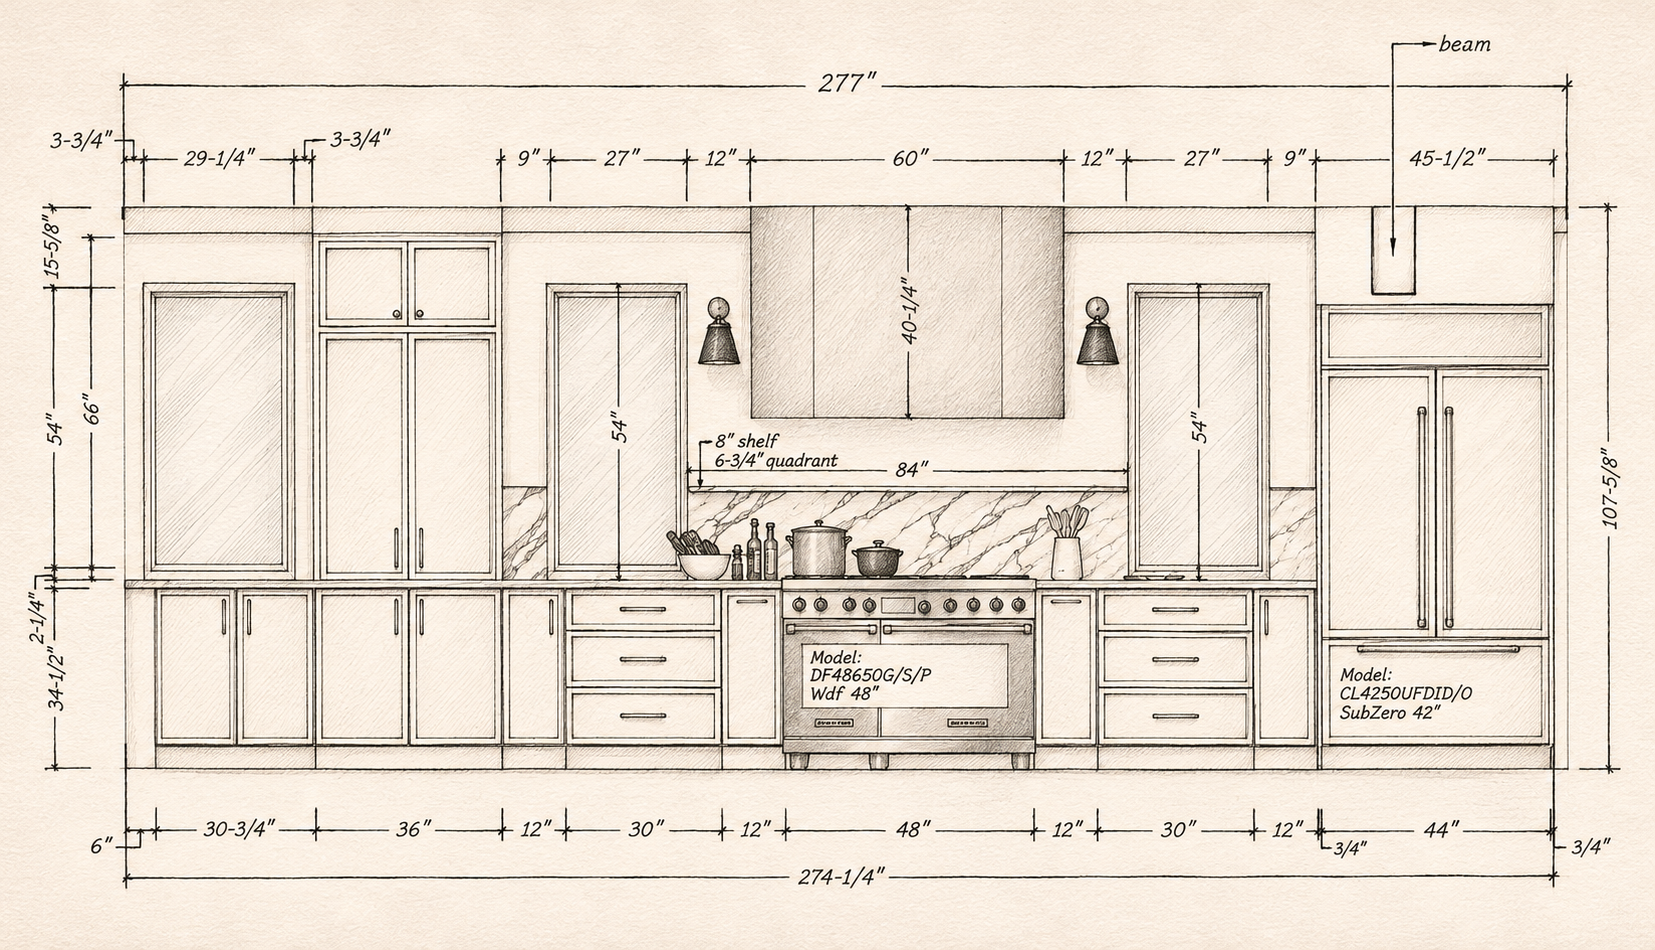
The design studies organize the kitchen around a long range wall and an island of approximately ten feet. The sink moves to the island, opposite the cooking area. A roughly four-foot working aisle gives those two zones room to operate, while the surrounding passages connect to the adjacent rooms.
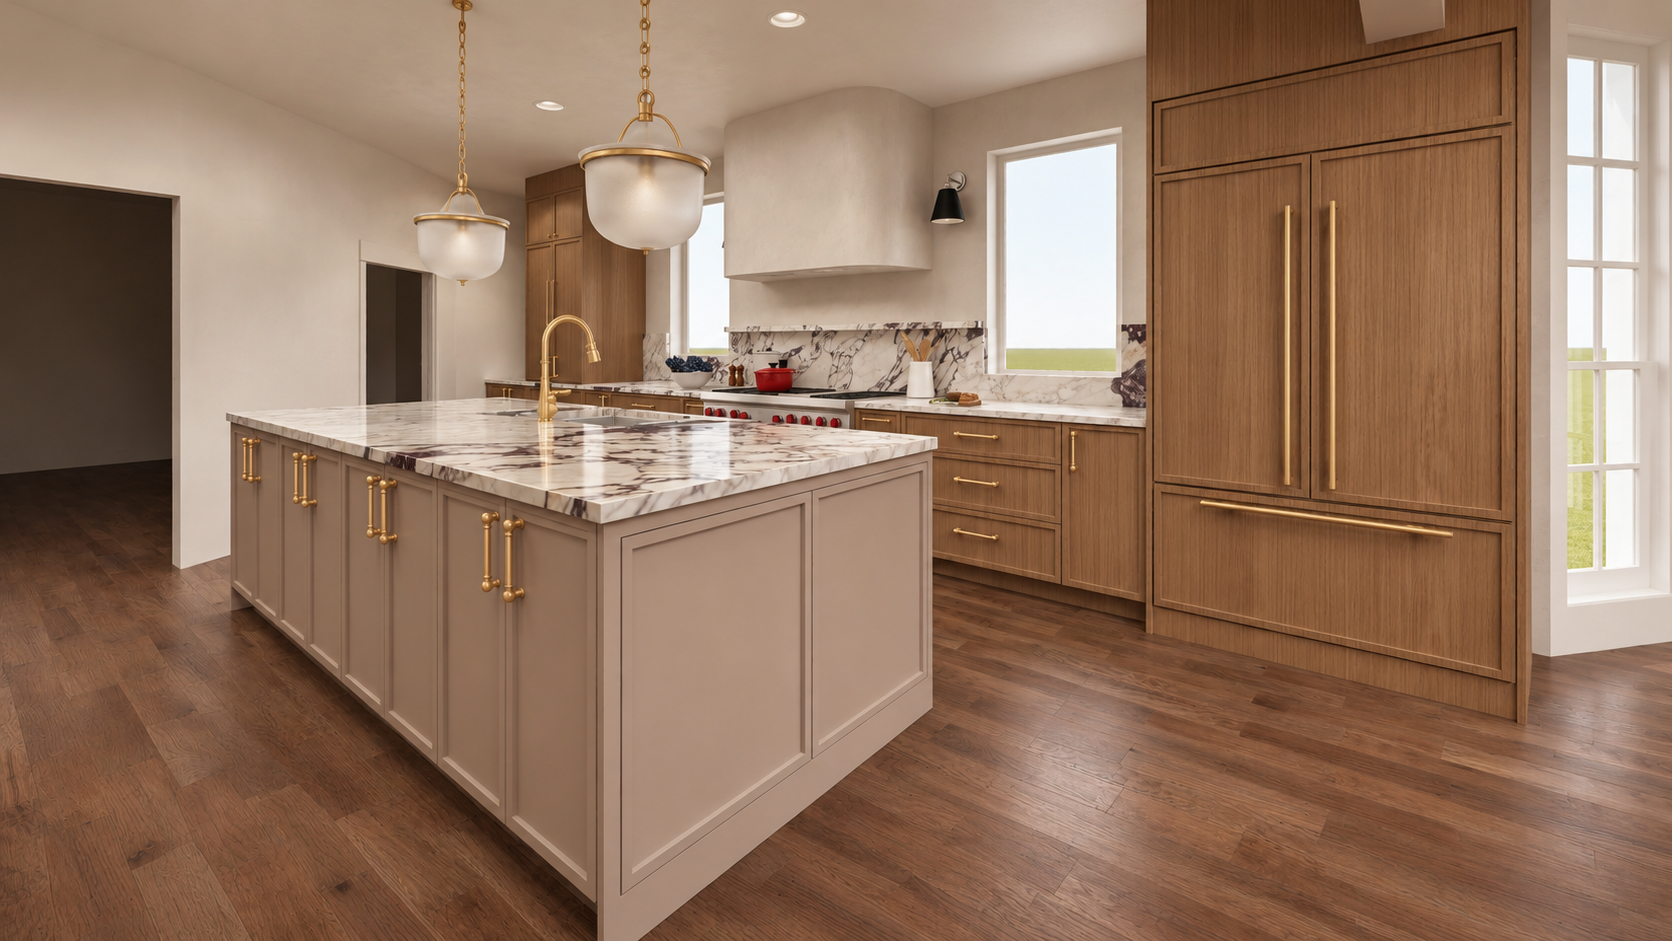
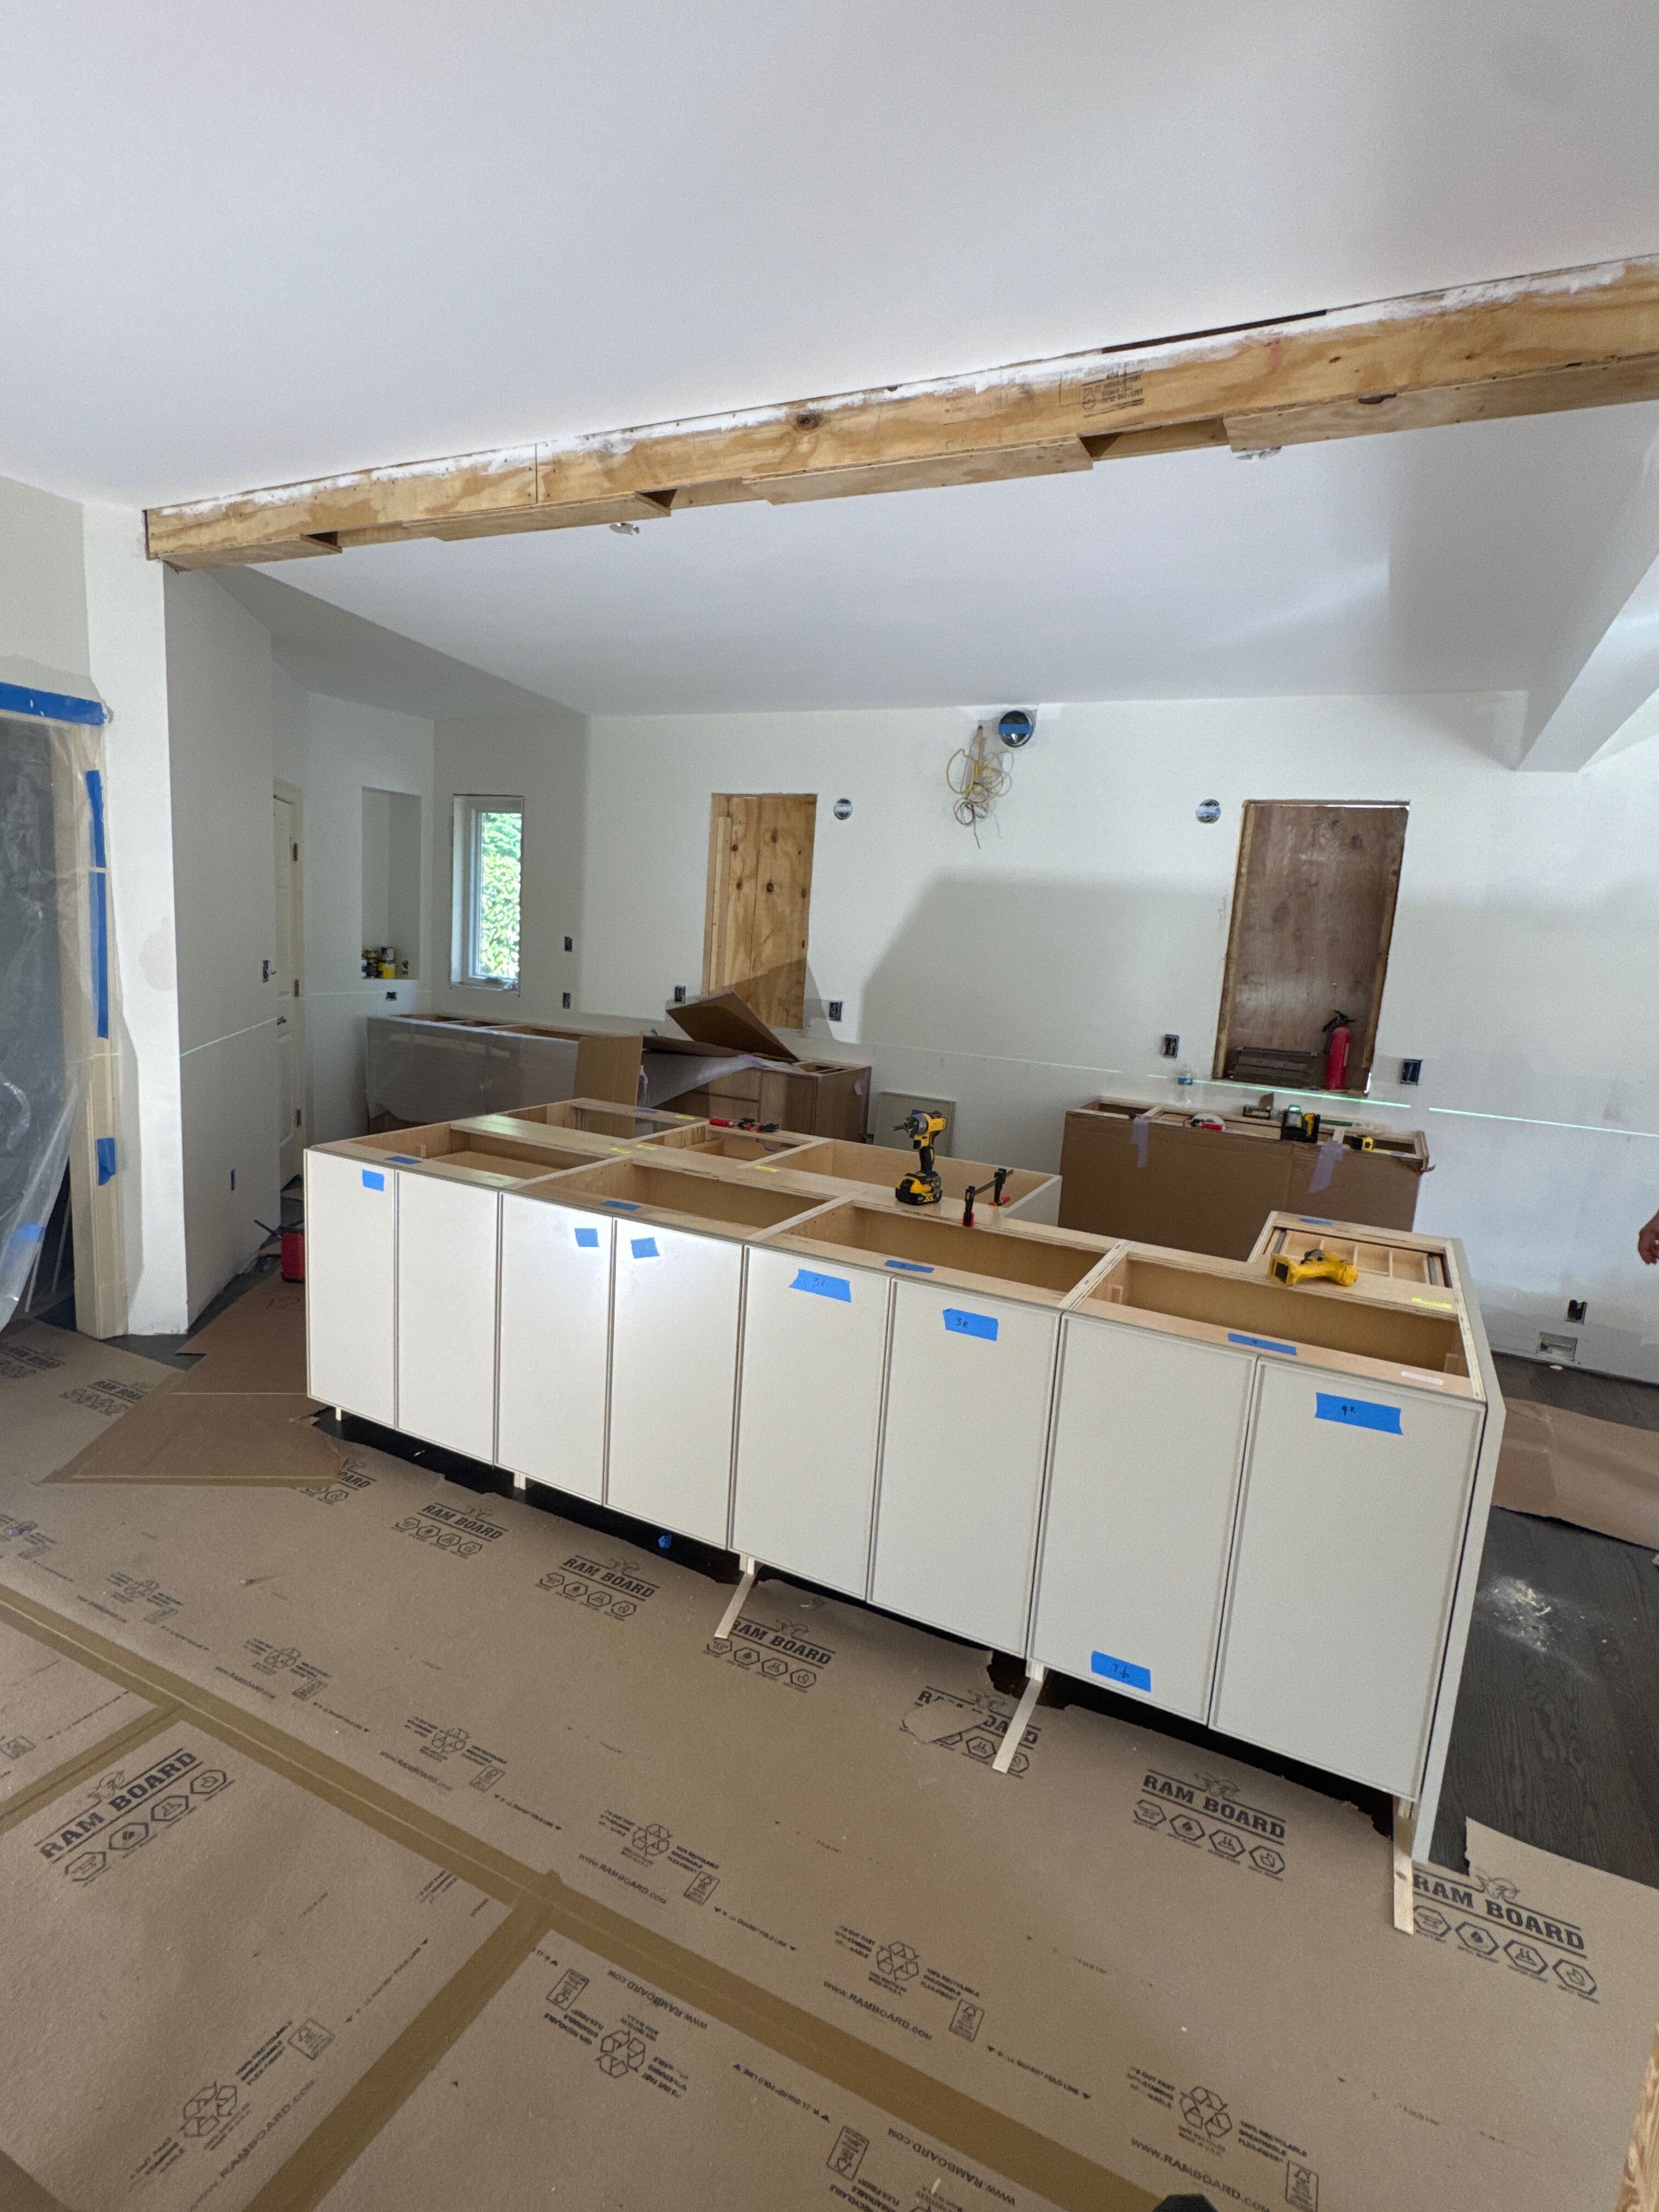
The island was deliberately planned without stools. With a dining area and breakfast nook already nearby, additional seating would compete with circulation. Storage and a generous preparation surface offered more value here. That decision shaped the cabinetry on the living-room side as well as the space around it.
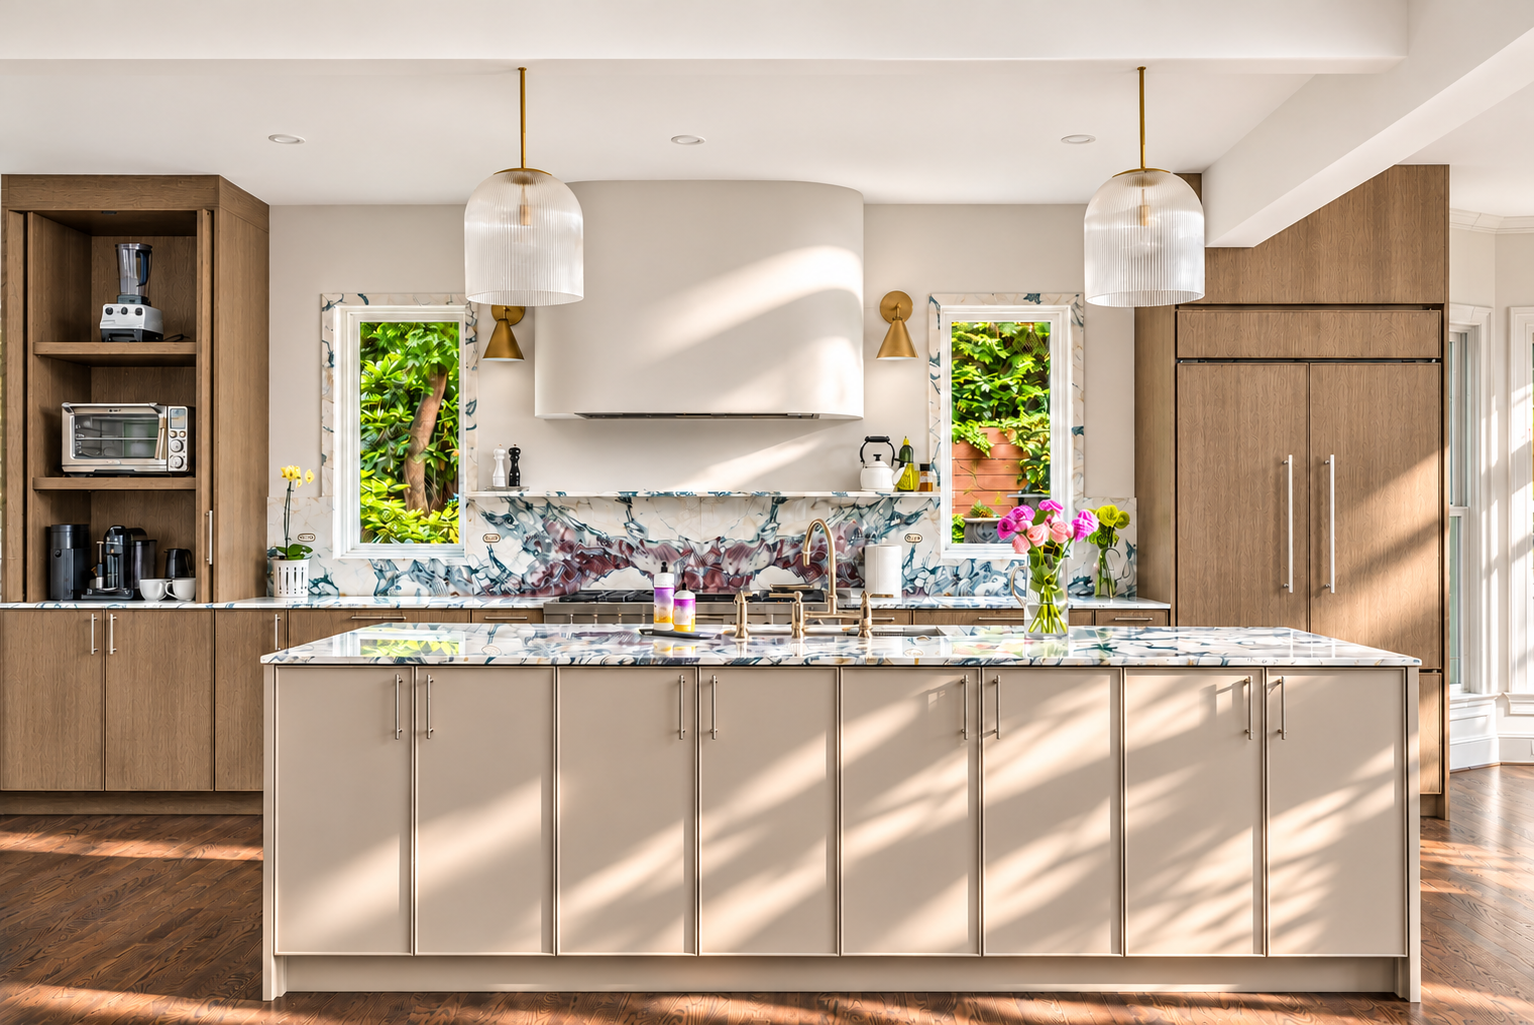
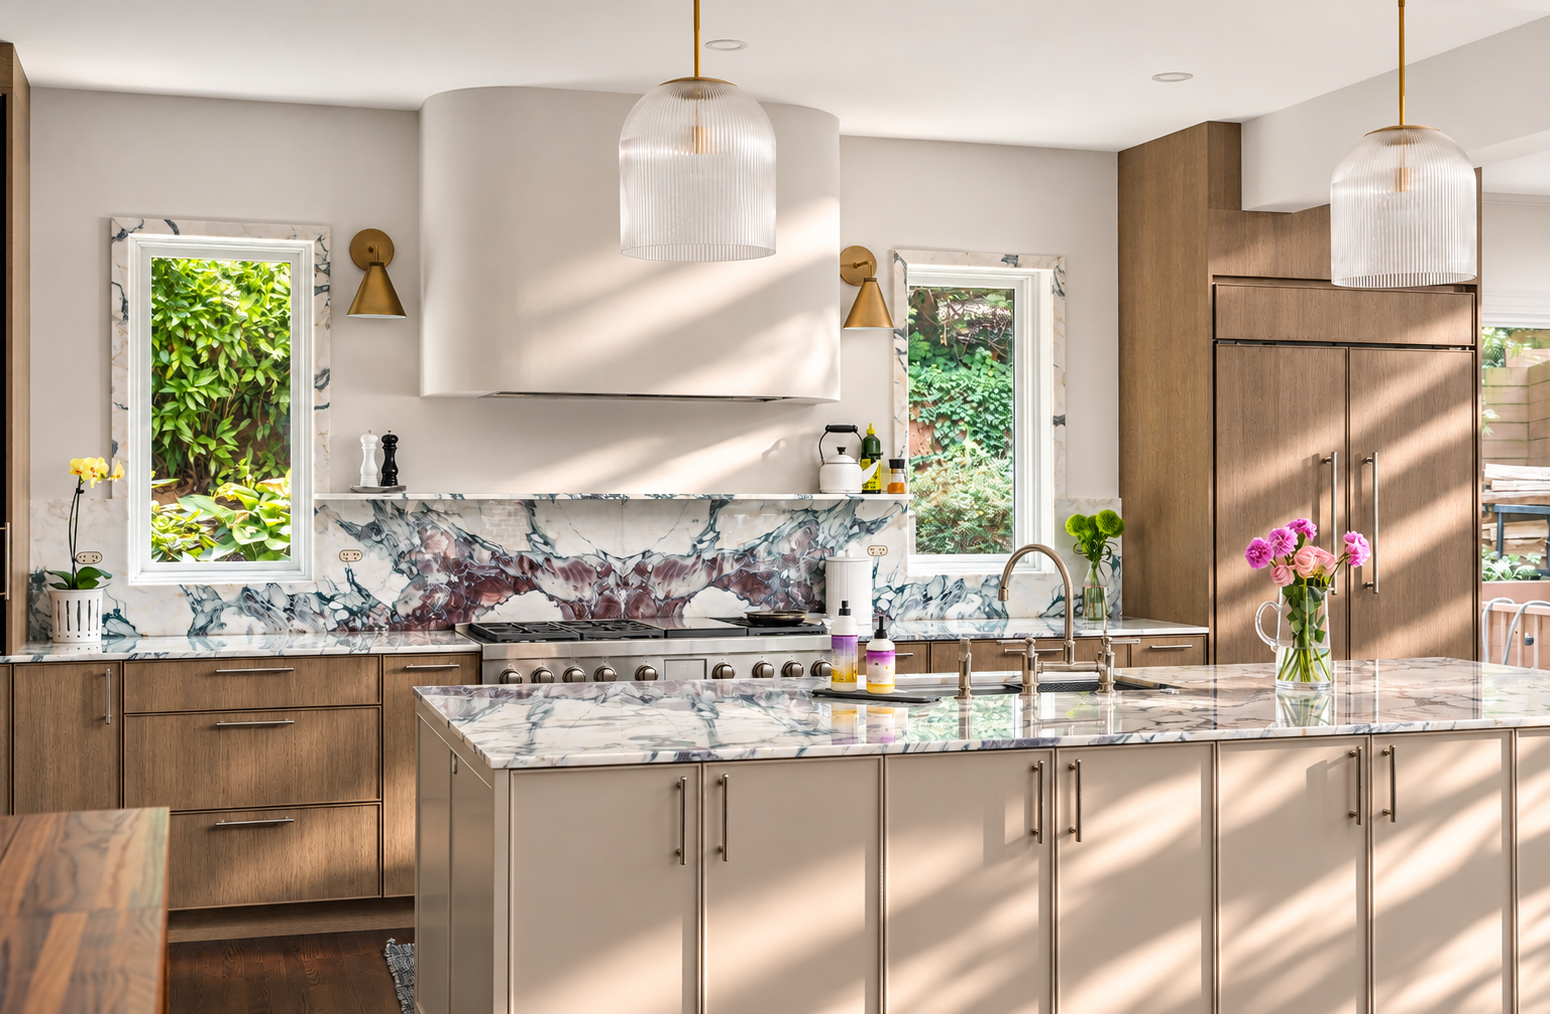
The elevation brings the windows, hood, shelf, tall appliance storage and paneled refrigerator into one composition. The client presentation render then tests the warmth of the wood against the pale island and sculptural hood. The drawings and render record the design intent; the photographs show how the materials and details developed in the completed room.
Plan study
Elevation study
Client presentation render
After
03 / Structure
Opening walls. Keeping support.
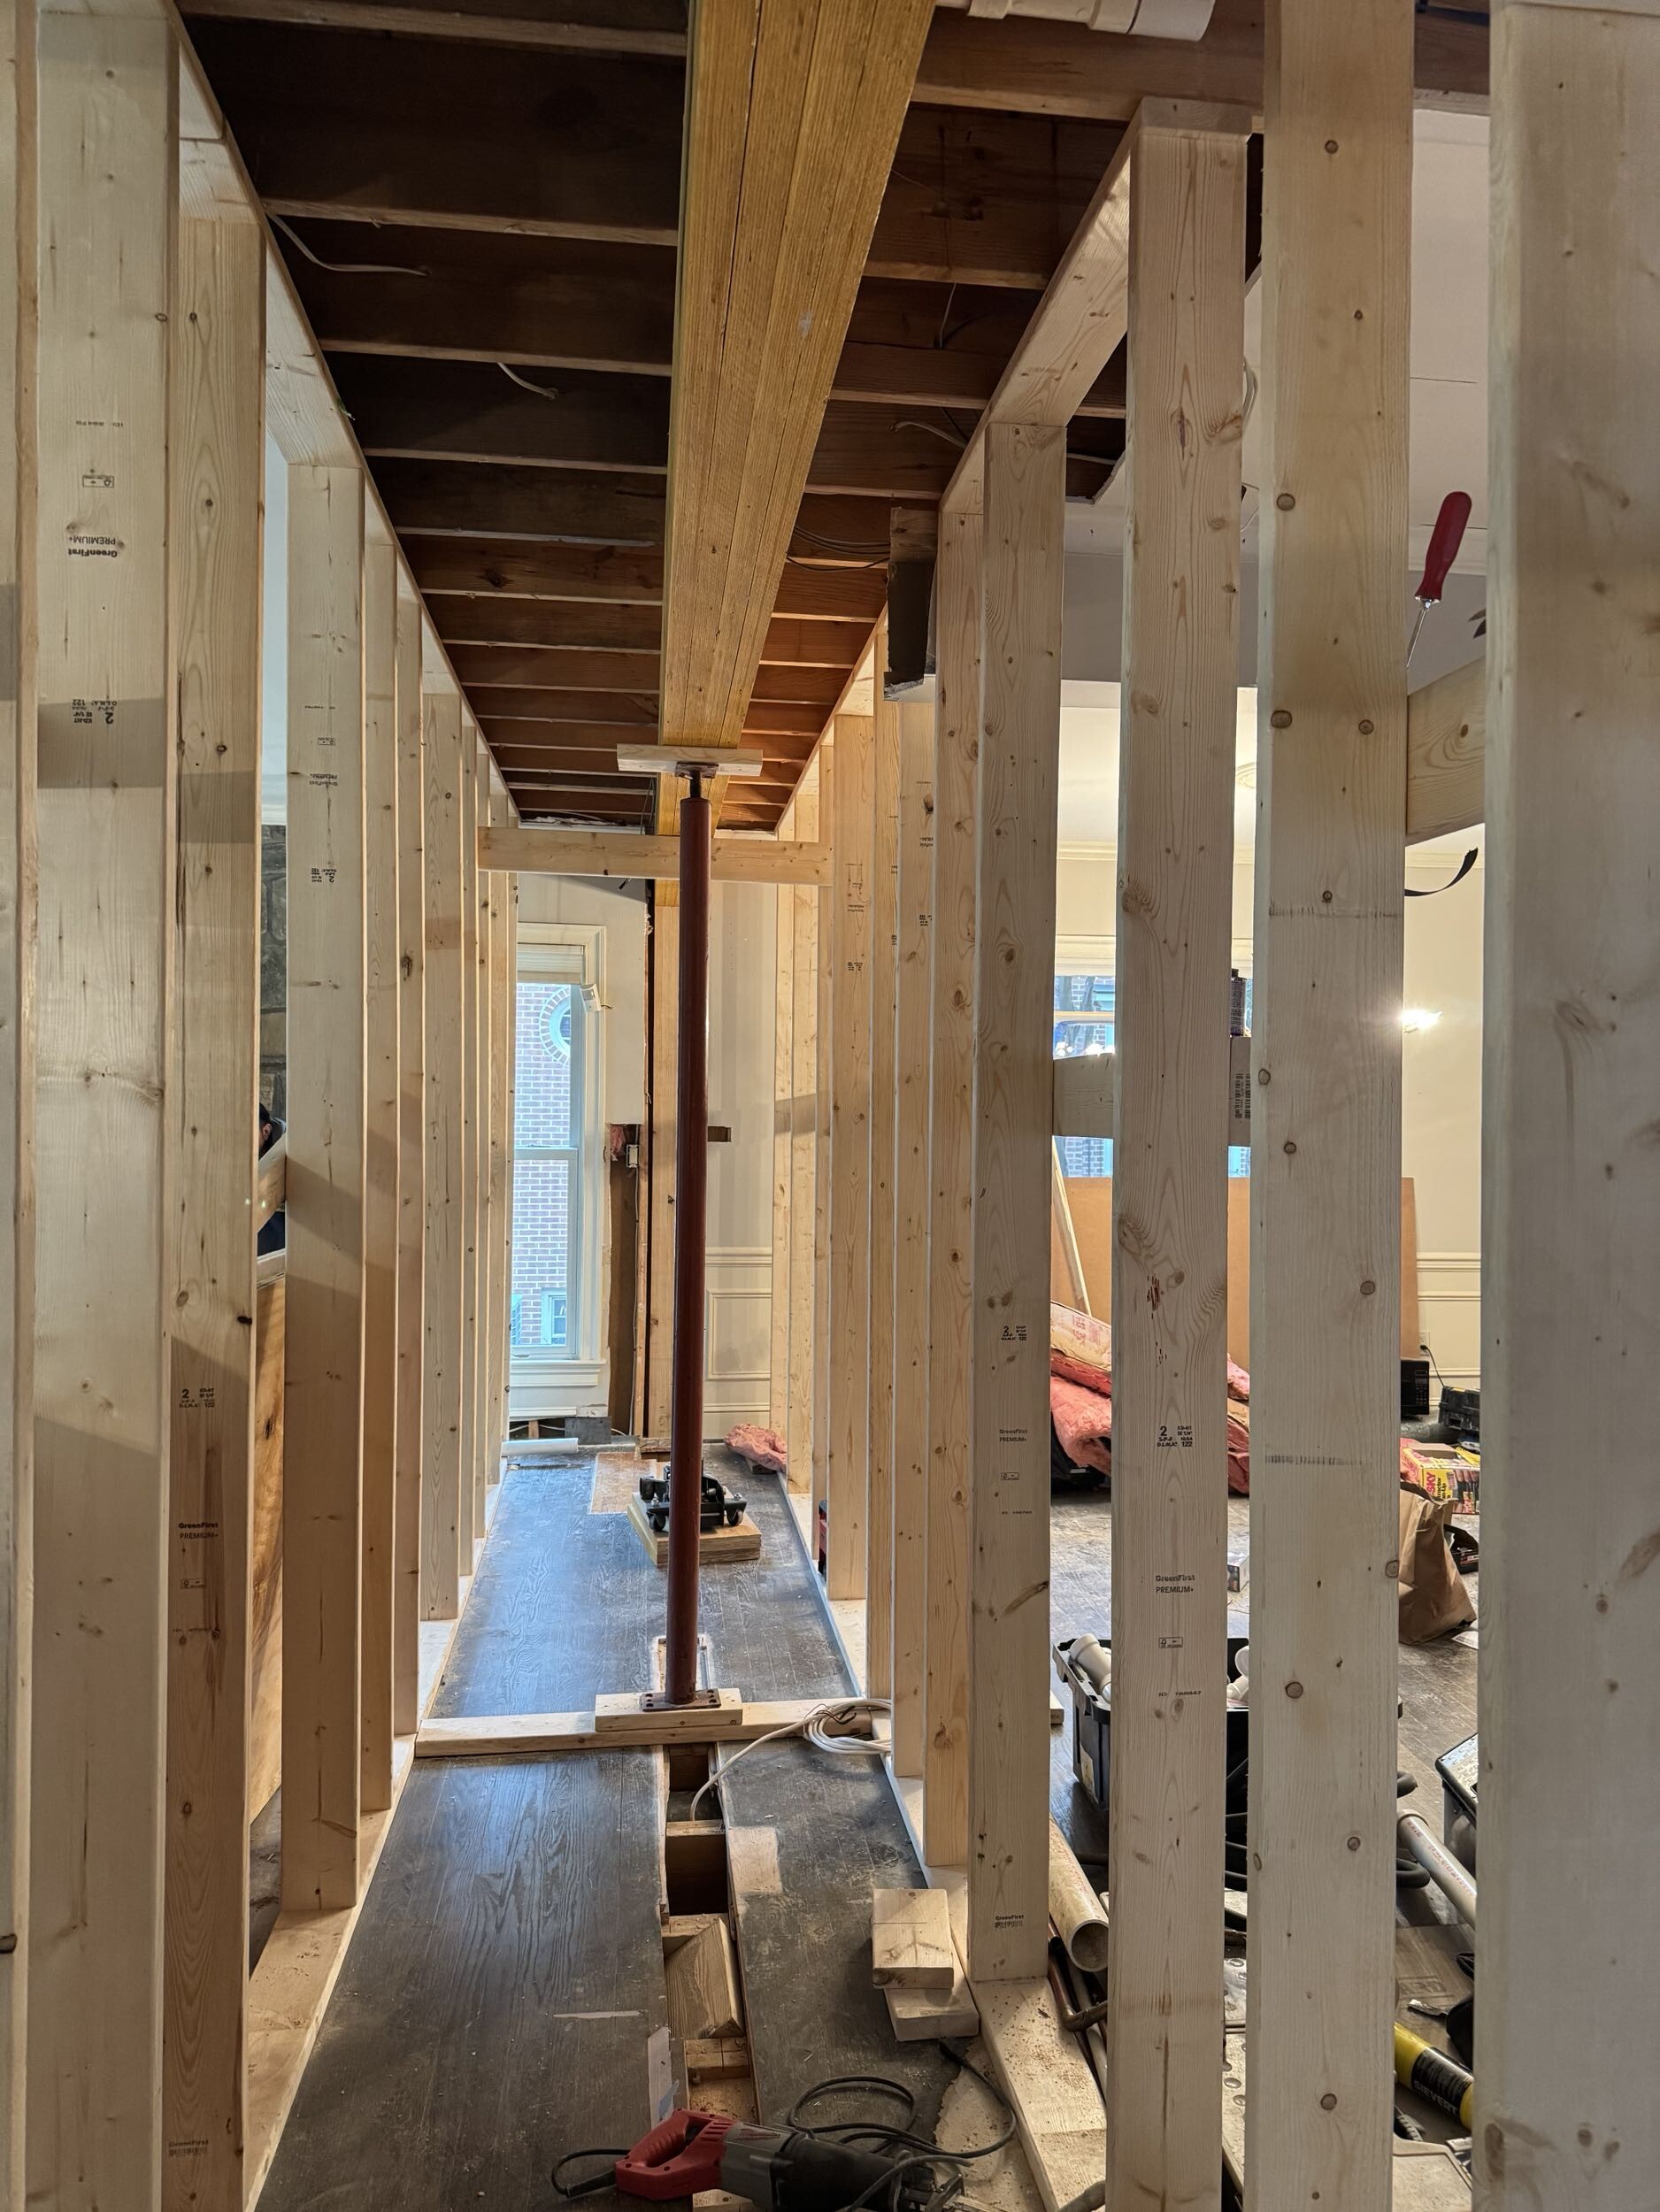
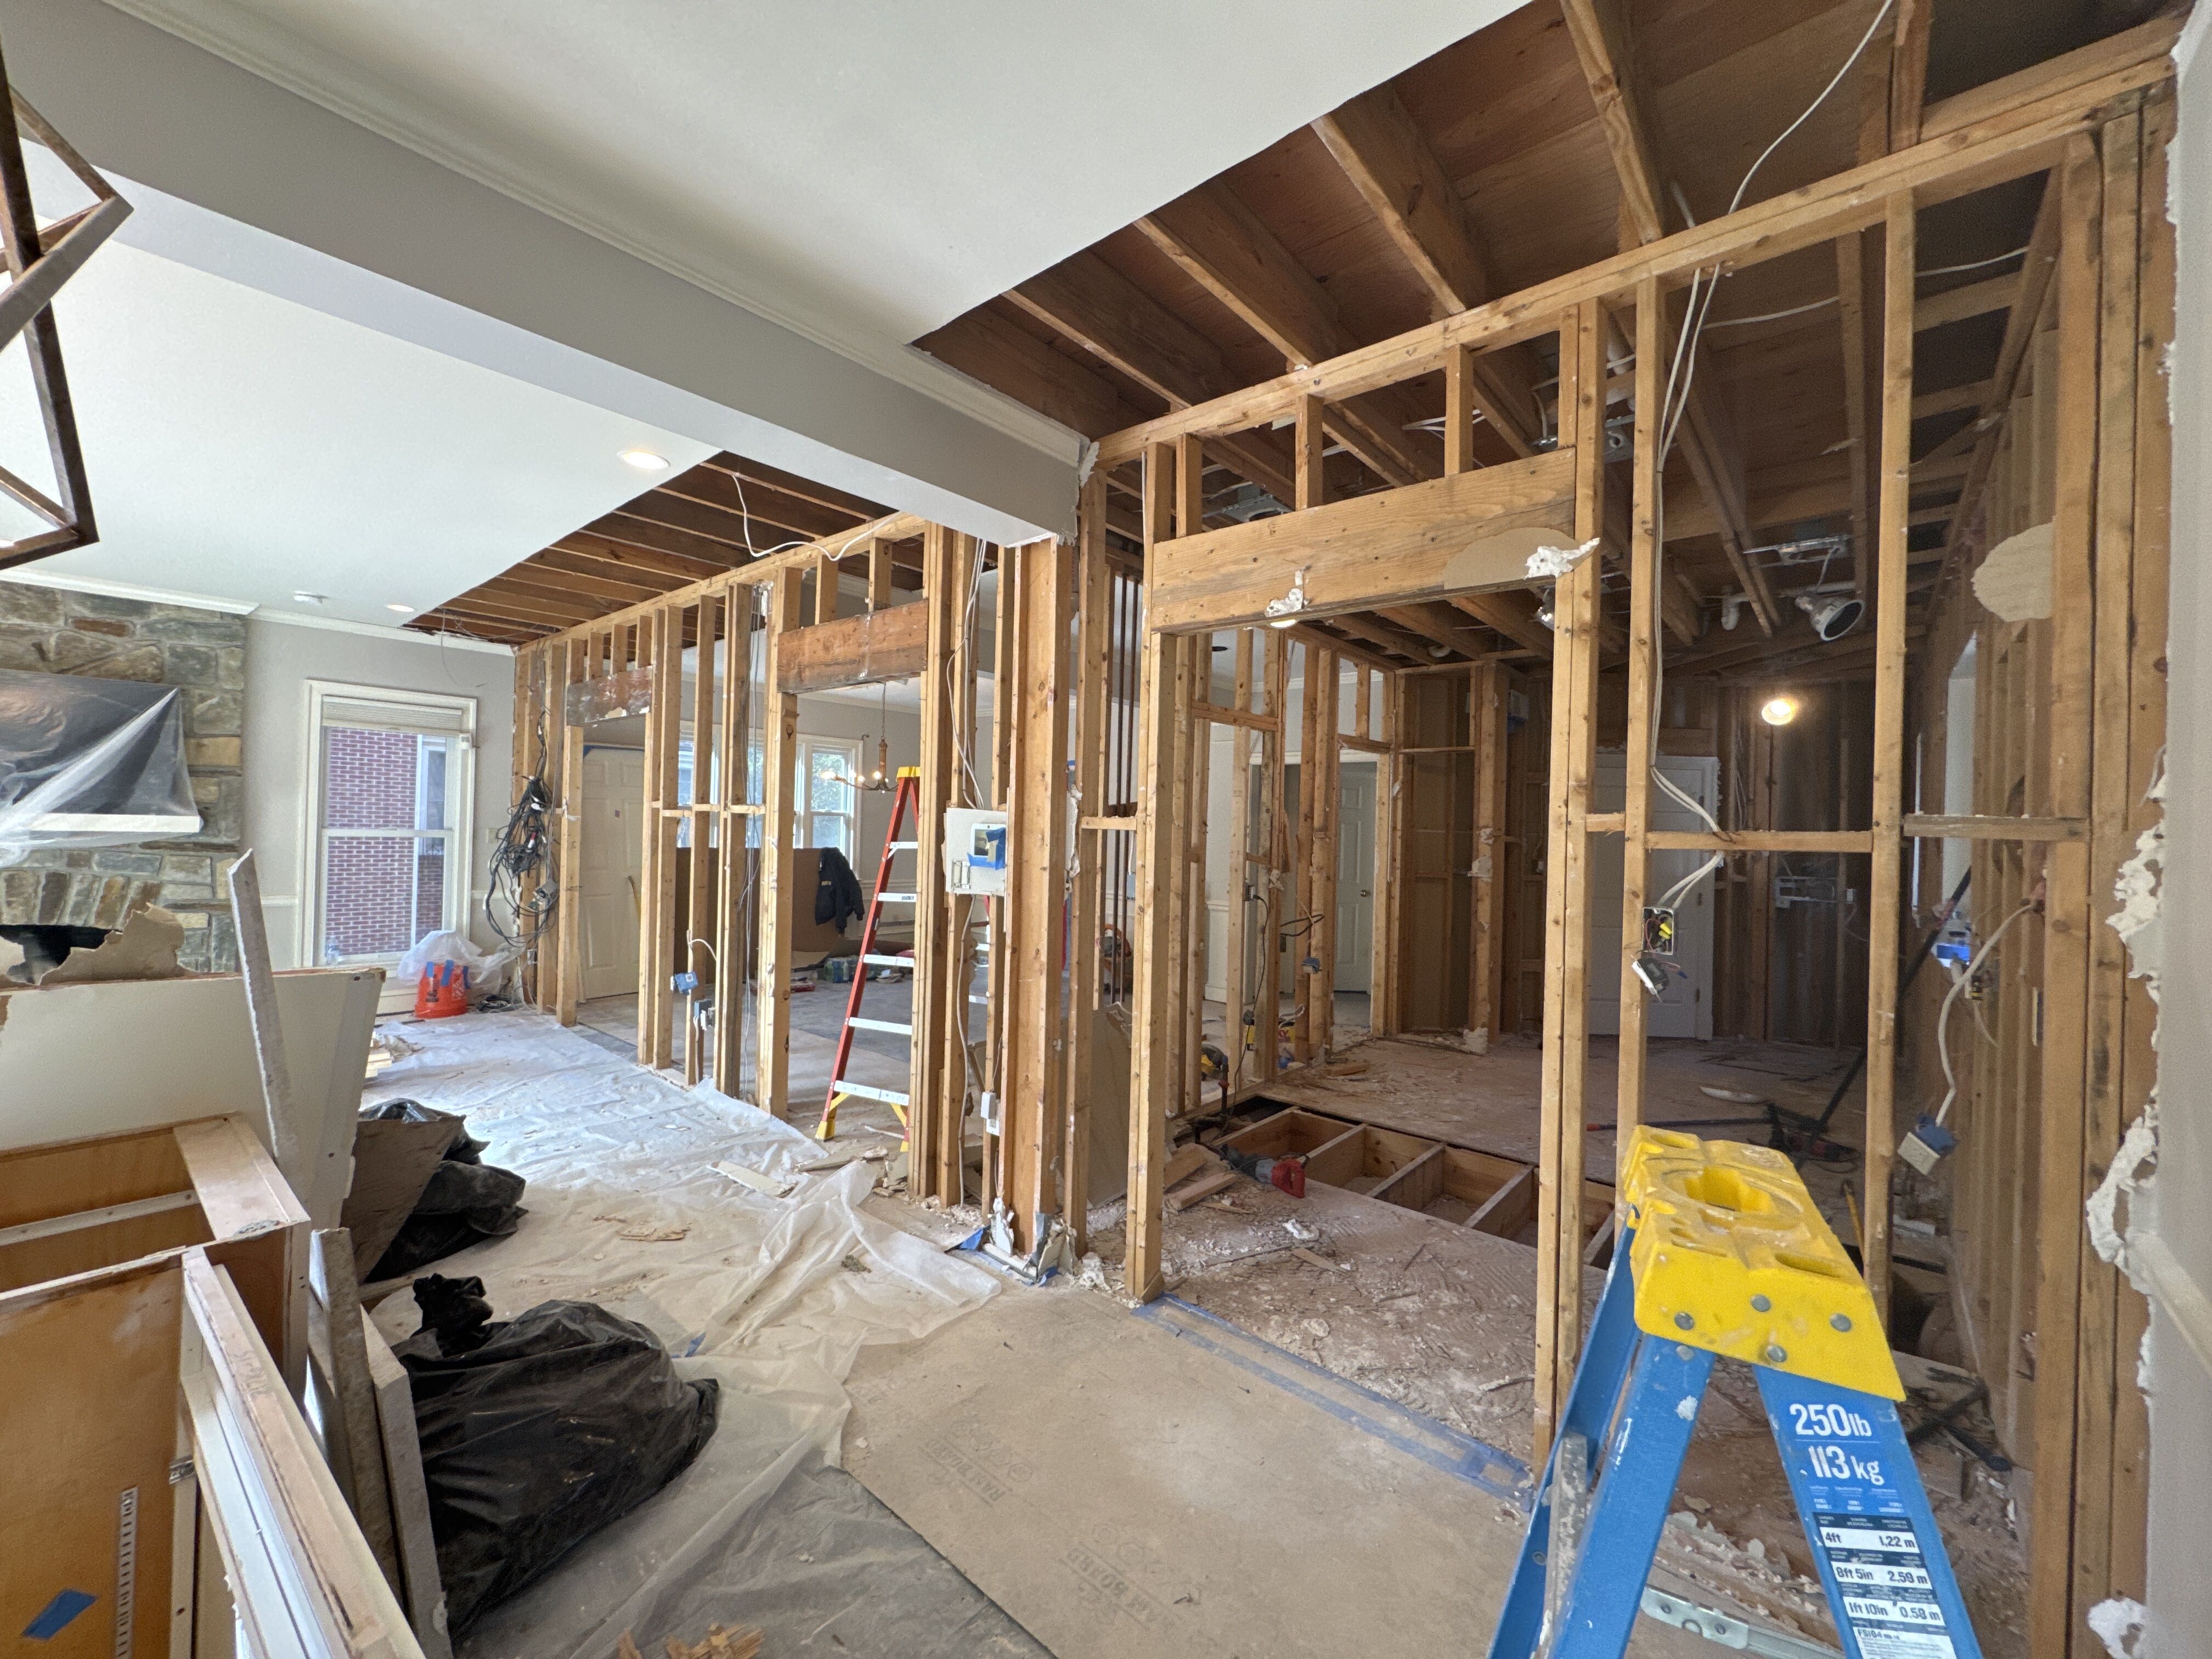
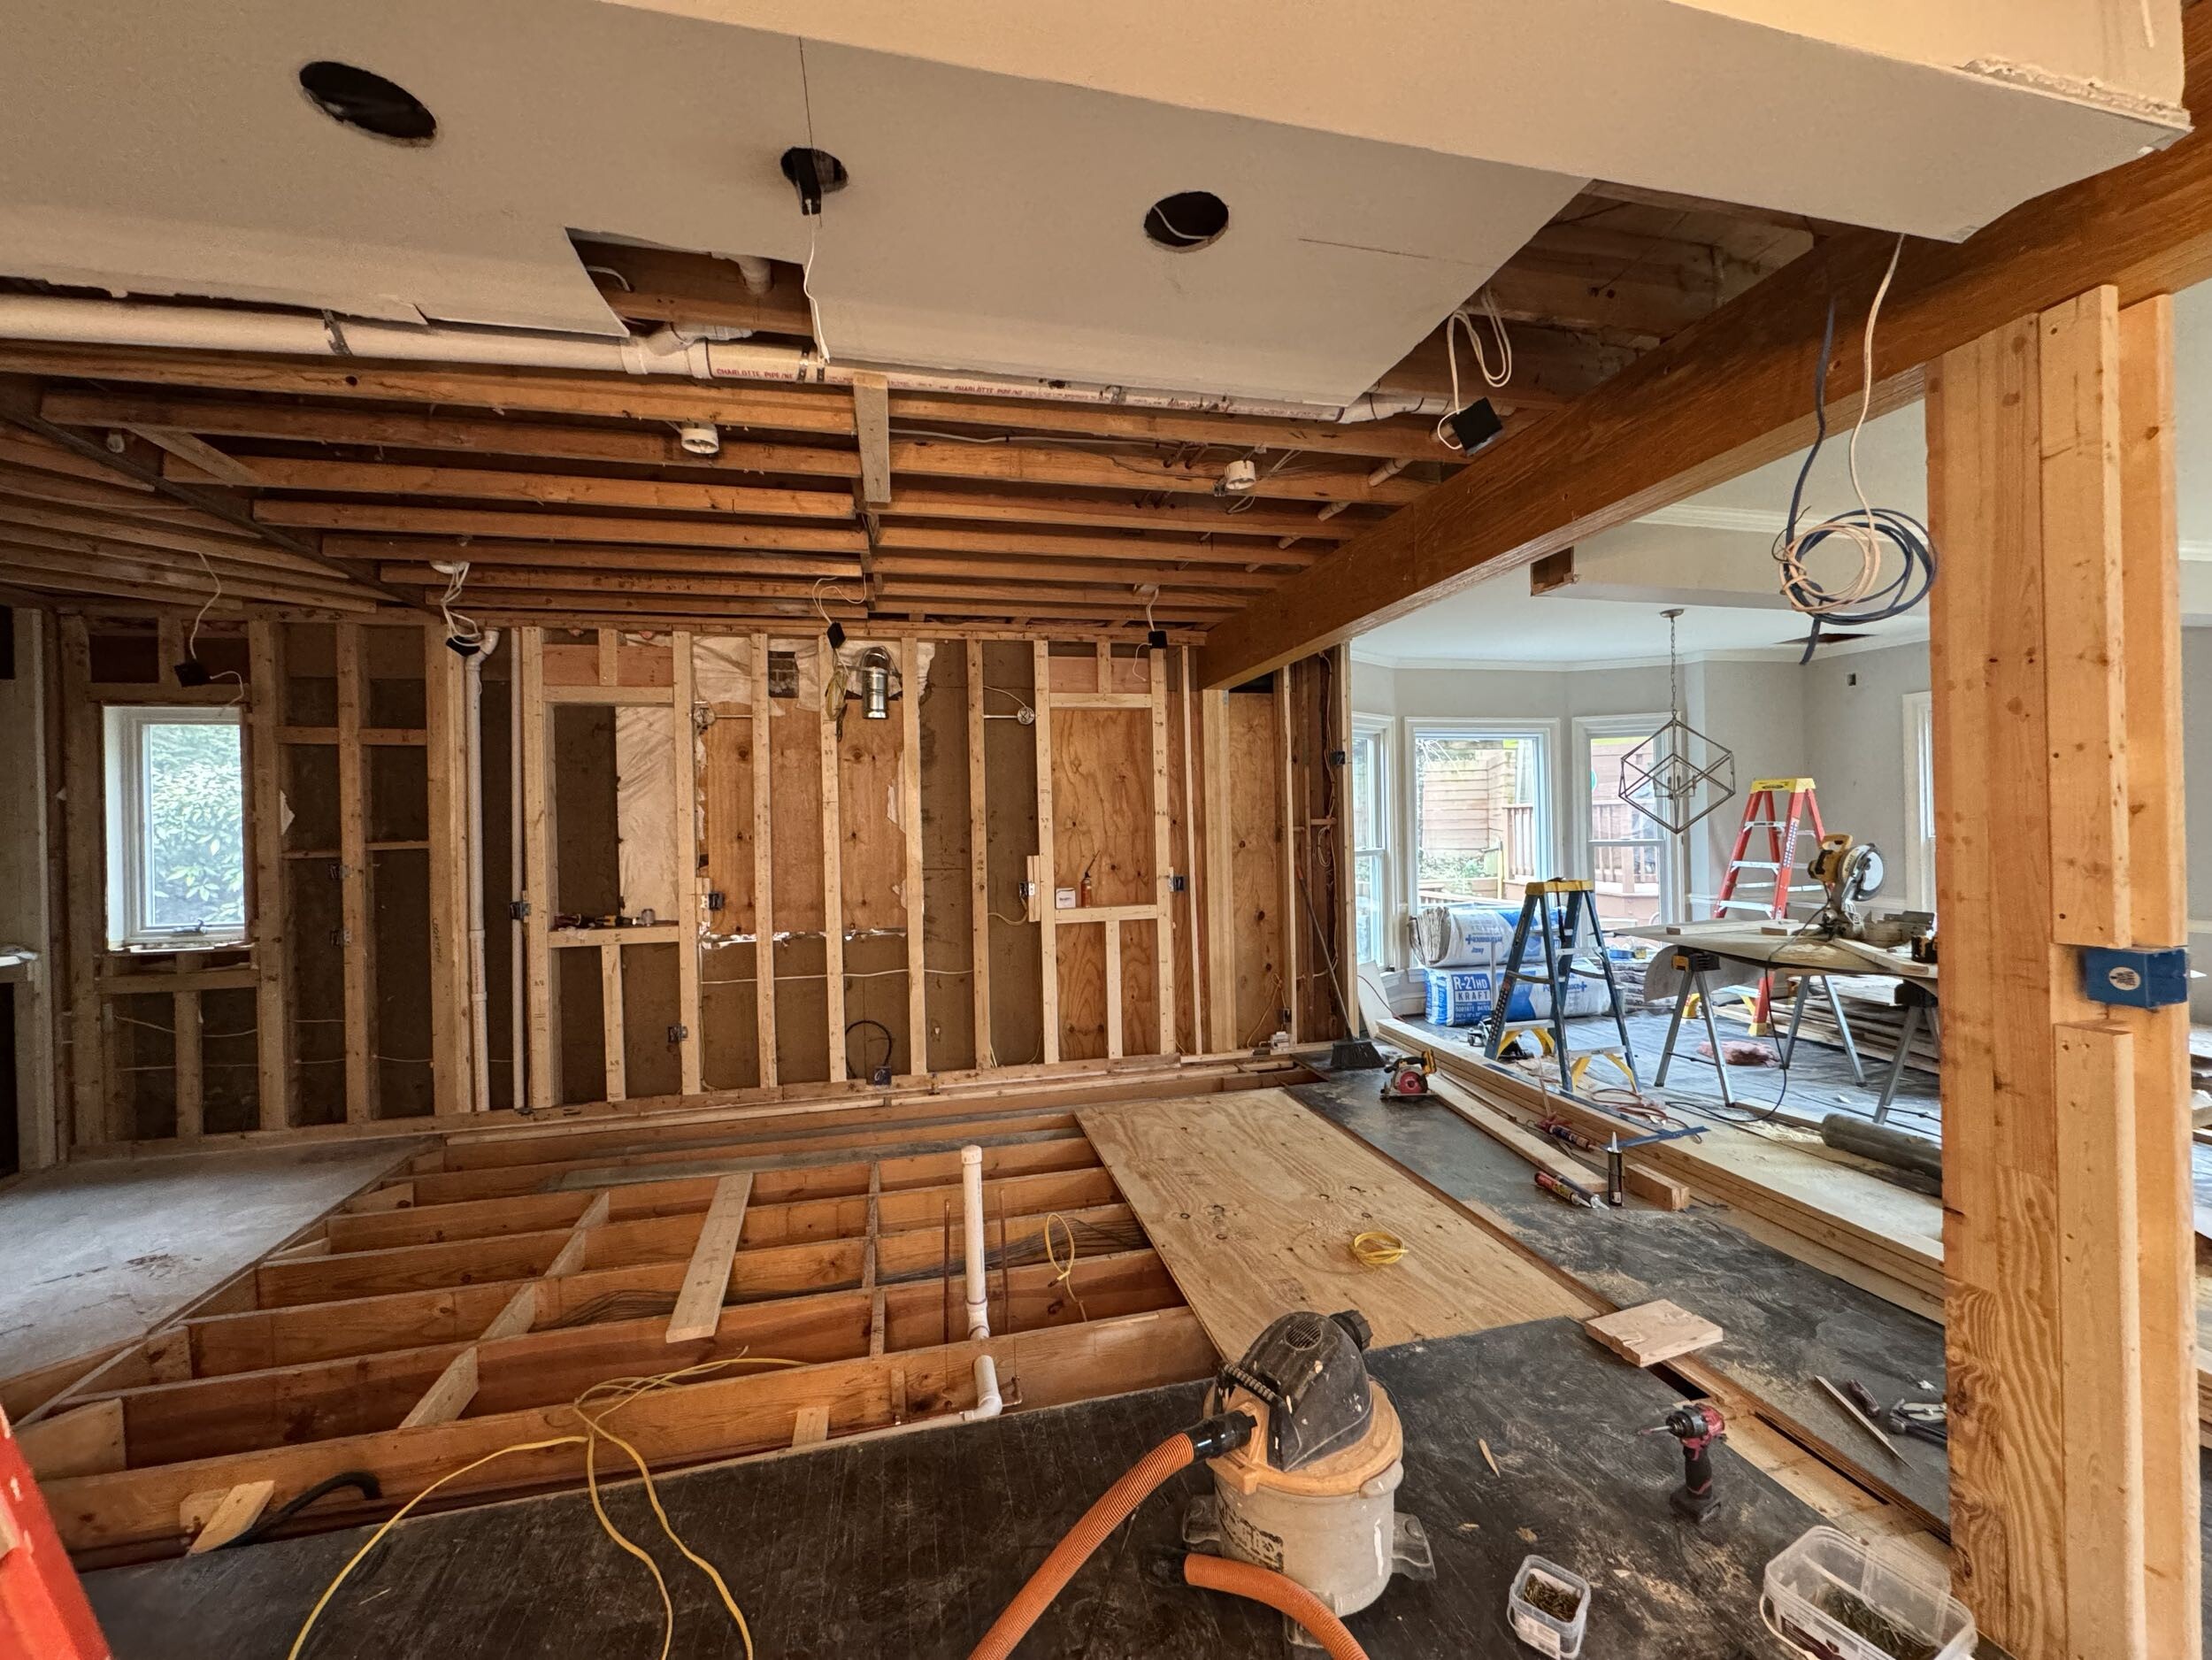
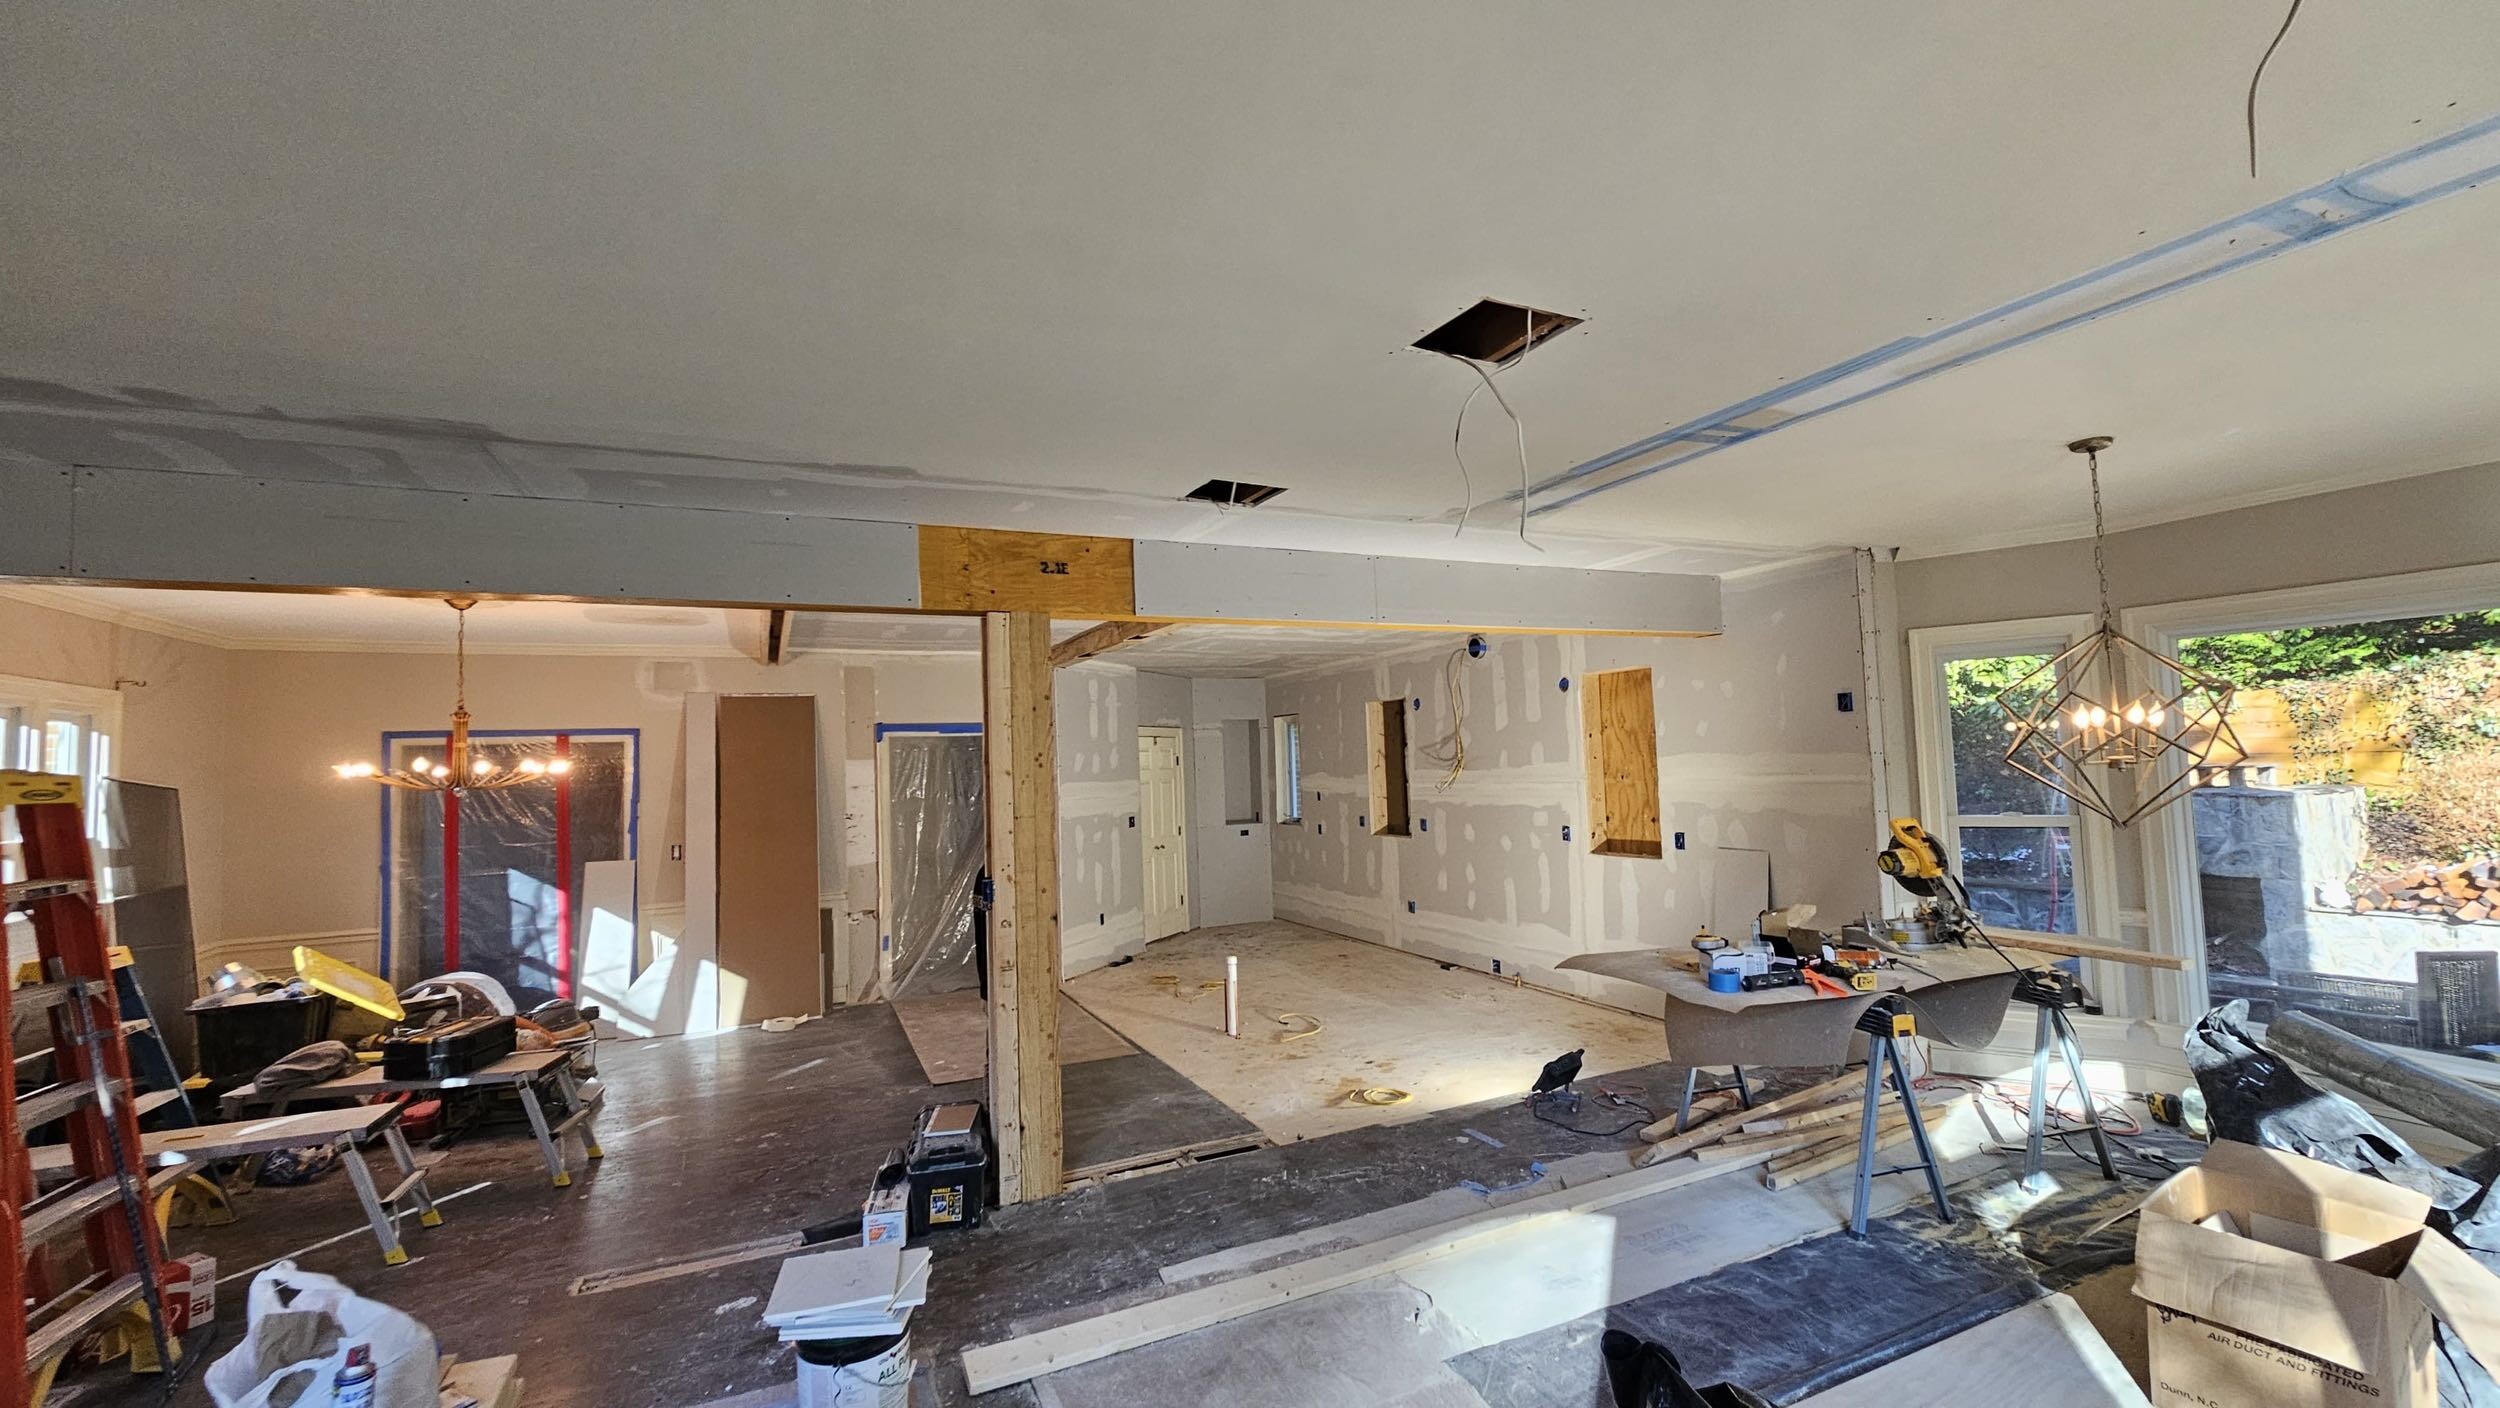
A structural engineer identified one of the dividing walls as load-bearing. Its removal therefore depended on a new beam-and-column arrangement. The other wall carried no structural load, but it still contained services that had to move. Each opening required its own construction plan.
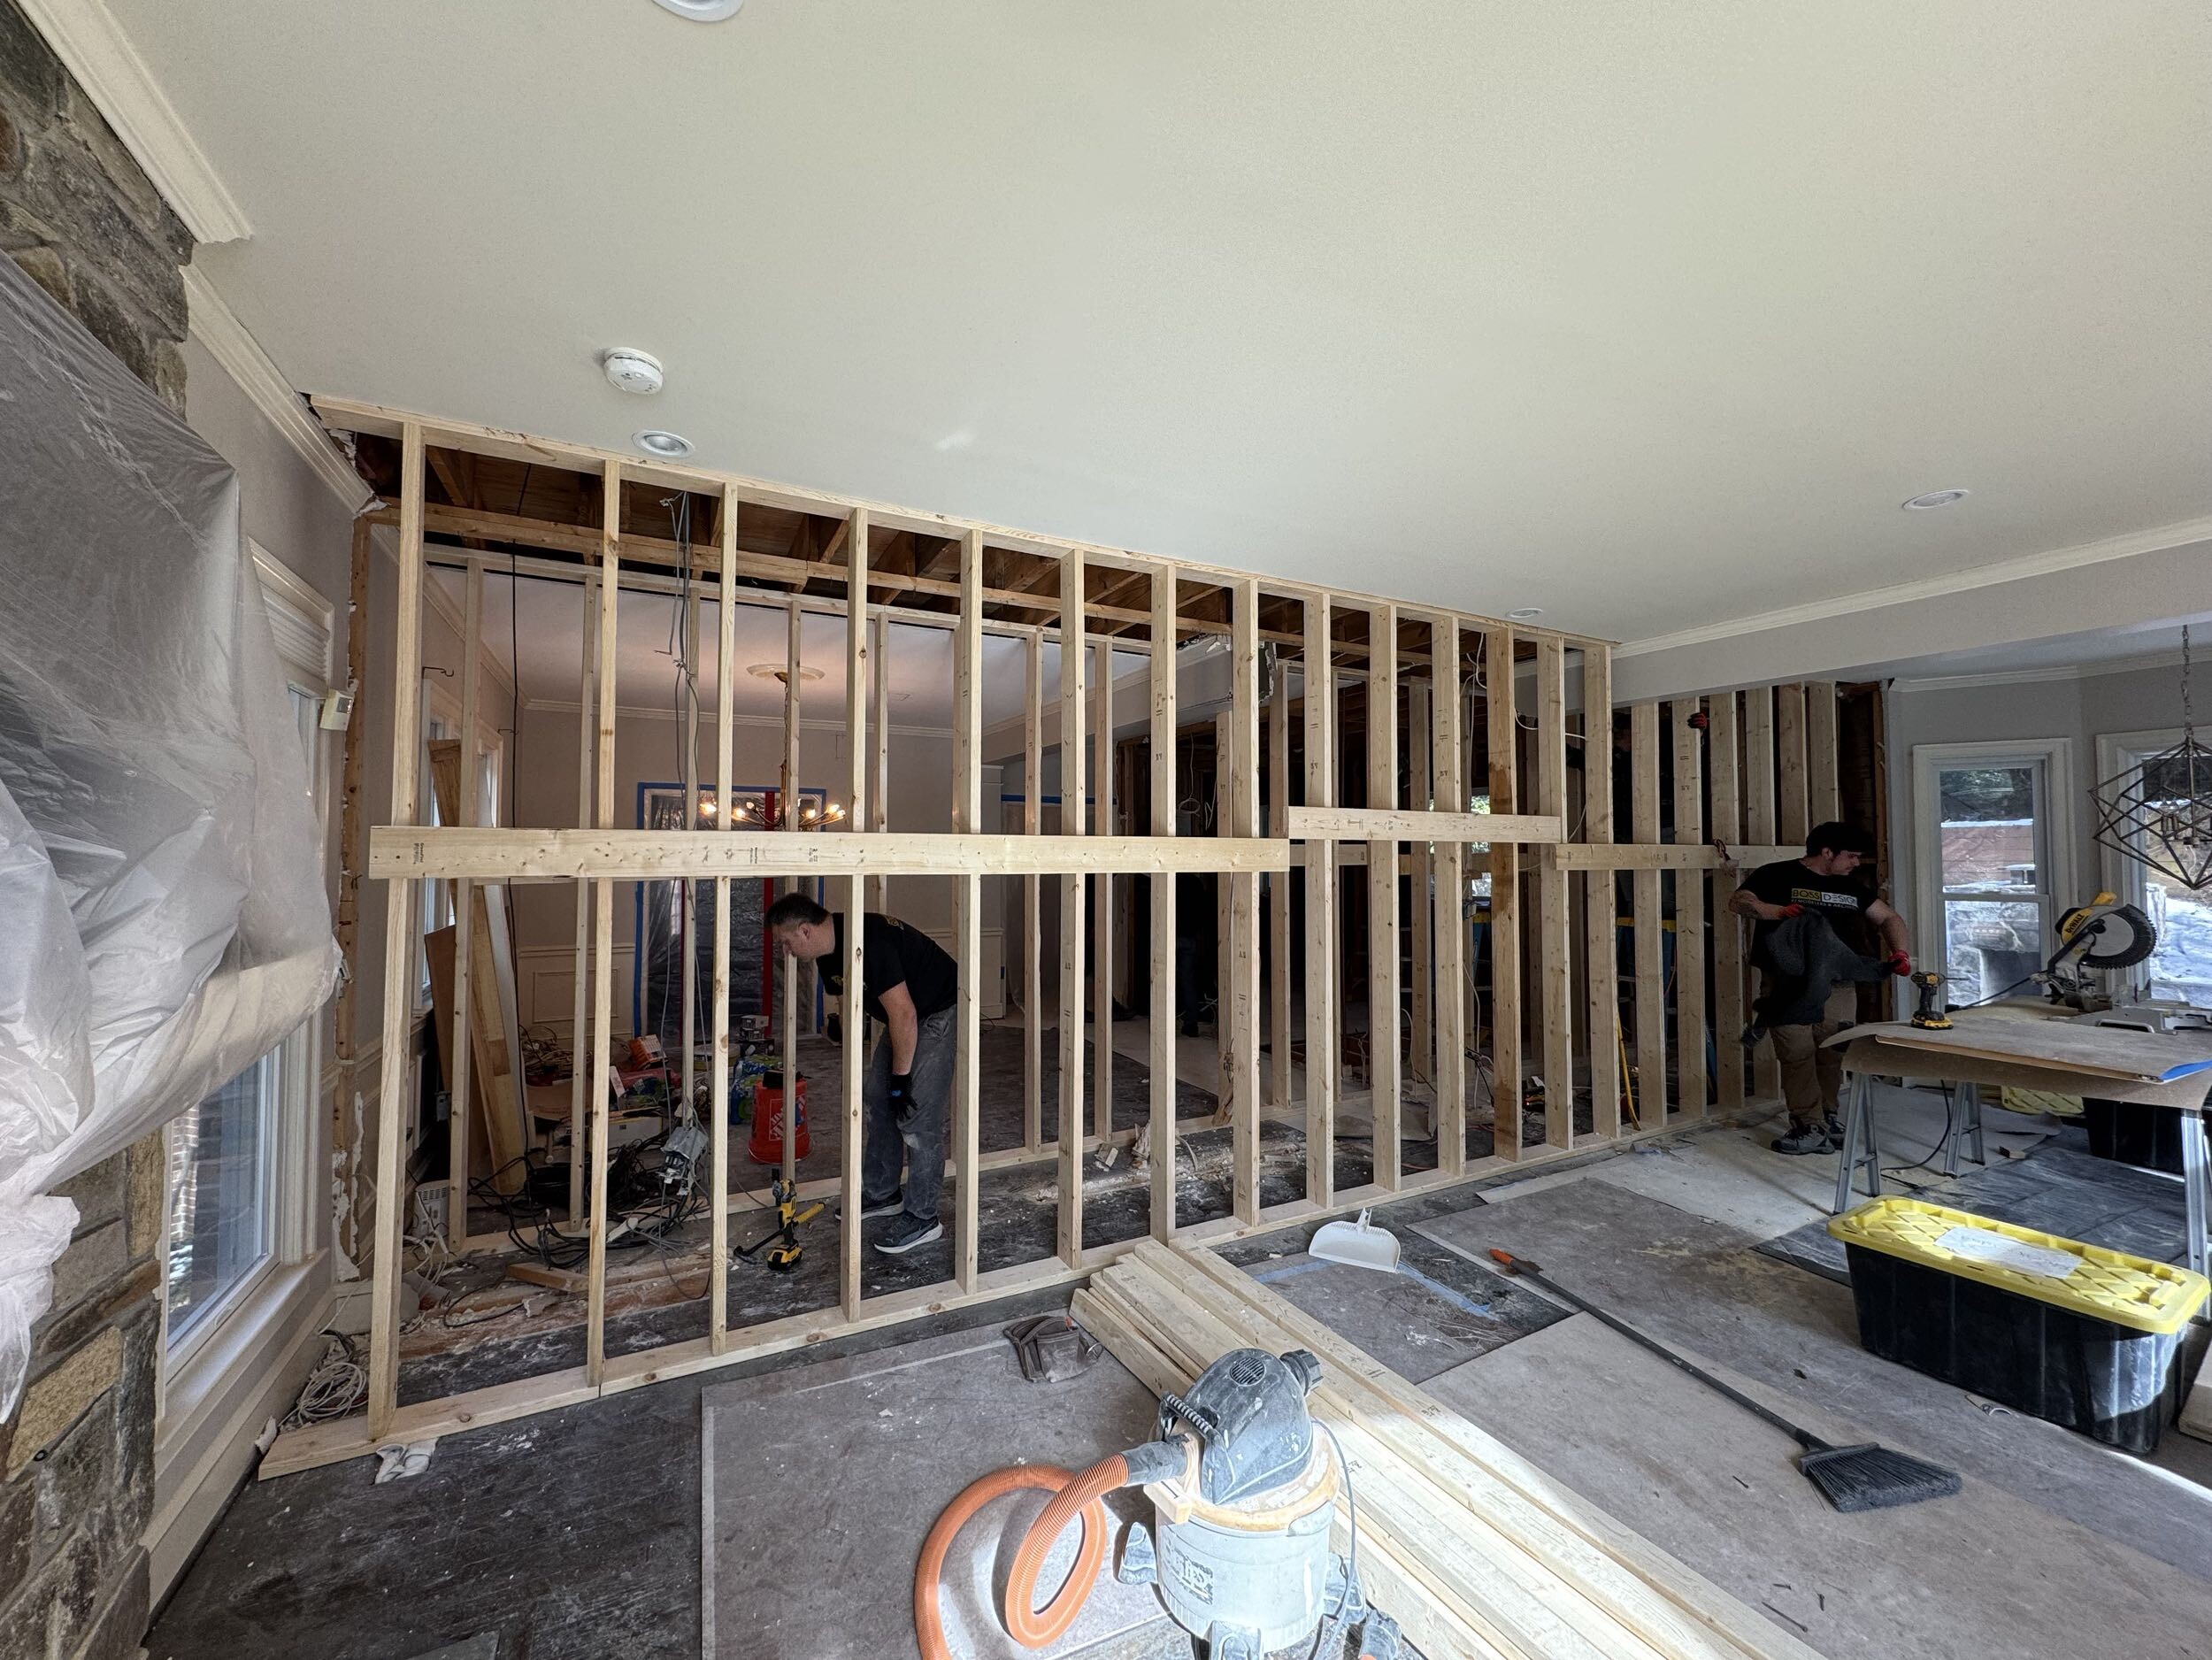
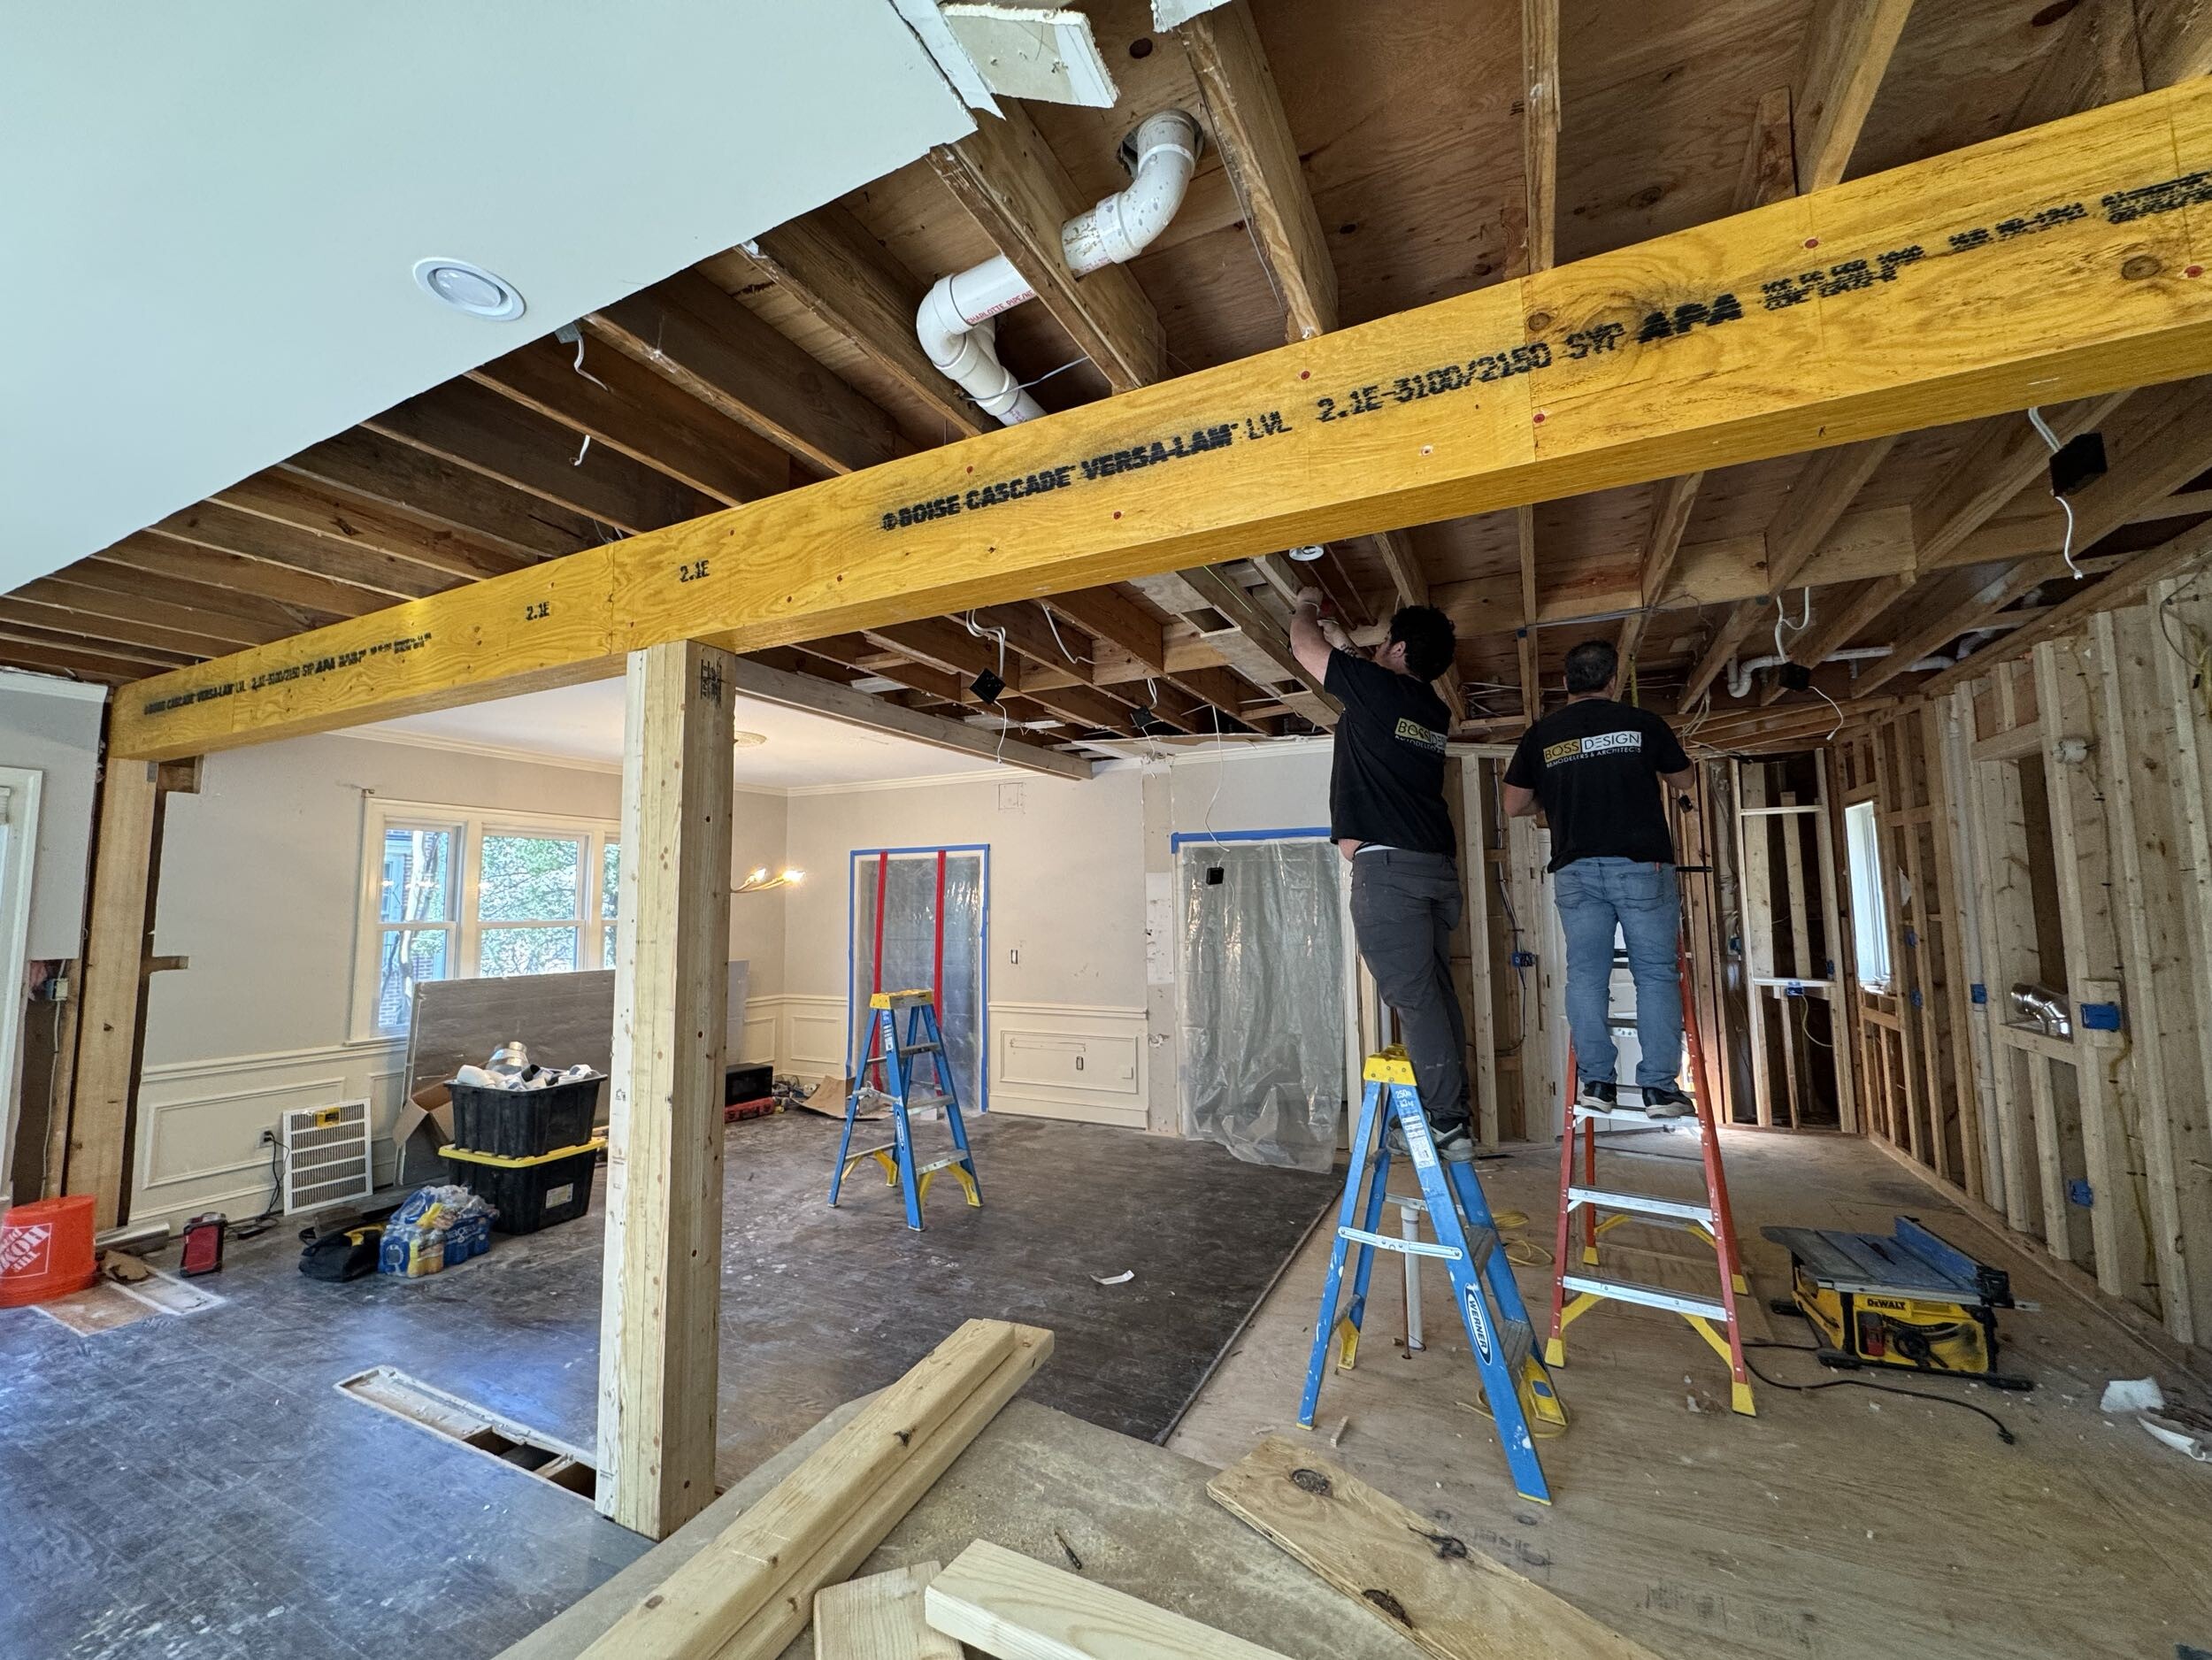
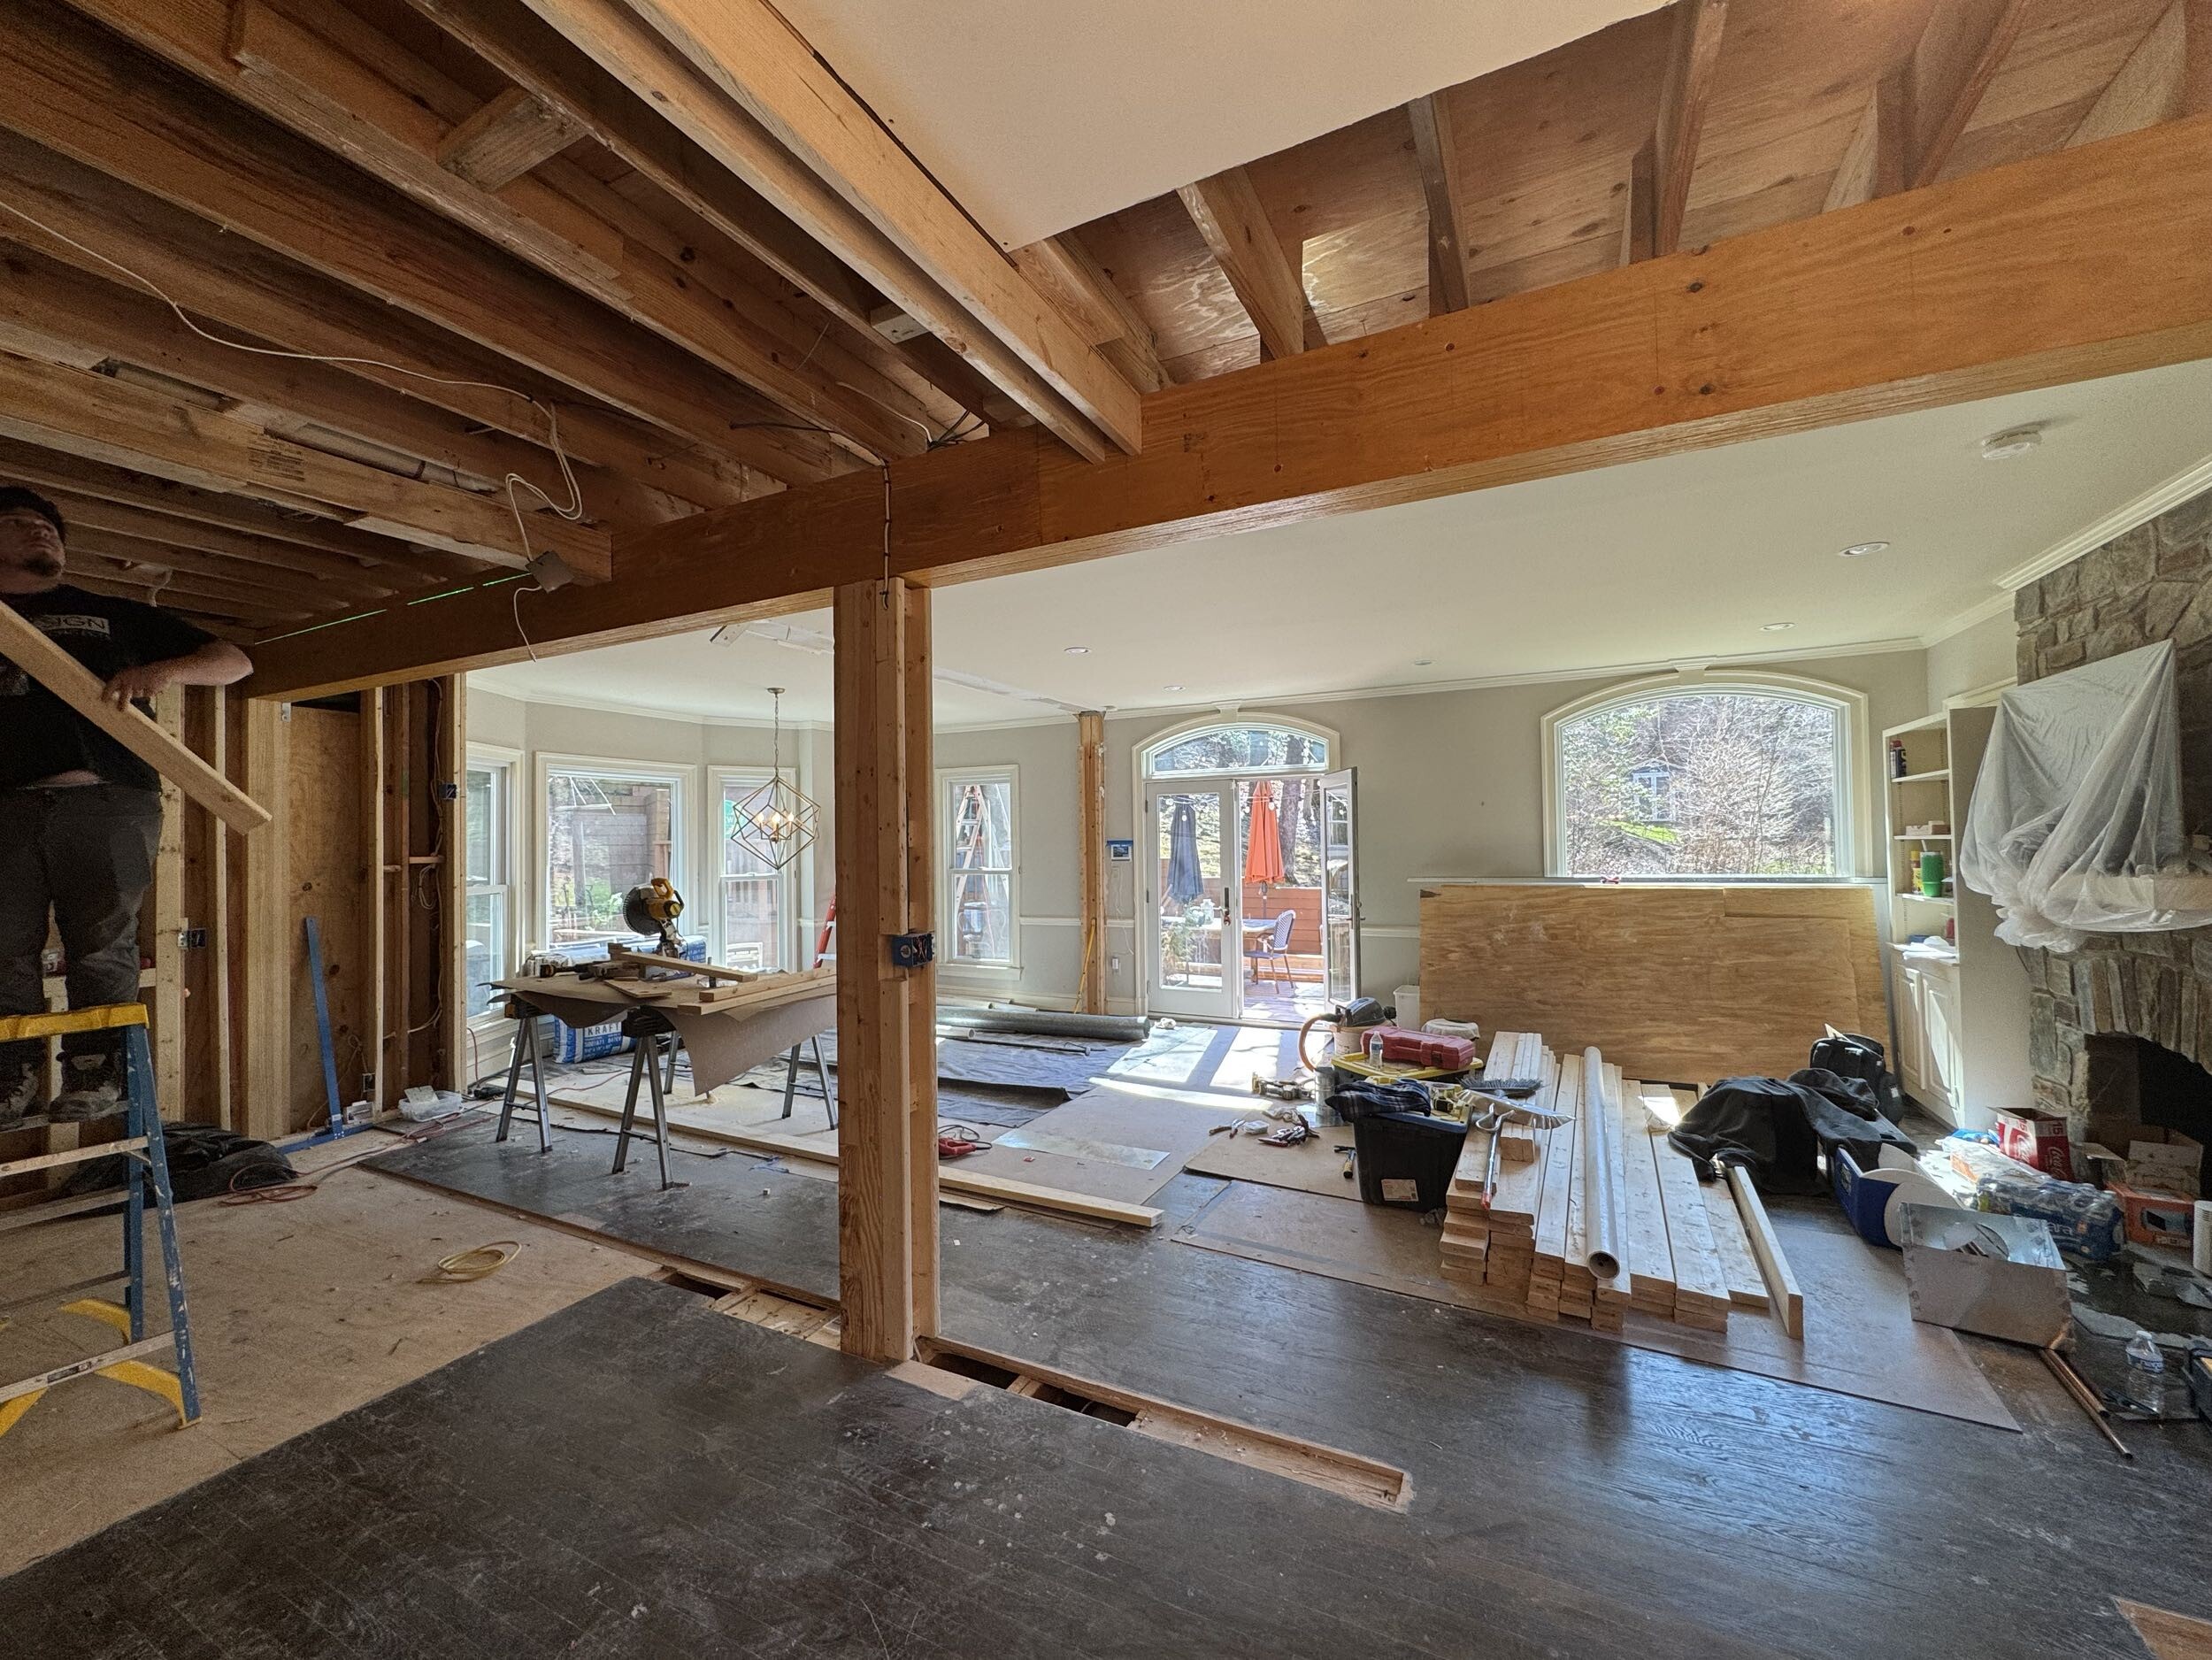
Temporary support walls held the floor structure above while the crew installed the new LVL beam. The construction photographs make the sequence visible: the original enclosure gives way to temporary framing, then to permanent beams and posts. A central column remains part of the completed structural arrangement.
The design works with that structure. The beams define transitions between the kitchen and adjoining rooms, while the remaining supports are incorporated into the finished openings. The result is a much broader visual connection across the ground floor, with the load path resolved before the cabinetry and finishes arrive.
Temporary support
Beam installation
Permanent structure
The new opening
04 / The exterior wall
A new rhythm in the brick wall.
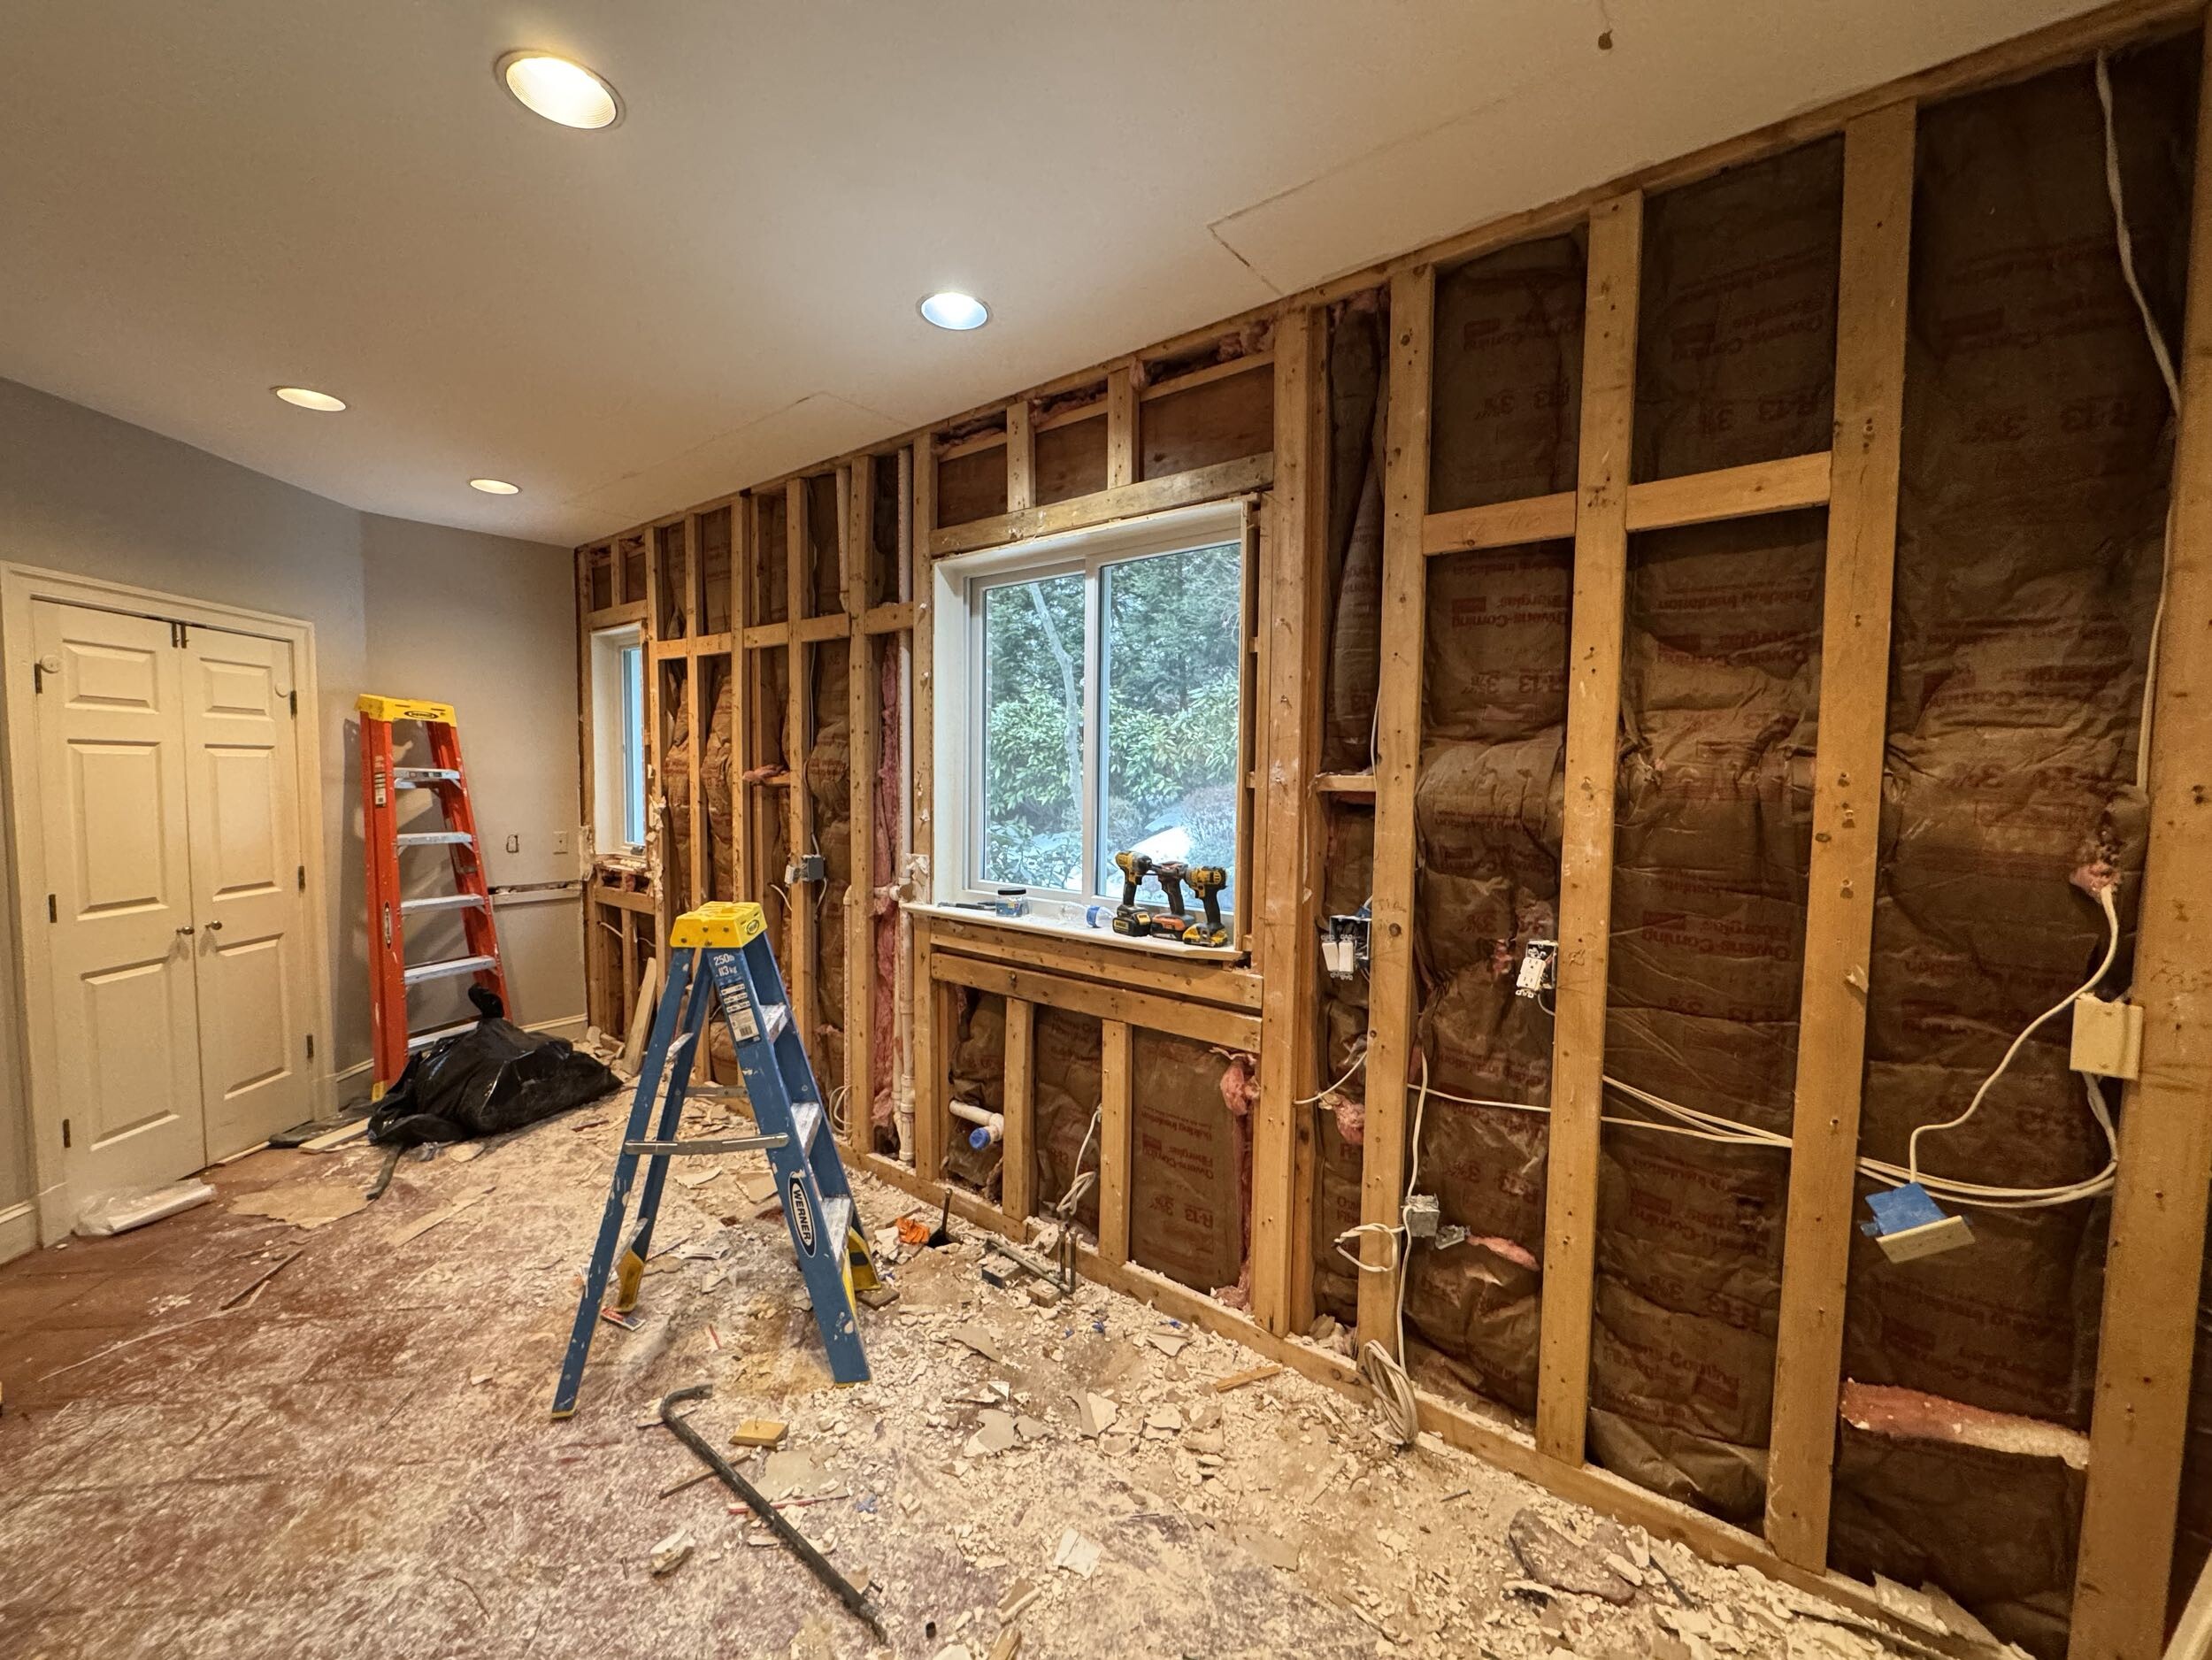
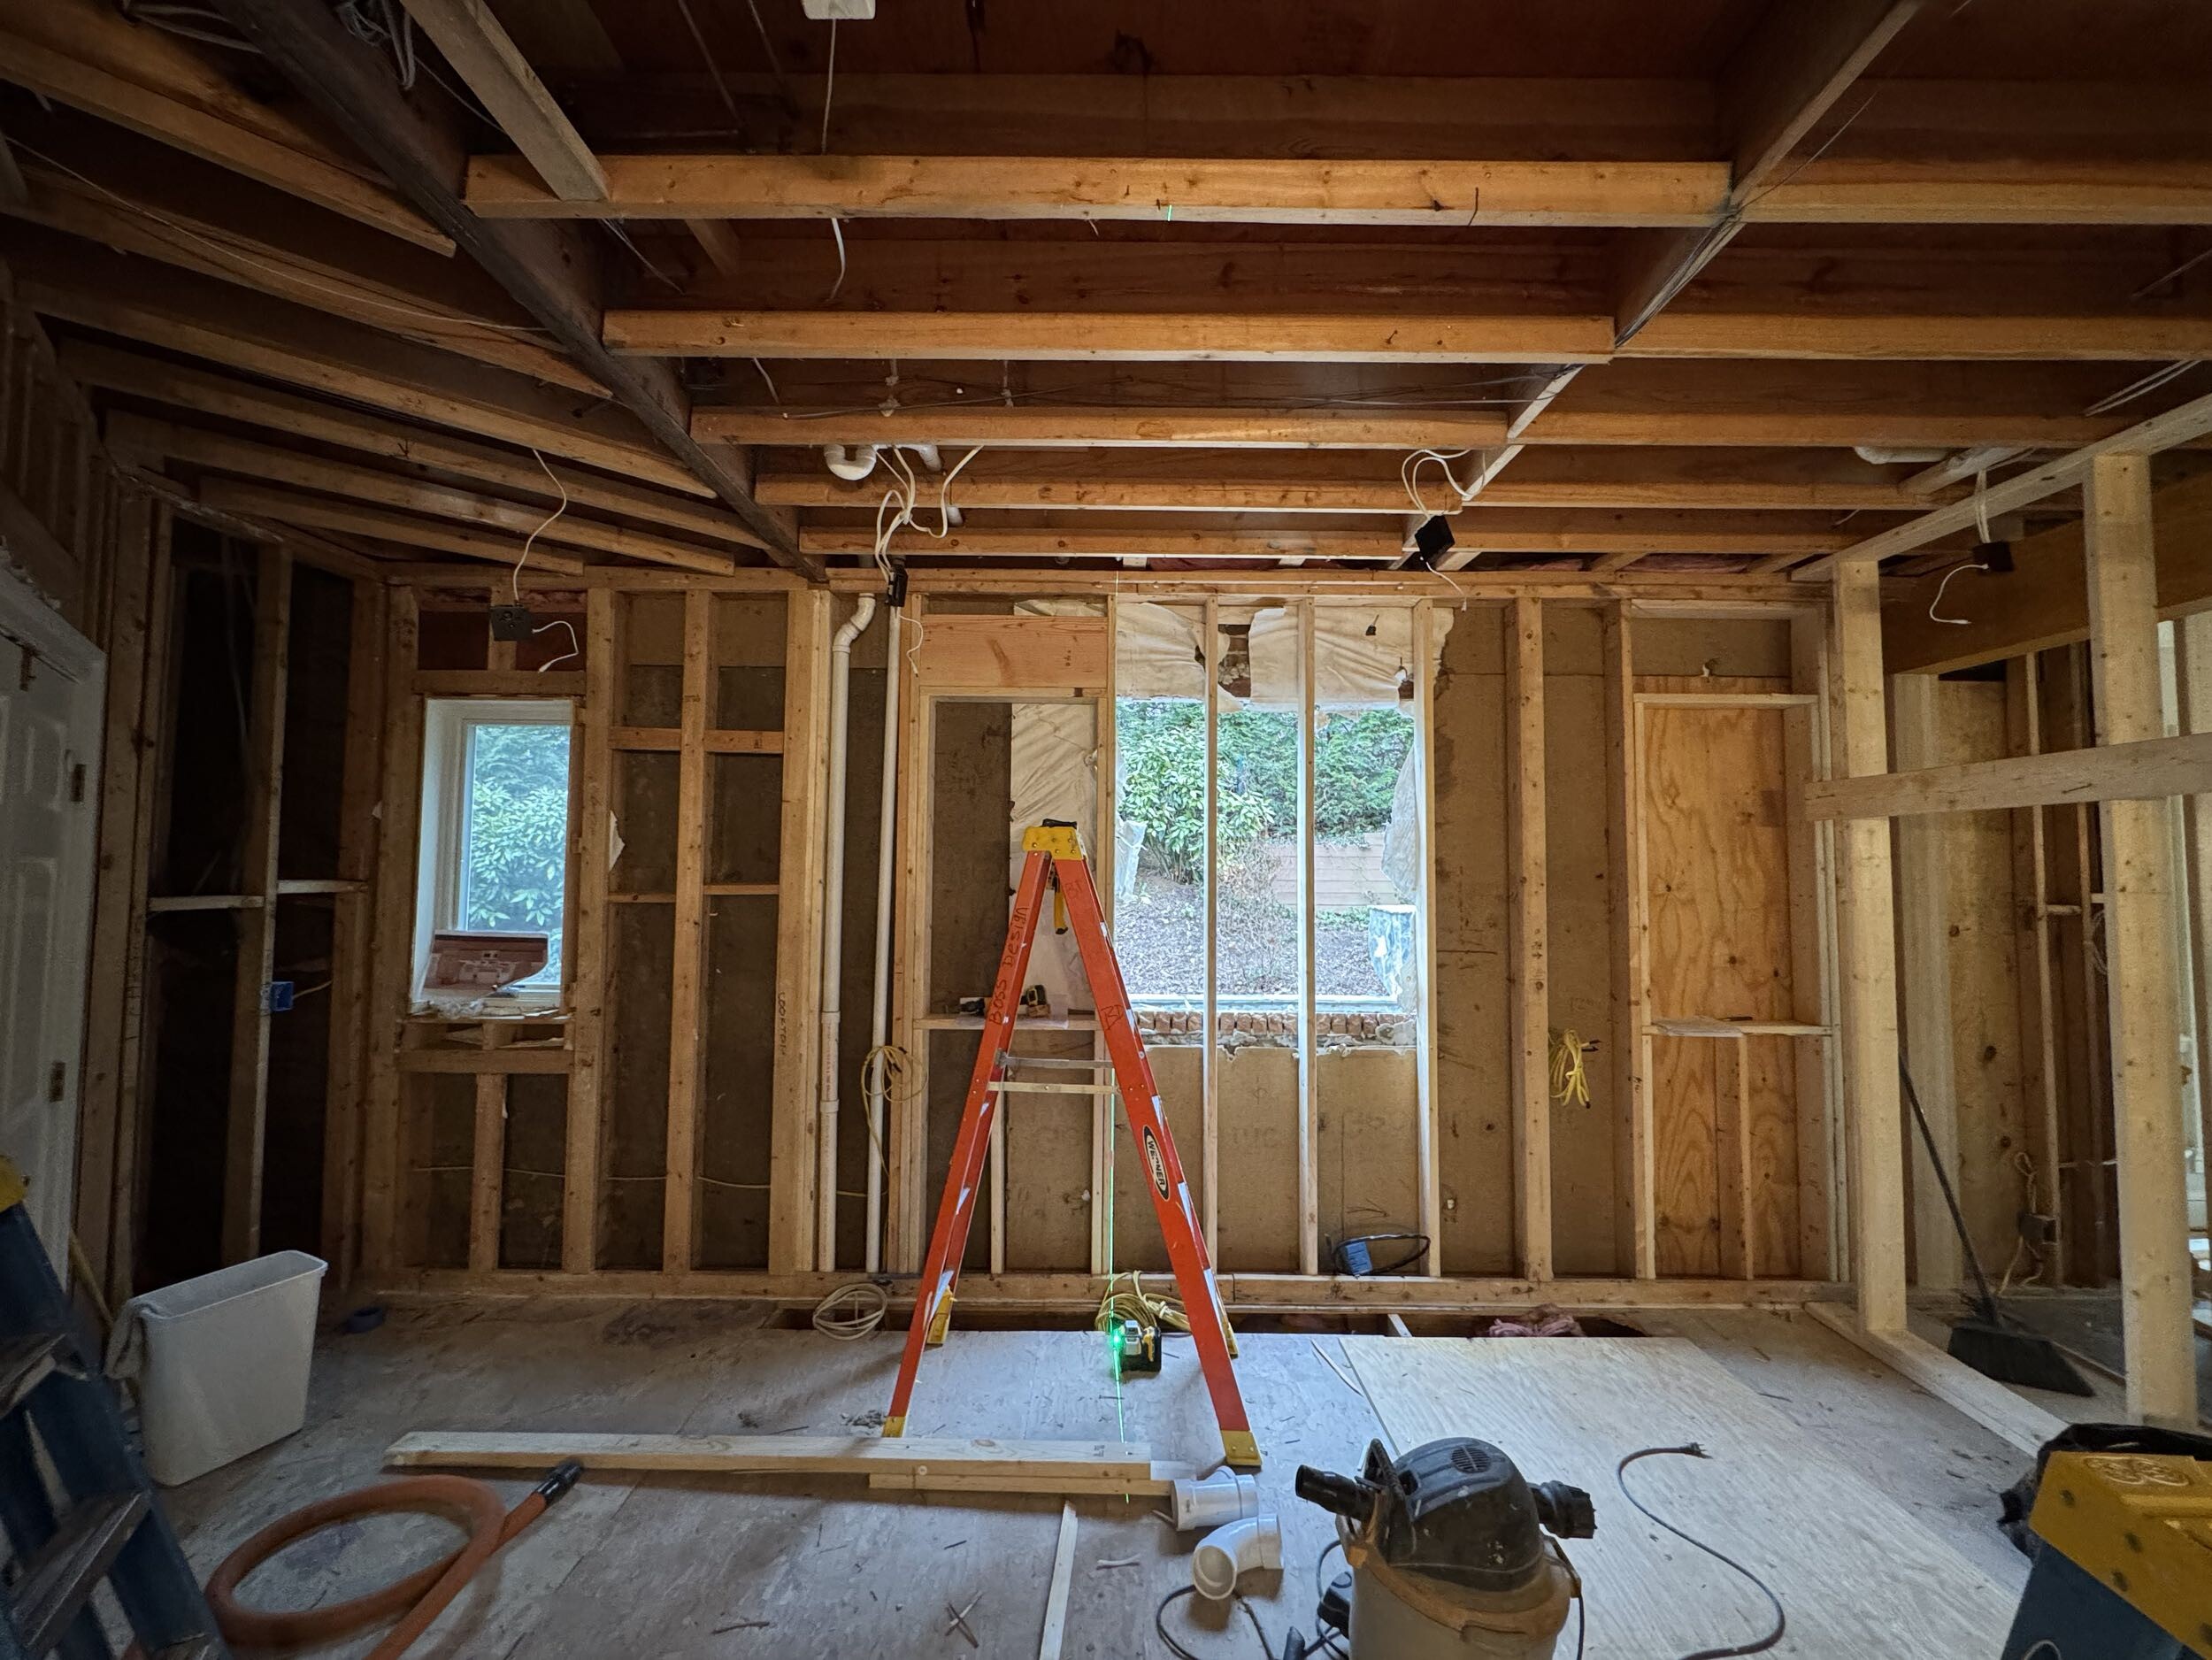
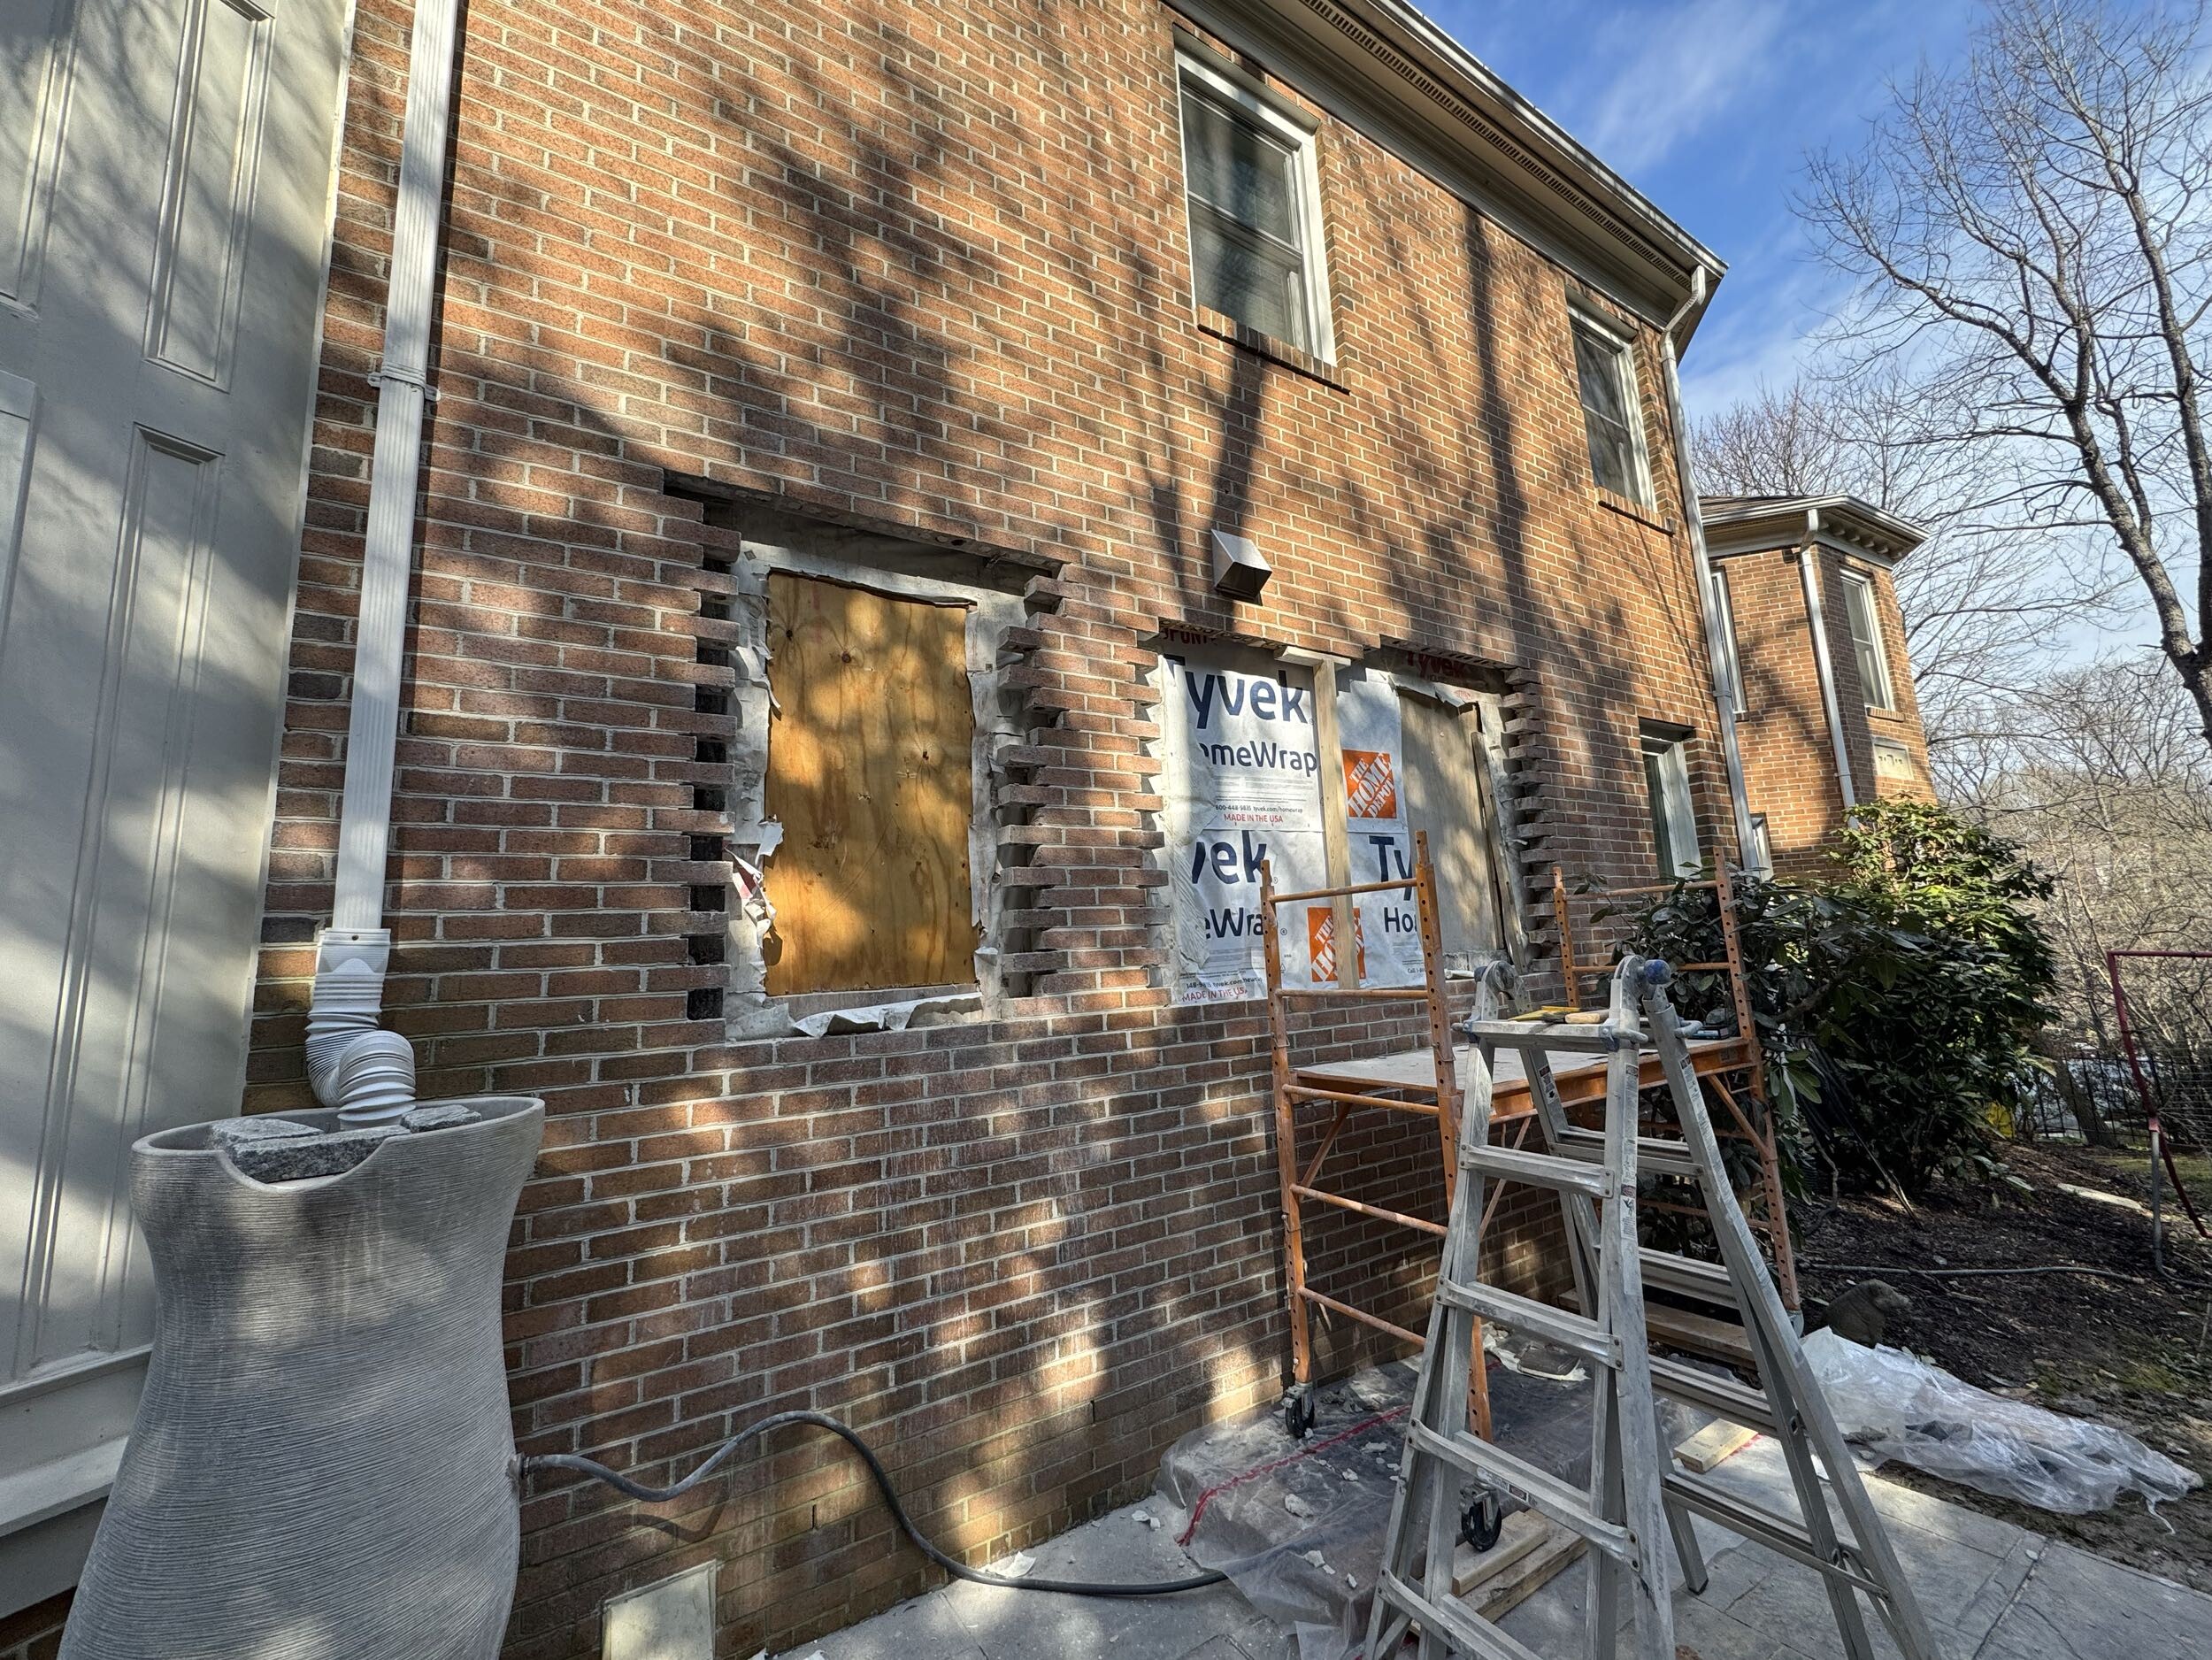
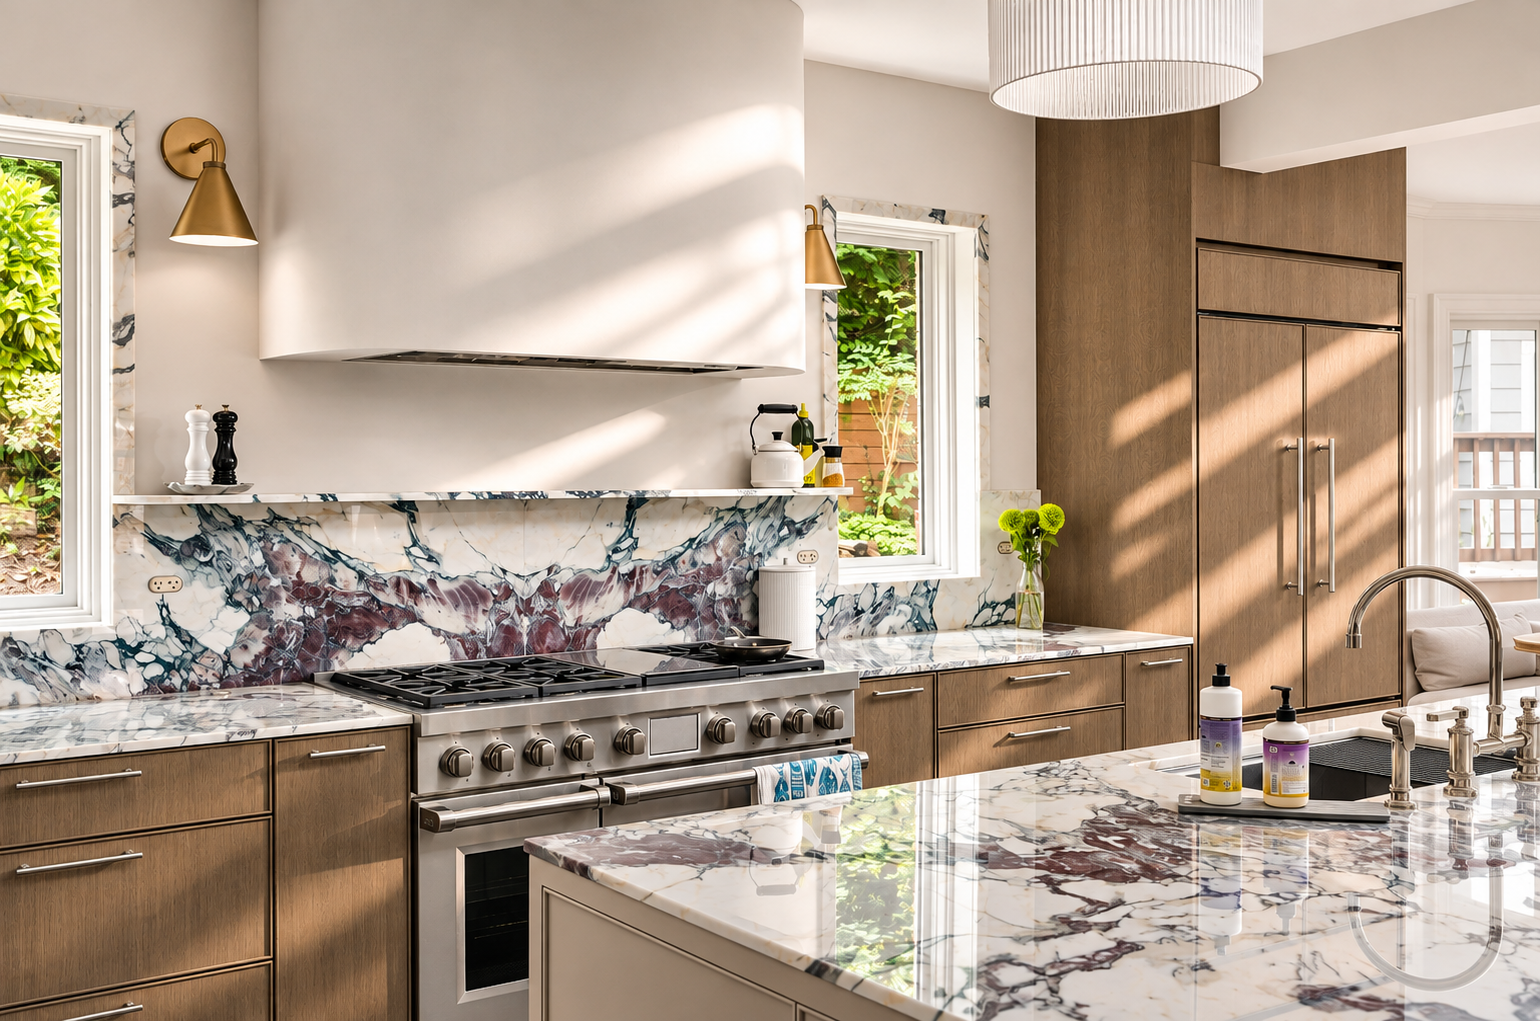
Moving the range to the exterior wall created a conflict with the existing broad window. The solution was to close that opening and create two narrower windows, one on each side of the range and hood. Their positions establish the symmetry of the finished wall while keeping daylight at the cooking area.
This was an exterior alteration as well as an interior layout decision. New framed openings and headers had to align with the cabinet plan, and the brickwork had to be opened around them. Existing pipes in the wall also crossed the proposed window locations, so their relocation was part of the same operation.
The exterior photograph records the masonry work in progress: the new openings are cut through the brick, and the former window area is being enclosed. Inside, the finished pair of windows makes the hood feel intentional and gives the range wall a balance that the original opening could not provide.
Original opening / early demolition
Reframing
Exterior work in progress
After
06 / Everyday use
An island built for working.
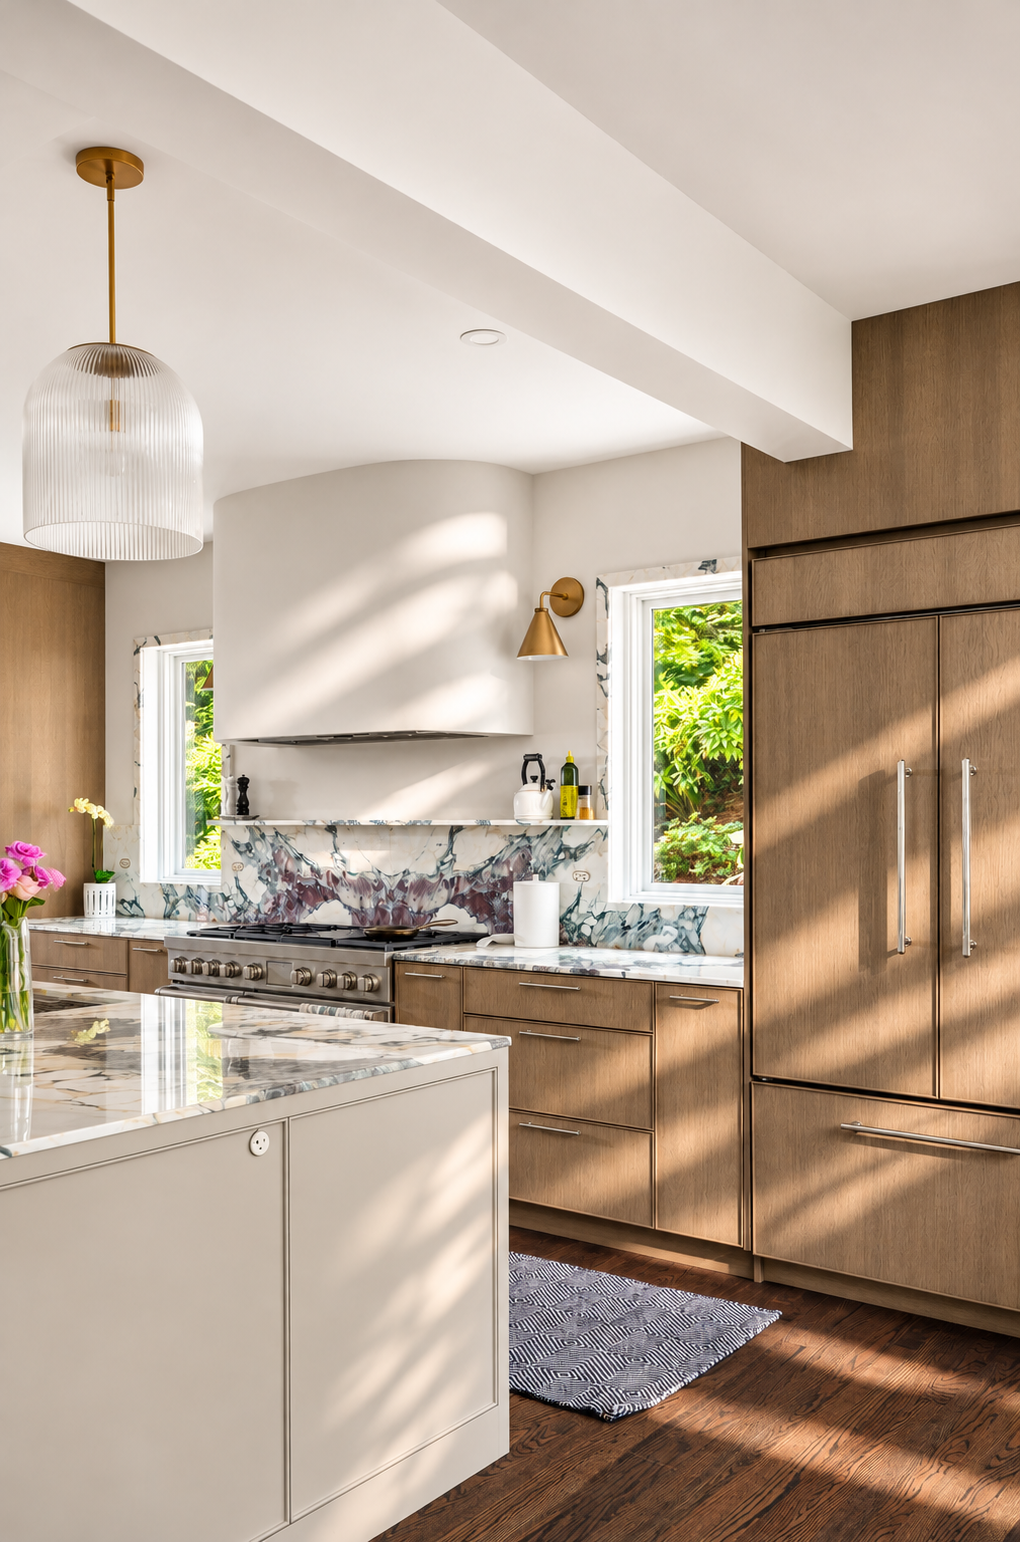
The island gives the kitchen a substantial preparation area, a sink and storage facing both the working aisle and the living space. Paneled ends and doors on the outward-facing side make it read as a complete piece of furniture. Keeping stools out of the surrounding passages supports the movement between the family room, dining area and kitchen.
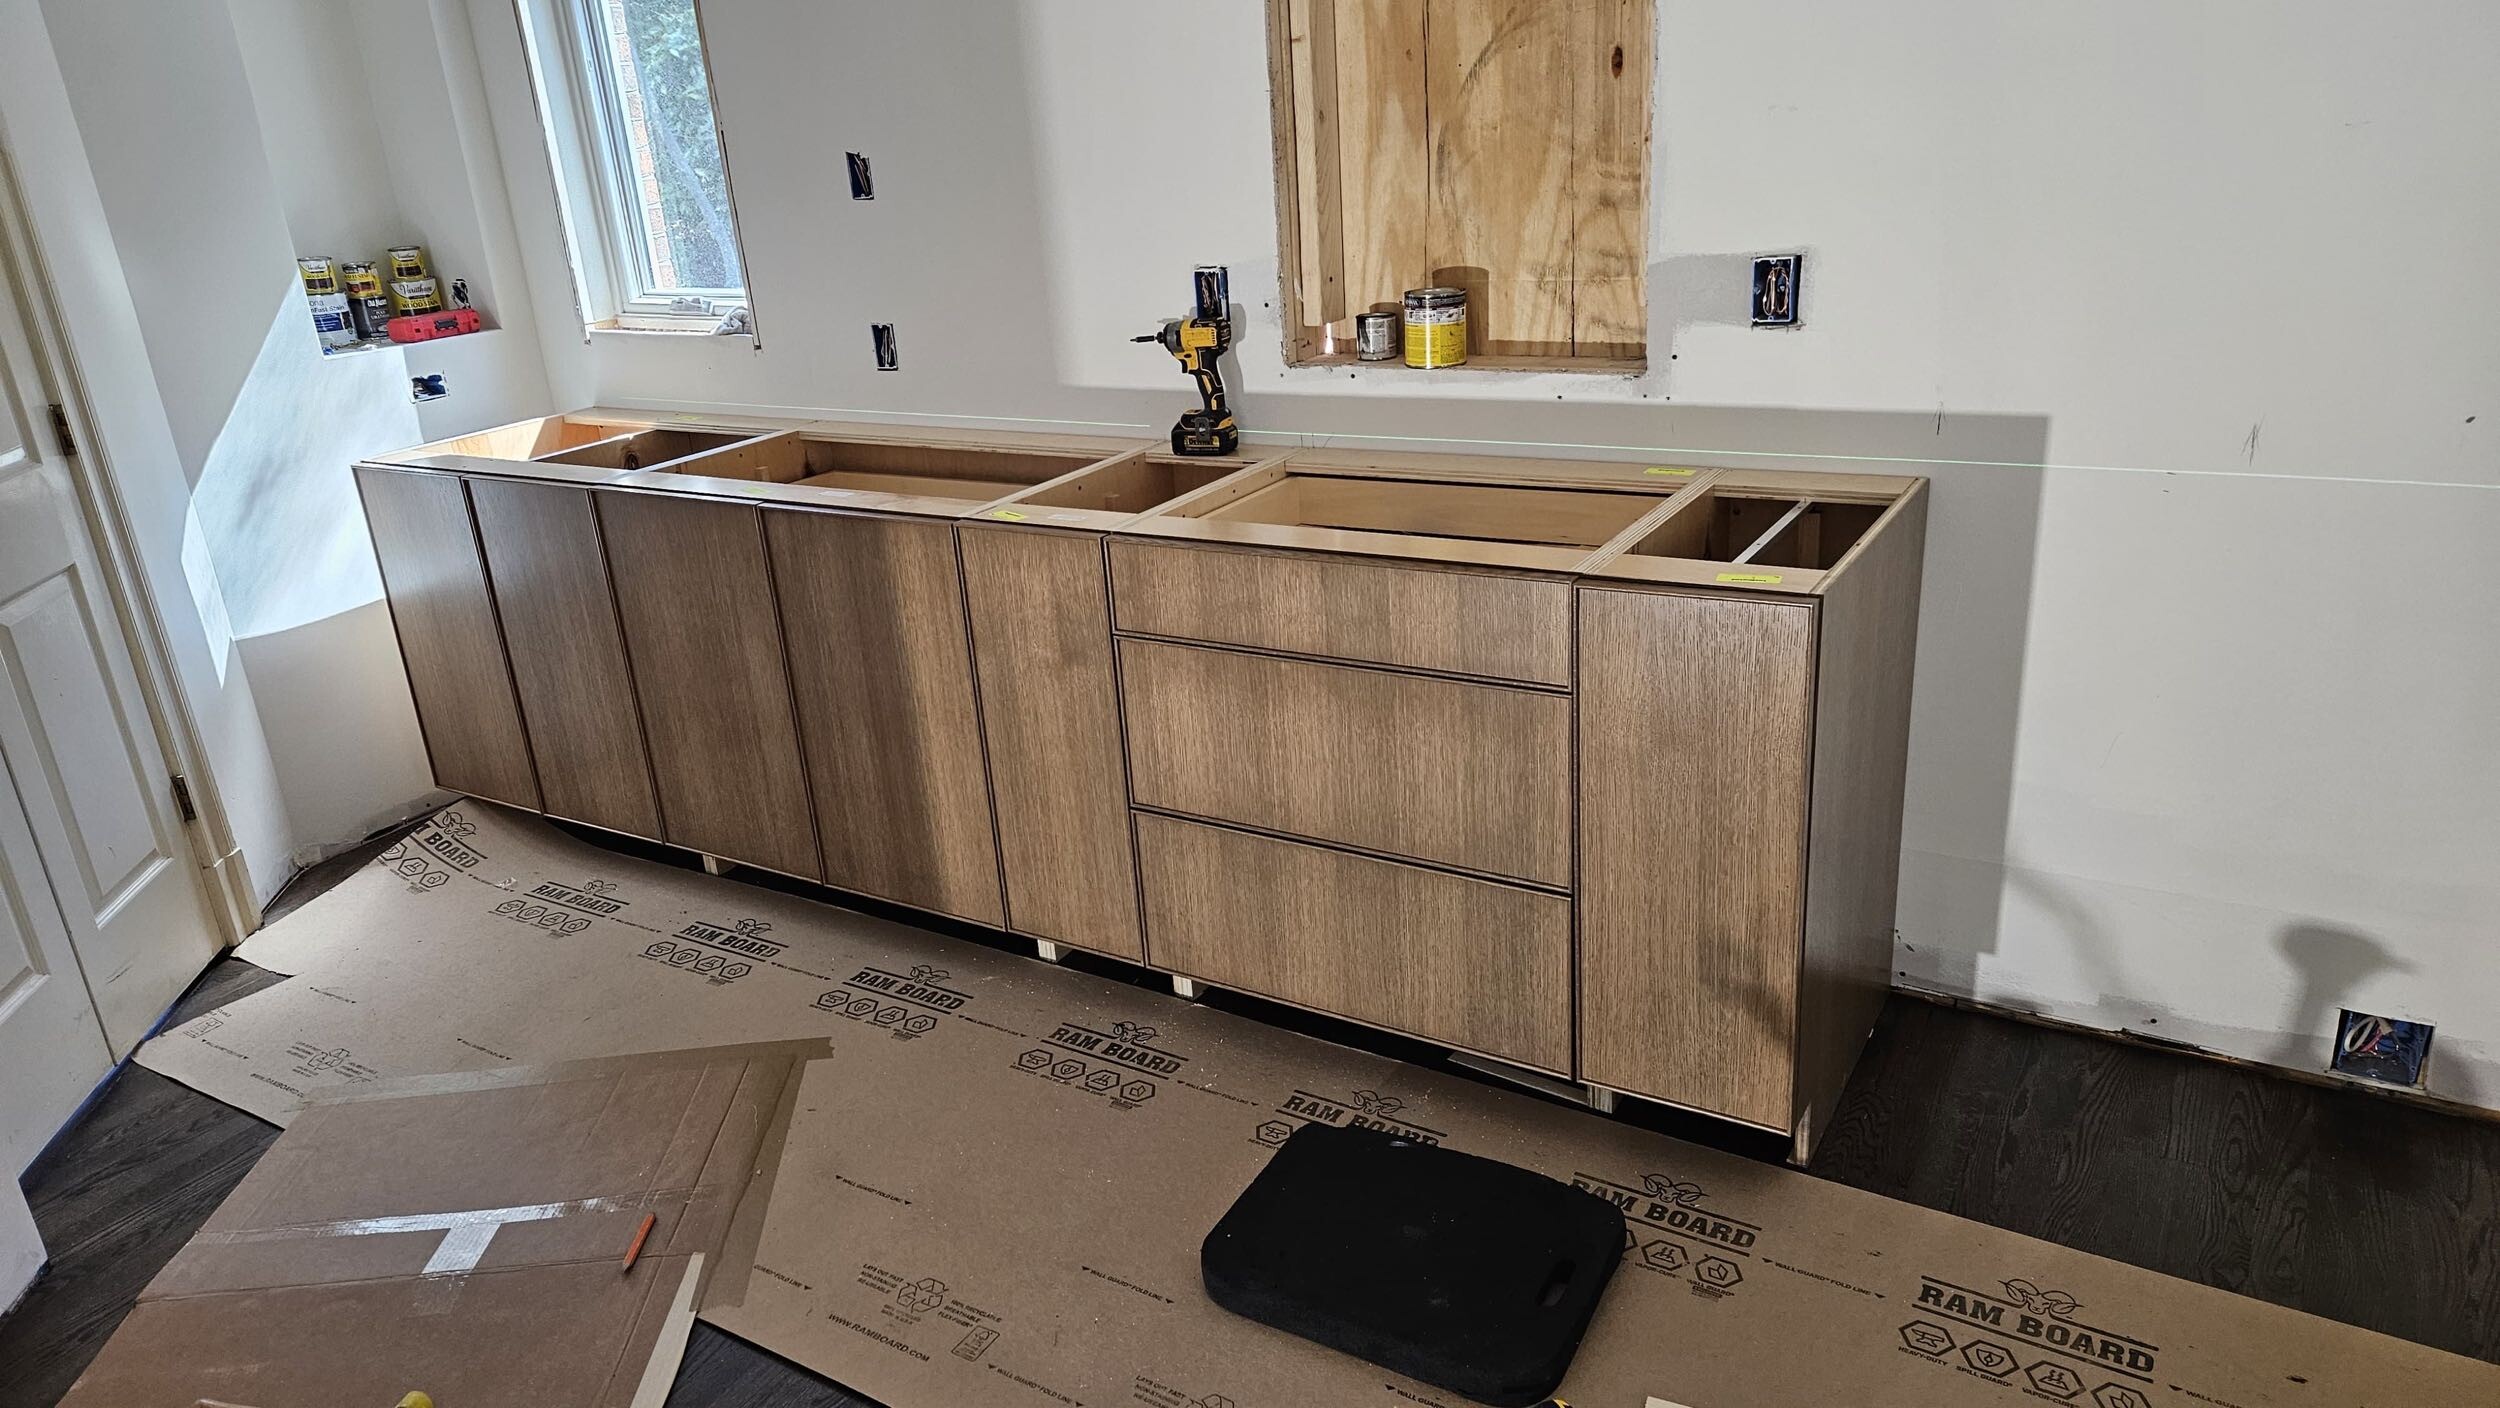
The perimeter cabinetry uses rift-cut white oak in a medium tone that sits comfortably against the darker floor. One-inch-thick doors with quarter-inch slim Shaker trim give the fronts a precise edge without a heavy frame. The pale island repeats the door language in a contrasting finish.
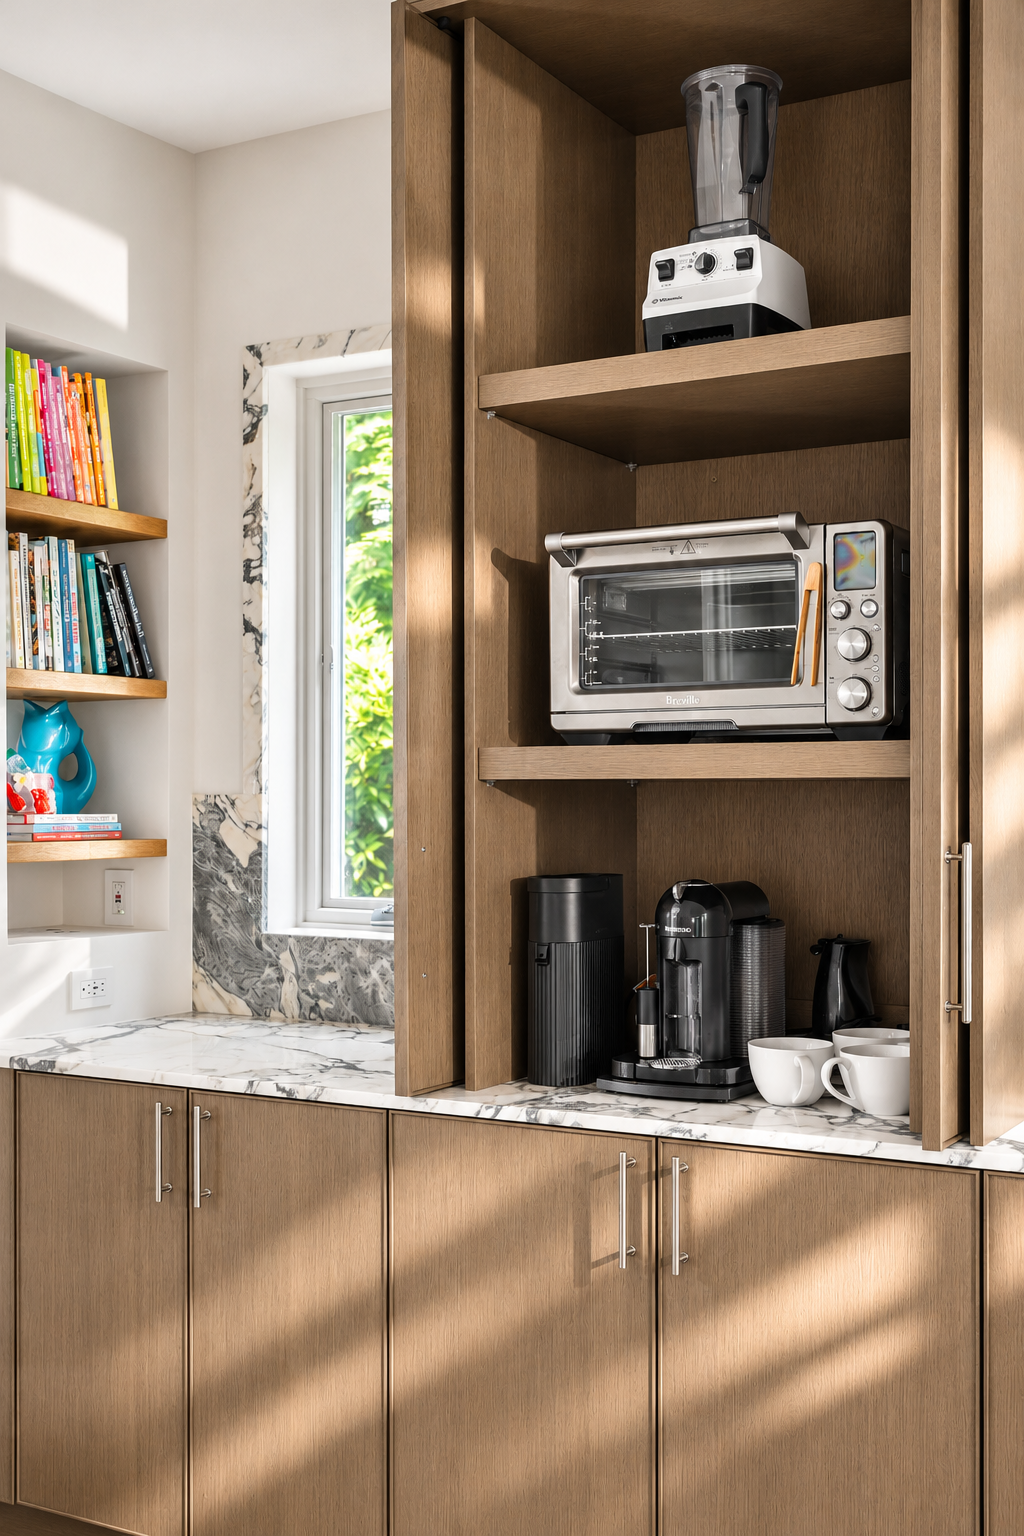
Tall cabinetry balances the two ends of the range wall. On one side, pocket doors allow the coffee and small-appliance station to close away. On the other, panels integrate the refrigerator beneath the beam. A small open niche provides a place for cookbooks, and the drawers organize frequently used tools close to the preparation and cooking zones.
Island installation
Cabinetry detail
After
After
07 / Material decisions
Let the stone lead.
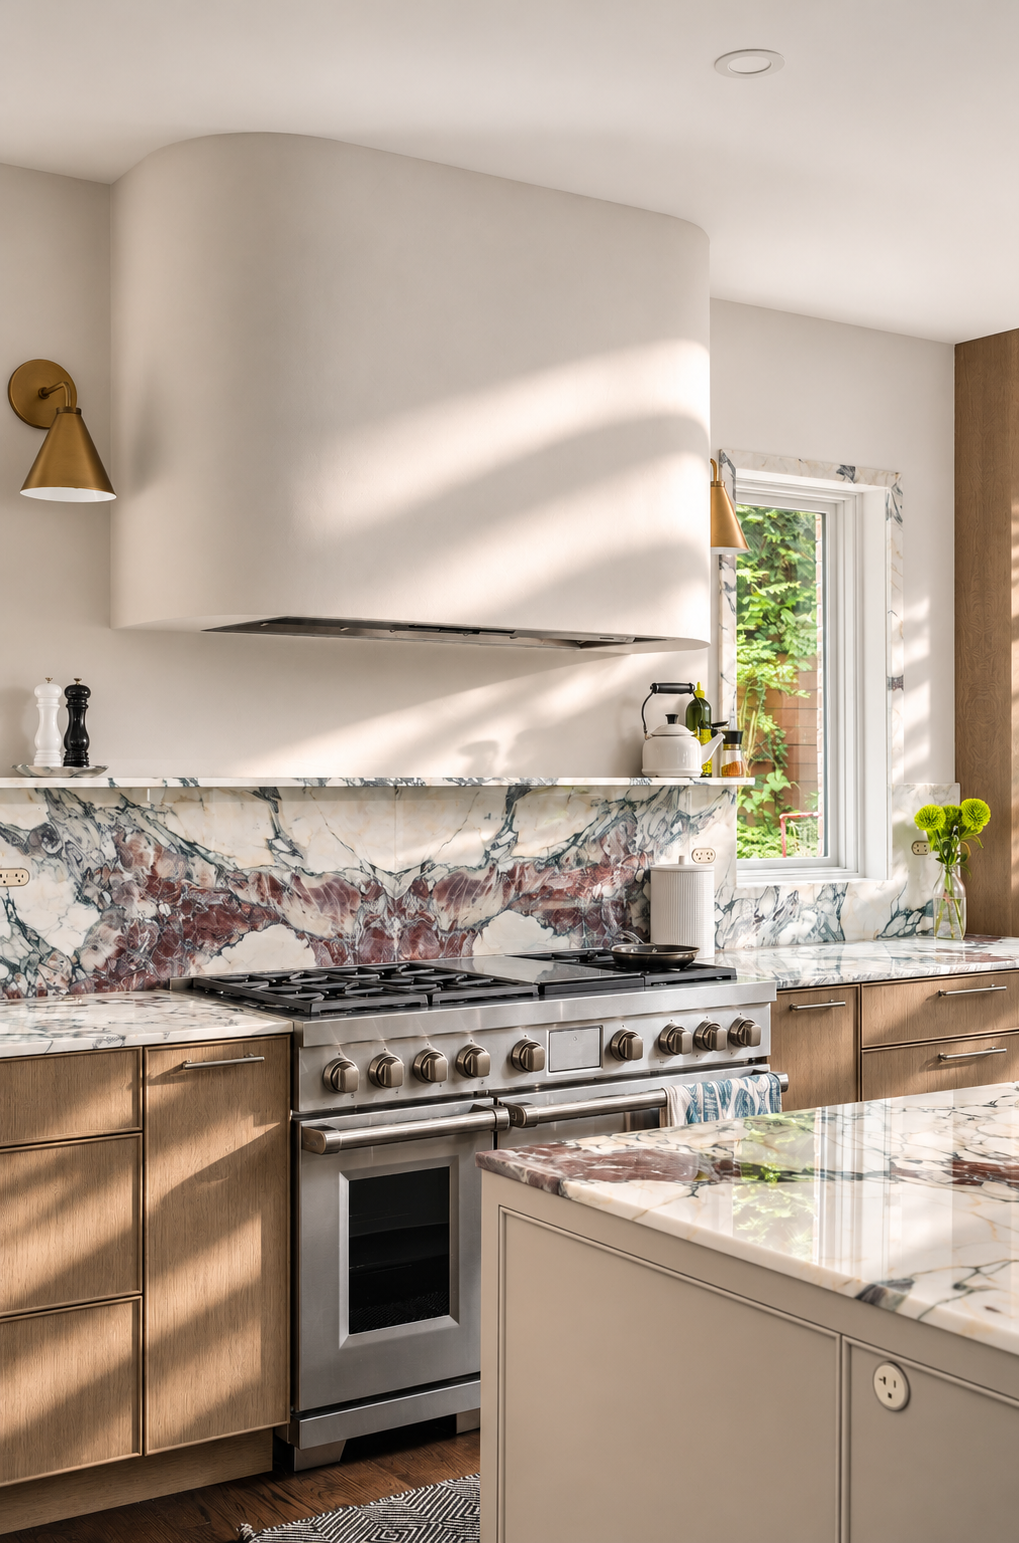
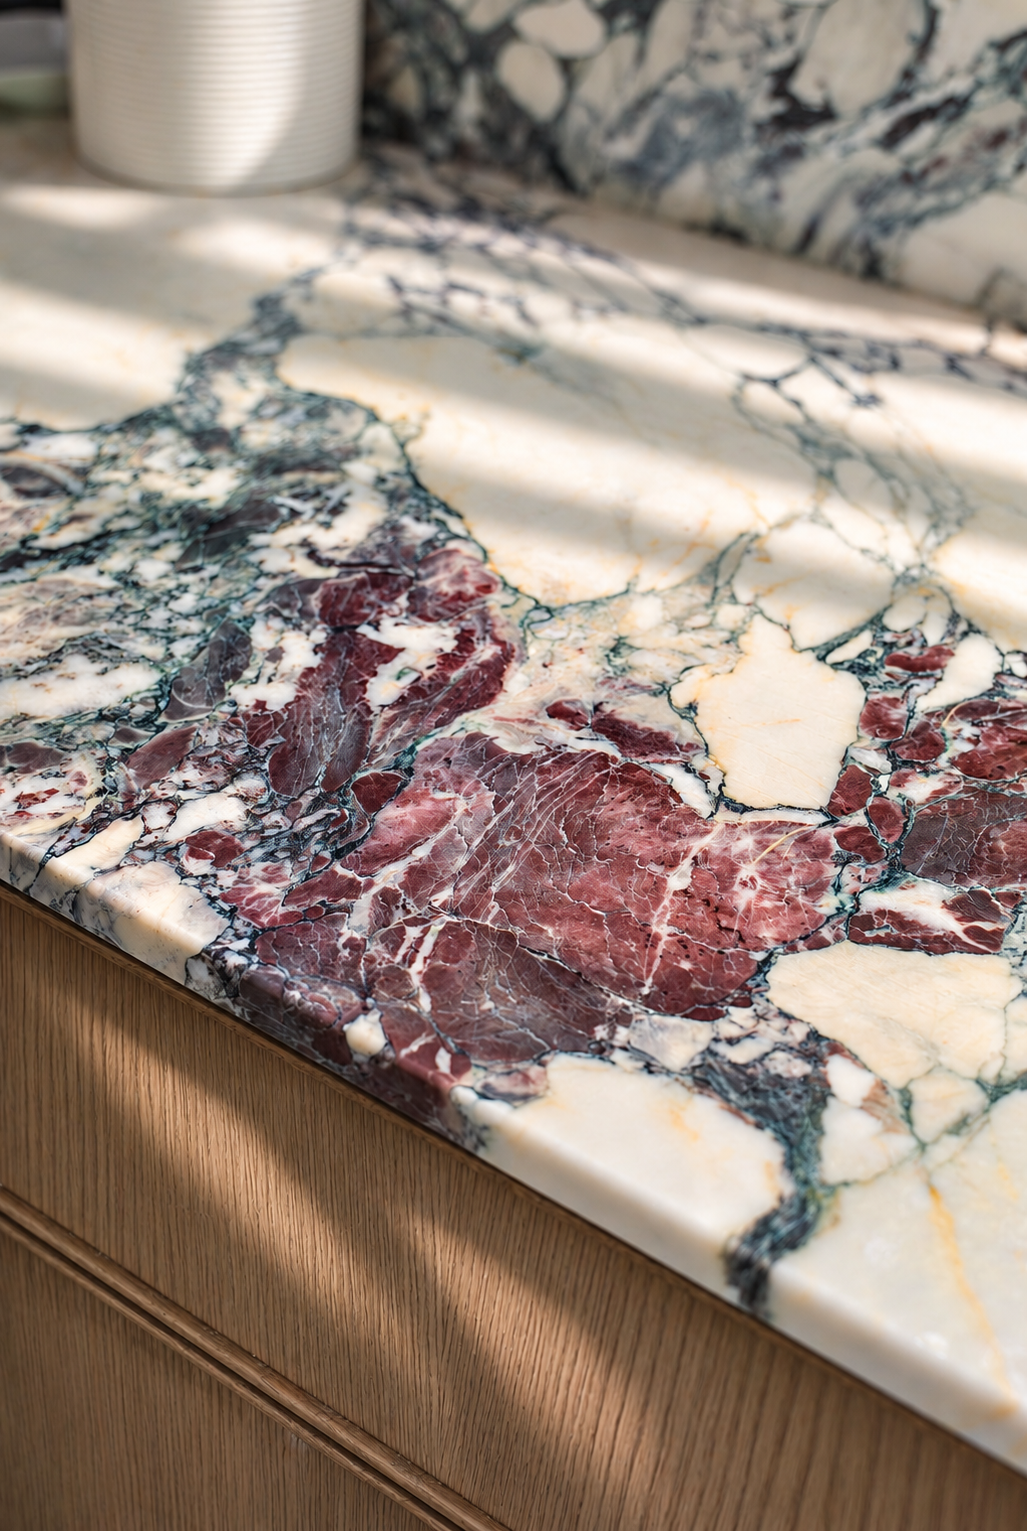
The marble became the visual center of the kitchen. Finding the slab meant considering its dimensions as carefully as its color: it needed to suit the large island and provide the veining the design called for. Purple and gray movement gives the pale room depth, with the wood providing a warmer, quieter counterpoint.
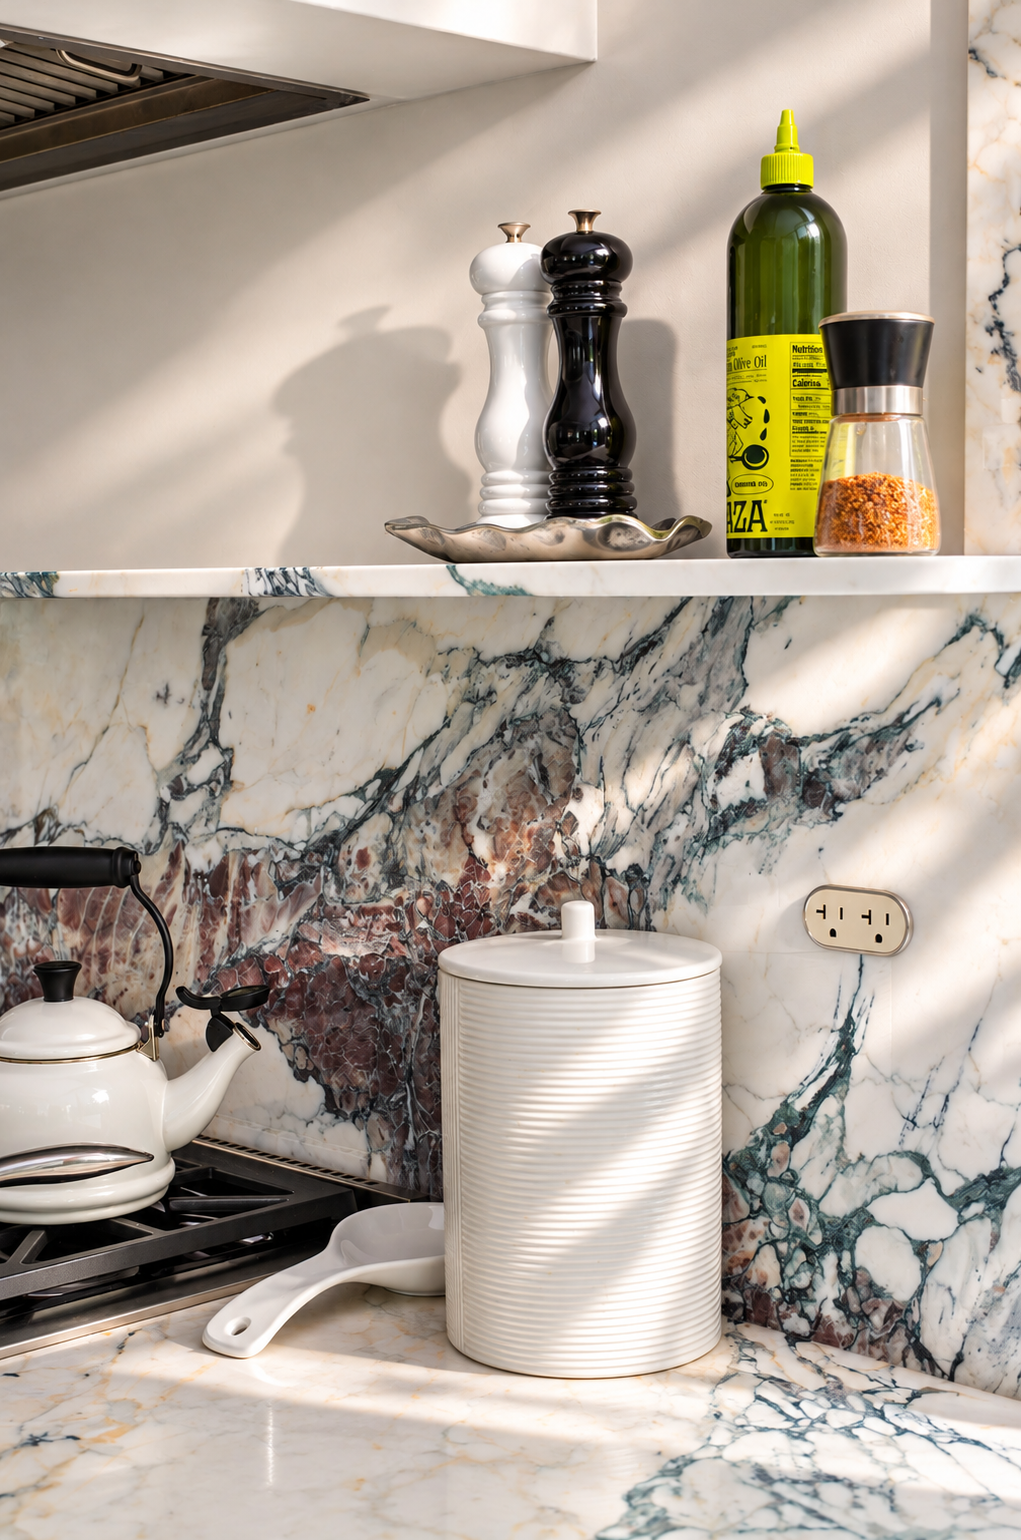
Behind the range, the stone cuts were selected for the composition they would create. The placement of the veins matters across the backsplash, just as it does along the island edge. A shelf follows the range wall, while the plaster above allows the stone pattern to remain the focus.
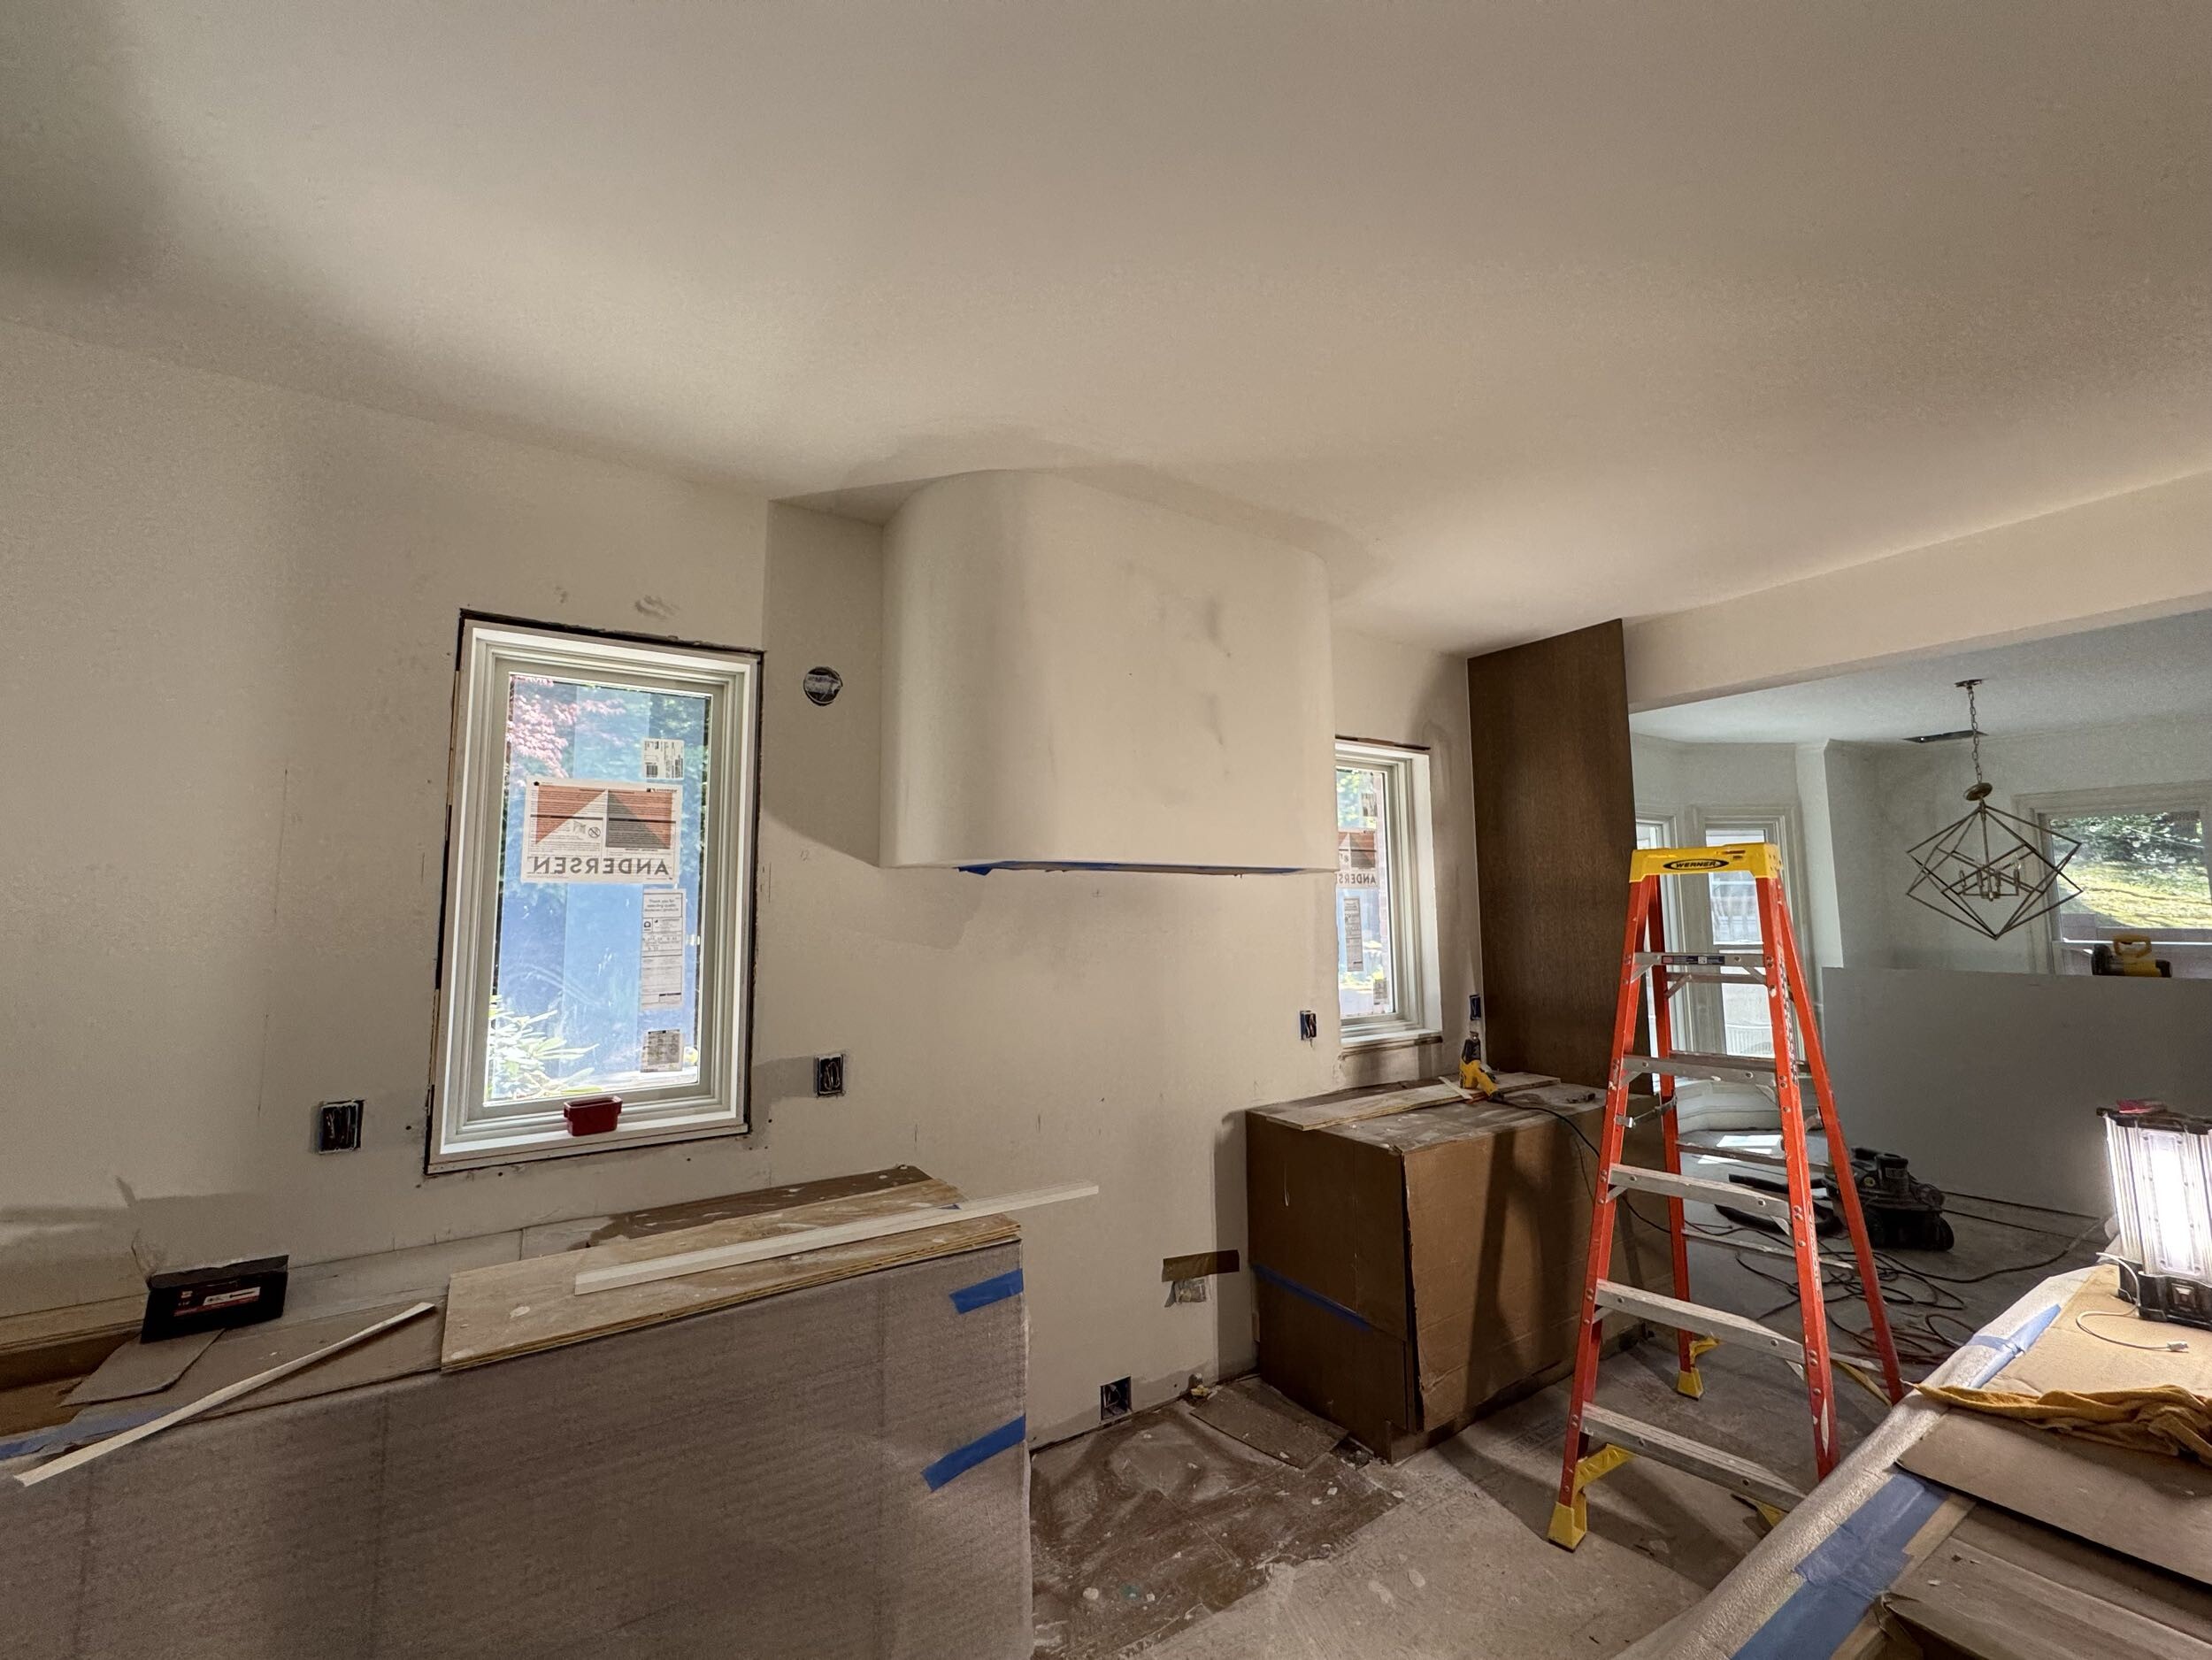
The hood was formed on site, with its curved plaster profile developed around the cooking area. Cabinet installation came first, followed by countertop templating and fabrication; plumbing and appliance completion followed the fitted stone. The construction sequence explains how the apparently simple final composition depends on several trades meeting at precisely the right locations.
Hood in progress
After
After
After
08 / The result
A kitchen connected to the house.
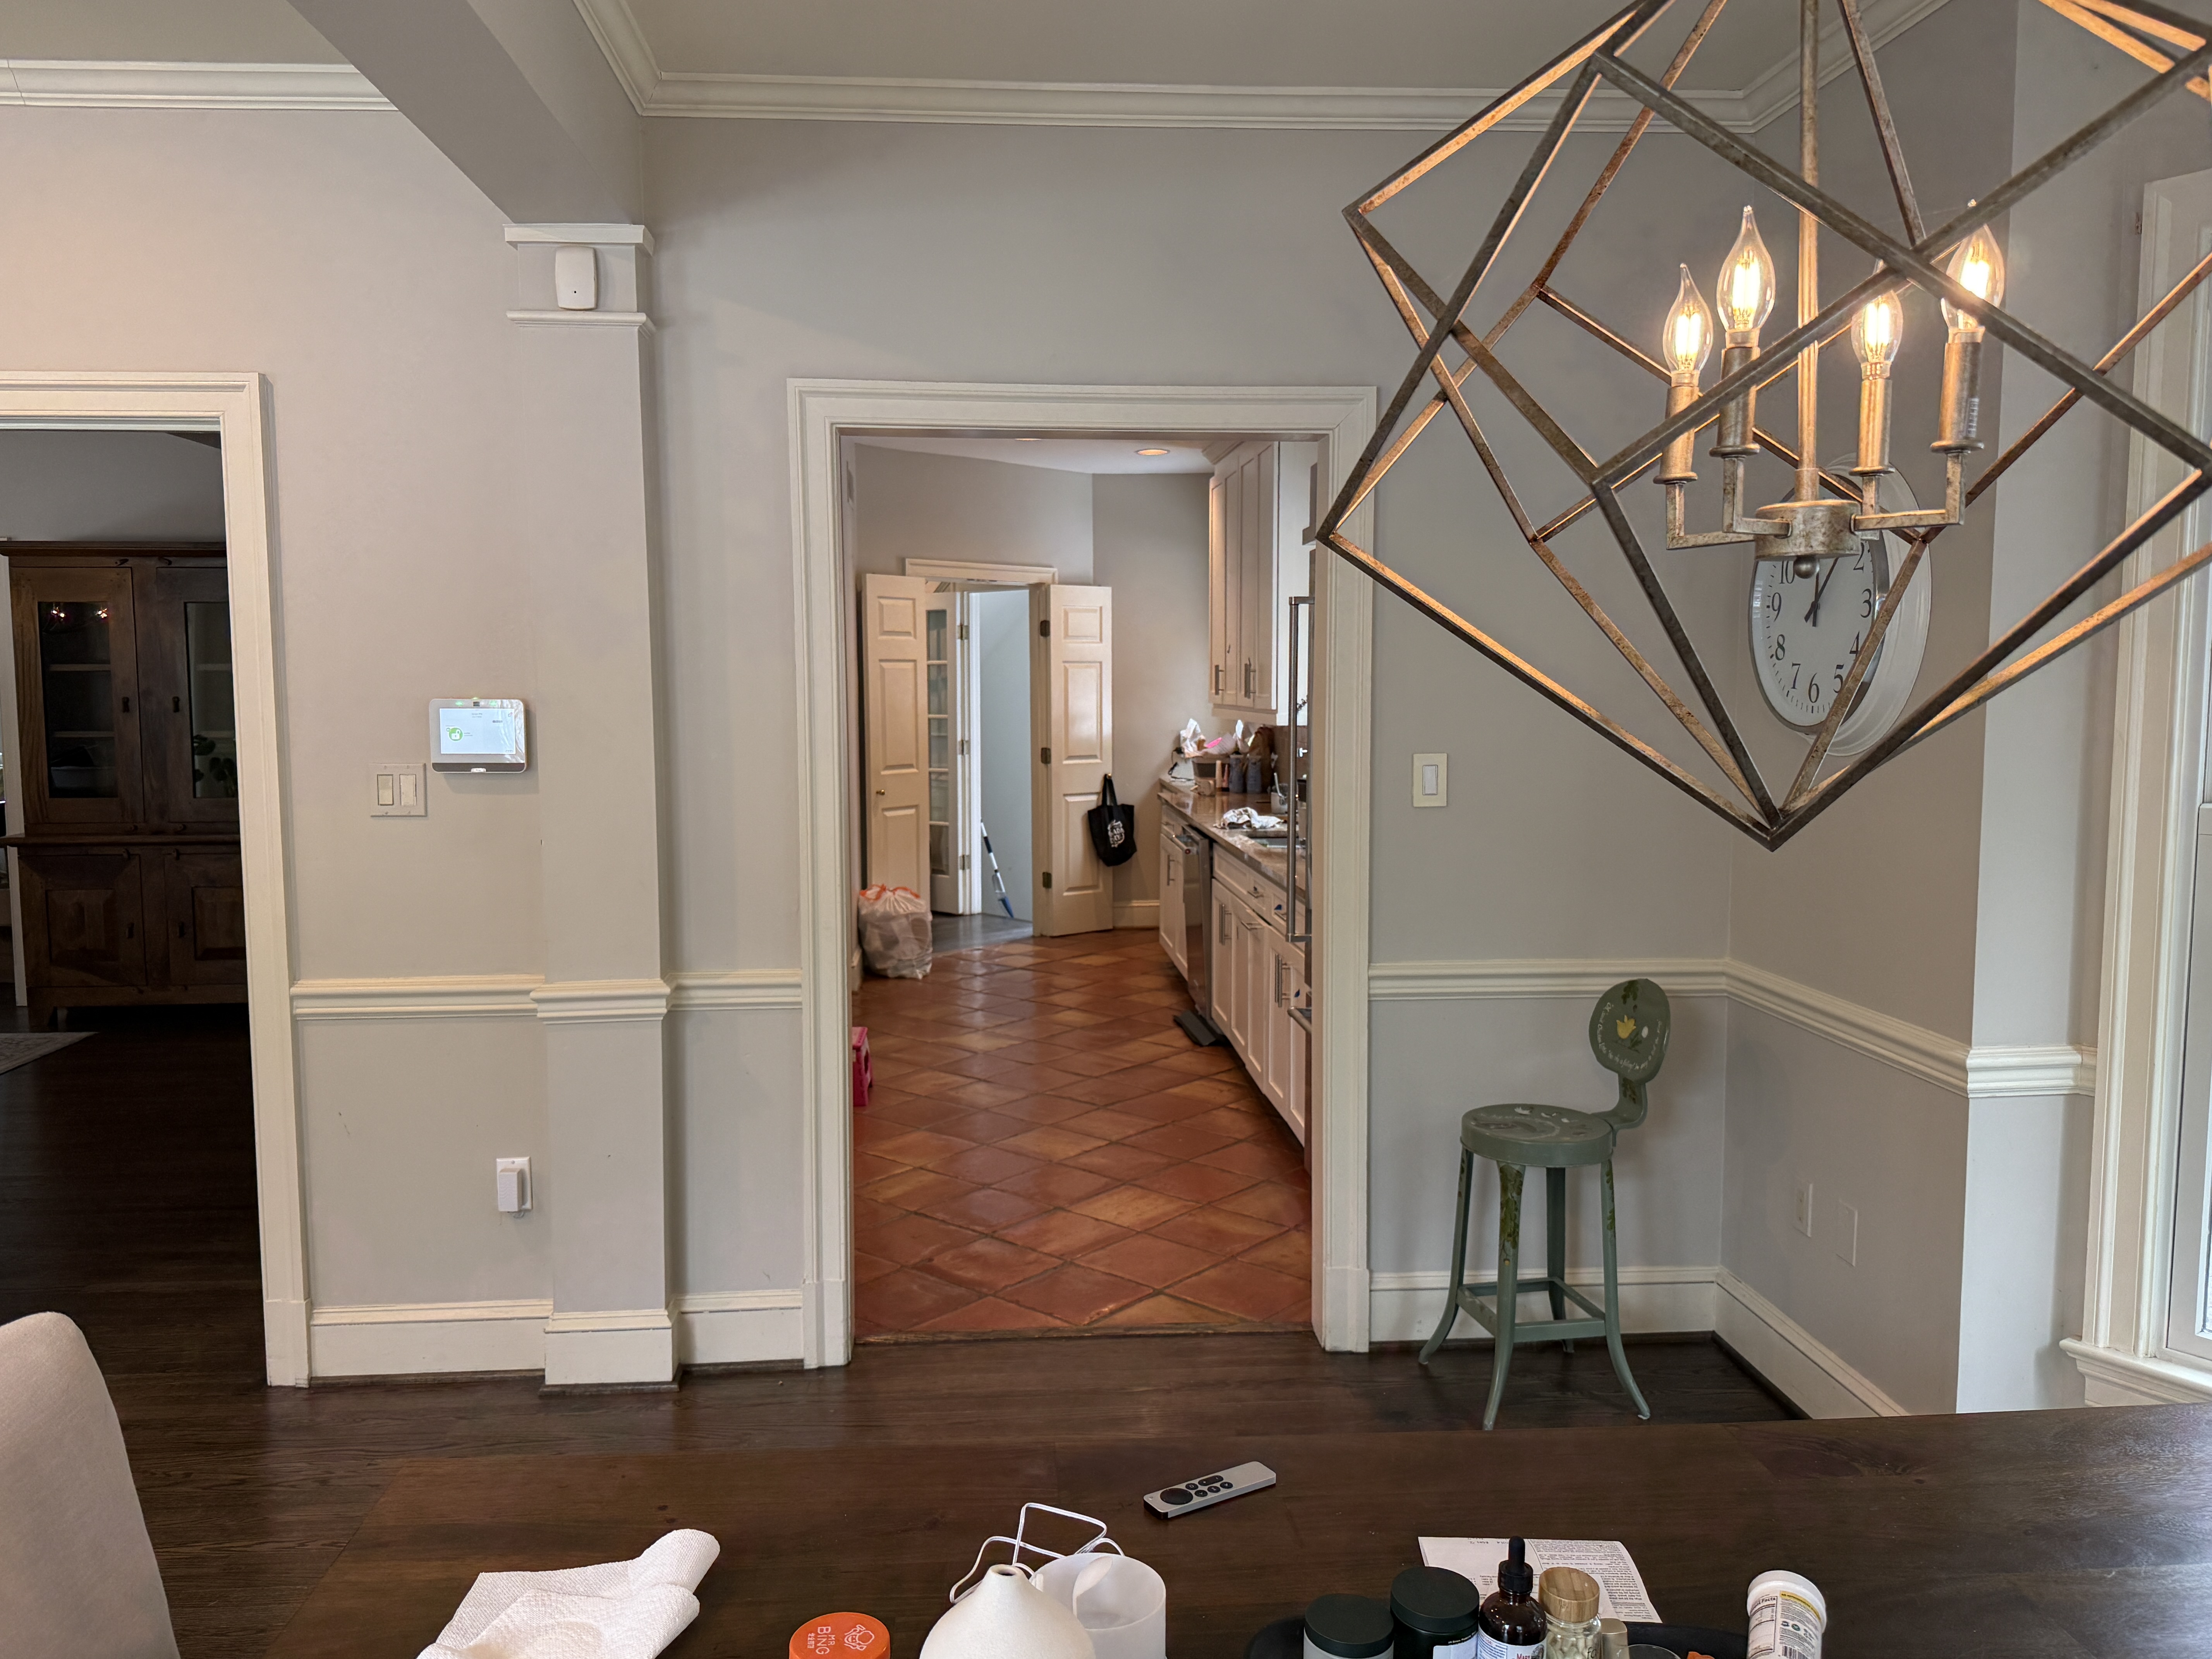
The change is clearest in the views between rooms. The former doorway led into an enclosed, corridor-like kitchen. Today, the working aisle opens toward the breakfast area, and the island faces the adjoining living space. Cooking, conversation and movement can take place within the same connected plan.
The finished ceiling and openings still express the structure, but the pipes and wiring that complicated demolition have disappeared into the construction. The two new windows give the range wall its order, and the cabinetry makes daily storage part of the architecture. Together, those decisions turn a kitchen renovation into a reconfiguration of how the ground floor works.
Before / from the dining area
After
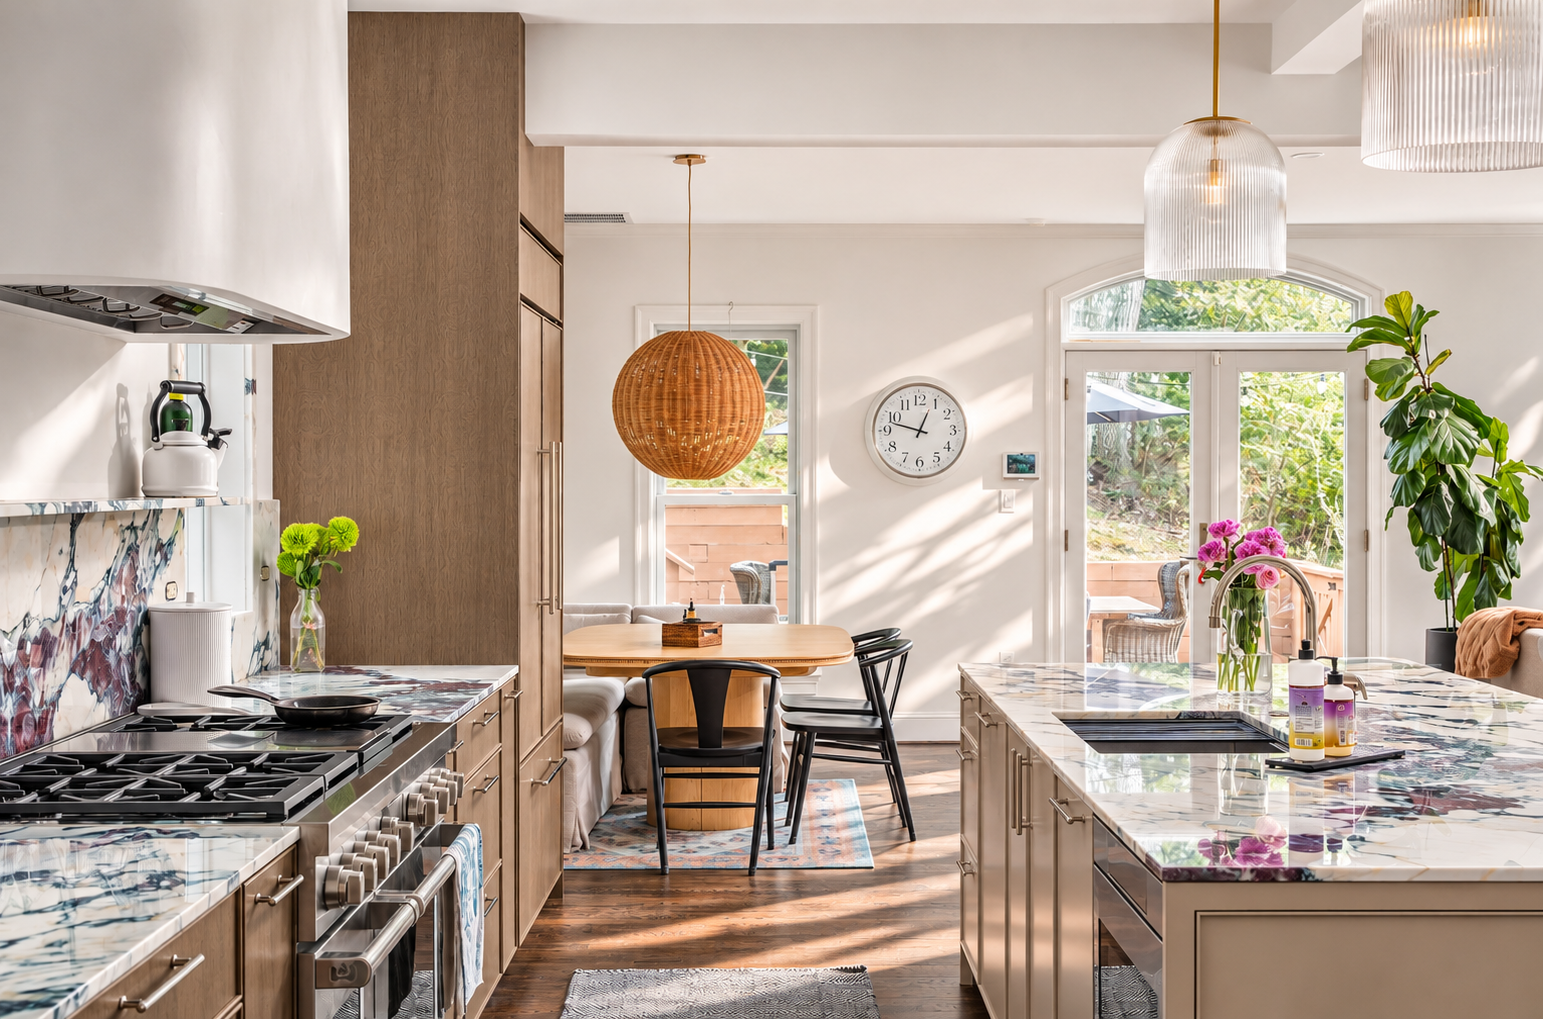
These opposite-direction views explain the relationship between the kitchen and its adjoining spaces.
After